WIELAND Dental +Technik & WIELAND Dental Ceramics
|
|
|
- Barnard Ramsey
- 5 years ago
- Views:
Transcription


1 Instructions for Use ZIROX Update November

2


3 WIELAND Dental +Technik & WIELAND Dental Ceramics WIELAND Dental+Technik Ever since Dr. Theodor Wieland founded the company as a family business in 1871, the WIELAND name has represented a unique combination of tradition and innovation as well as high-quality products and the best in customer service. Today we have a staff of over 250 employees and are a market leader in products and services for the dental and precious metal industries. In recent years a constant process of organisational optimisation together with numerous technical innovations has enabled us to considerably strengthen our market position. At WIELAND Dental + Technik we are proud of our competent and dedicated staff who understand how to exploit the synergy effects of our differing but interrelated product lines within our flexible, customer-friendly structure. One major aspect of our business is centred on products and services in the field of high-quality dental restorations using precious metal alloys. The AGC range is the world s leading electroforming system and caters for the highest aesthetic requirements in terms of dental ceramic veneers and structural ceramics. Other key business areas encompass the production of semi-finished precious metal products for technical and decorative applications, brazing alloys and special alloys, precious metal electrolytes and solutions, as well as precious metal refining, recovery, and hazardous waste management. WIELAND Dental Ceramics WIELAND Dental Ceramics GmbH was founded at the end of 2001 in Rosbach-Rodheim as a subsidiary of WIELAND Dental + Technik GmbH & Co. KG, Pforzheim. The company began operations at the beginning of 2002 and has since grown to over 0 employees. The company s goal is the development and production of veneering ceramics and ceramic systems that will set benchmarks in materials technology and aesthetic standards. Dental technicians, dentists and schools of dentistry collaborate closely in this research. WIELAND Dental Ceramics currently offers veneering ceramics for all standard framework materials, for example all types of metal-ceramic alloys and ceramic frameworks such as Al2O and ZrO2. Competence, good customer relations and innovation result from the close cooperation and integration of research, development, applied technology and production. 4
4 New Generation Ceramics... p. 6 ZIROX Assortments... p. 9 Color-coded Labels... p. 11 Instructions Preparation of the substructure... Standard build-up procedure... p. 14 ZIROX Stain Set... p. 18 Professional build-up procedure... p. 20 ZIROX Chroma Dentine Set... p. 2 ZIROX Expert Set... p. 24 ZIROX Shoulder materials... p. 0 ZIROX Gingiva materials... p. 2 ZIROX Bleach concept... p. ZIROX Bleach materials... p. 4 Recommendations for firing... p. 12 p. 6 Firing programmes... p. 7 Troubleshooting... p. 9 Technical Hotline Germany: / Ceramic works and photography by Christian Ferrari 5
 Densely sintered all-ceramic frameworks based on ZrO 2 (zirconium")
5 New Generation Ceramics veneering ceramics with a leucite-free HDAM * microstructure Innovative microstructure Extremely homogeneous, gingiva friendly and plaque resistant surface Leucite-free HDAM * microstructure Opalescence remains stable through multiple firings Indication Firing temperature: 900 C + X (1 st dentine bake) Densely sintered all-ceramic frameworks based on ZrO 2 (zirconium oxide) with a CTE of approx K -1 ( C). * High Density Advanced Microstructure Aesthetic Perfect color match with all WIELAND -type veneering ceramics Exceptionally natural color effects Fulfils the highest aesthetic requirements Light dynamics are standard for us Reliable Bonds best to all the indicated substructures Simple and reliable firing programme cf. T.Klinke, R.Biffar, Quintessenz Zahntechnik 26 (12) (2000) High fracture strength: 120 MPa Contraindications Veneering of frameworks with defects in the form of cracks, fissures or cavitations. Unsuitable preparation types (e. g. tangential preparations) Cases where space is restricted If the patient suffers from parafunctional habits (such as bruxism) Major grinding work carried out by the dentist or the dental technician on the restoration (interior and exterior of ZrO 2 framework or the veneering ceramic) with rotary instruments without water cooling and with the exertion of considerable contact pressure. 6

 Technical specifications conventional ZrO 2 veneering ceramic Coefficient of thermal expansion (CTE 25 500 C) (EN ISO 6872): 9.")
6 ZIROX : leucite-free HDAM microstructure Efficient Easy and accurate matching of the V-shade guide Minimal shrinkage Reliable application techniques Excellent handling properties and robust firing characteristics Innovative HDAM microstructure Leucite-free, single phase ZIROX features a tension-free and fissurefree structure. fine = good The advantage of the ZIROX leucite-free HDAM microstructure The homogeneous, fissure-free ZIROX microstructure is shown in the top photograph. (Both photographs are to the same magnification.) Technical specifications conventional ZrO 2 veneering ceramic Coefficient of thermal expansion (CTE C) (EN ISO 6872): K -1 Transformation temperature (EN ISO 6872): 570 C Bending strength (-point test) (EN ISO 6872): 120 MPa Chemical solubility (EN ISO 6872): approx. 5 µg/cm 2 coarse = poor 7

 ZIROX (left) shows an")
.")
7 Reliability The light optical microscope images below demonstrate the density of ZIROX liners compared with a similar product from a competitor. ZIROX Competitor ZrO 2 Liner Dentine ZrO 2 Liner Dentine Build-up: ZrO 2 / liner / dentine (both photographs are to the same magnification) ZIROX (left) shows an extremely homogeneous, bubble-free liner and dentine layer compared with the competitor s product (right). The result is the best possible bonding to the zirconium oxide substructure. 8

8 ZIROX Assortments ZIROX Starter Set: Reference No SET Contains the V-shades: A2 - A - A,5 - B2 - B - C2 - C - D 8 x Liner 10 g each 8 x Dentine 12 g each 6 x Dentine Modifier *1 12 g each 8 x Chromatix 12 g each 2 x Flu Dentine *2 12 g each 2 x Incisal * 12 g each 2 x Opale Incisal * 12 g each x Shoulder High *4 12 g each 2 x Transpa *5 12 g each x Stain *6 2 g each 1 x Glaze 2 g 1 x Correction g 1 x X Carving Liquid Retain 50 ml 1 x X Carving Liquid Speed 15 ml 1 x X Stain Liquid 15 ml 1 x Liner Liquid Optimix 50 ml 1 x IsoPen 1 x Measure 2 x Shade guide ZIROX Add-On Set: Reference No SET Contains the V-shades: A1 - A4 - B1 - B4 - C1 - C4- D2- D4 8 x Liner 10 g each 5 x Liner Modifier *7 10 g each 8 x Dentine 12 g each 8 x Chromatix 12 g each 2 x Flu Dentine *8 12 g each 2 x Incisal *9 12 g each 2 x Opale Incisal *9 12 g each x Shoulder High *10 12 g each 6 x Stain *11 2 g each 4 x Body Stain *12 2 g each 1 x X Carving Liquid Retain 50 ml 1 x X Carving Liquid Speed 15 ml 1 x X Stain Liquid 15 ml 1 x Liner Liquid Optimix 15 ml 2 x Shade guide ZIROX Expert Set: Reference No SET 1 x Liner Modifier Gum 10 g 5 x Dentine Gum 12 g each 2 x Dentine Modifier *1 12 g each 8 x Incisal Modifier *14 12 g each 4 x Opale Effect *15 12 g each x Bleach Dentine *16 12 g each 1 x Bleach Flu Dentine 12 g 1 x Bleach Incisal Blue 12 g 1 x Bleach Shoulder High 12 g 7 x Stain *17 2 g each 1 x X Carving Liquid Retain 50 ml 1 x X Carving Liquid Blue 15 ml 1 x X Carving Liquid Yellow 15 ml 1 x X Carving Liquid Red 15 ml 2 x Shade guide * 1 Mocca, Caramel, Khaki, Brown, Yellow, Ivory * 2 Flamingo, Straw * 2, * 4 Flu, 2, * 5 Clear, Neutral * 6 Caramel, Peach, Marone * 7 White, Yellow, Orange, Brown, Violet * 8 Bright, Sunny * 9 1,4 * 10 Red, 1, 4 * 11 White, Black, Orange, Ocker, Blue, Yellow * 12 A, B, C, D * 1 Corn, Mango * 14 Topas, Anthrazit, Amethist, Aquamarin, Citrin, Rubin, Lemon, Melon * 15 Frosty, Milky, Ice, Snow * 16 Light, Pearl, Creme * 17 Grey, Melon, Steel, Violet, Gum, Olive, Ivory ZIROX Starter Set 9

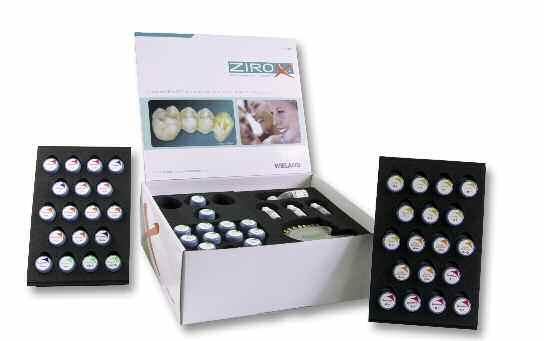
9 10 ZIROX Add-On Set
10 Color-coded labels Liner Covers the zirconium oxide substructure in a thin layer, defines the basic chroma and ensures identical shade matching with all -type veneering ceramics. Dentine Used for the dentine build-up and to support the basic color definition. Dentine Modifier Dentine Modifiers allow better individual nuances of the dentine build-up in different shades. Chromatix (chroma Dentine) Chromatix materials are dentine modifiers and are used to control and individualise chroma and opacity. Chromatix has a slightly higher opacity than the dentines and a higher degree of chroma. Incisal (enamel) Used for imitating the natural enamel. The individual incisal materials are numbered and labelled according to shade. For example, Incisal 2 when used as part of a standard A2 build-up will create an exact overall reproduction of shade A2. Incisal Modifier Used for enhancement of particular enamel characteristics. Flu Dentine (fluorescent dentine) This material also belongs to the dentine modifier group. It can be used to control the brightness of the ceramic build-up. The more Flu Dentine (fluorescent dentine) is used, the brighter the ceramic crown becomes. Opale Incisal (opale enamel) A natural opalescence can be achieved using by using Opale Incisal even after multiple firings. Opale Incisal can be mixed with regular incisal material or used on its own. Light dynamics is a standard asset for us. Opale Effect (opale enamel) In contrast to the standard opale incisals, which are color-keyed, the Opale Effect materials are characterised by linearly diminishing translucency and opalescence. Moreover, analogous to the diminishing translucency, the fluorescence of these materials shows a linear increase. This makes them ideal for simultaneously enhancing and regulating the brightness of the veneer in the incisal area. Shoulder High (high-melting shoulder material) For aesthetic ceramic shoulders. ZIROX Shoulder is mixed with X Carving Liquid Retain. Transpa Clear / Transpa Neutral By using Transpa Clear / Transpa Neutral it is possible to reproduce various degrees of translucency, whether transparent incisal edges or simply a nuance in the incisal area. Gum materials The gum materials are used to reconstruct the gingival areas. Stain Finishing touches, for example in the incisal or occlusal areas, can be added by using the stains. Note: Gum Only ZIROX Stains may be used, since they are specifically designed to be compatible with the ZIROX veneering ceramics. Correction This material enables corrections to be made after build-up is complete. Because of the lower firing temperature - the veneer are not affected. Glaze The glaze firing determines the final surface structure of the ceramic build-up. The Glaze material is applied in a thin and even layer. However, because of the homogeneous surface structure of ZIROX, glazing is not always necessary. X Carving Liquids (mixing liquids) The X Carving Liquids are used for mixing all -type dentines, modifiers and incisals. They offer ideal modelling properties and a wide range of processing options together with excellent firing results. It is essential that ZIROX ceramics are only mixed with the recommended liquids. X Carving Liquid Retain Slow drying liquid. Also used for mixing shoulder masses. X Carving Liquid Speed Minimal shrinkage and quick drying. X Carving Liquid Red, Yellow and Blue Used for color coding the individual materials and for visual distinction during build-up. X Stain Liquid (stain and glaze liquid) X Stain Liquid is used for mixing all -type stains and glaze. Liner Liquid Optimix (liner mixing liquid) Used for mixing ZIROX Liner. In order to ensure the best handling, firing and bonding properties, only this liquid should be used. 11

. 4 Designing the framework and the veneer The framework must fit on the tooth stump without stress. Internal friction on the tooth stump is contraindicated.")

11 Instructions - Preparation of the substructure Recommended preparation Ideally, the tooth should be prepared anatomically. Please ensure that there is adequate room for the restoration. Remove 1.0 mm of tooth substance around the preparation and at least 1.6 mm from occlusal surfaces and about 2.0 mm from incisal surfaces. All transitions must be rounded, since sharp edges can cause the restoration to fail. A shoulder preparation with a rounded interior angle or a well defined chamfer preparation is also acceptable. The ideal preparation angle is 4 (Fig. 1). 4 Designing the framework and the veneer The framework must fit on the tooth stump without stress. Internal friction on the tooth stump is contraindicated. Any excessive absence of tooth substance must be made up for by the framework design and not compensated for by a correspondingly thicker veneer. Please ensure that the connectors are large enough in cross-section. For posteriors, the cross-section of the connectors should be 9.0 mm 2 and for anteriors 6.0 mm 2. In addition, the veneering ceramic on the occlusal / incisal surfaces must have a min. thickness of 1.0 mm and a max. thickness of 2.0 mm. The basal surfaces should have a min. thickness of 1.0 mm and a max. thickness of 1.5 mm. In order to guarantee that the restoration has adequate strength, the minimum dimensions specified must be adhered to. The framework must be anatomical in shape and above all should support the veneer in the area of the cusps. This principle should also be observed when designing restorations in the incisal area. Important! If the design criteria and minimum dimensions specified are not adhered to, this can result in the restoration failing as a result of cracks or flaking or can cause the restoration to fracture * 2.0* 1.0* 2.0* Fig.1Preparation angle Conditioning the framework Gentle sandblasting of the zirconium oxide framework is recommended. This cleans the surface of the framework and ensures better wetting by the veneering ceramic. The zirconium oxide framework should therefore be blasted with approx. 110 µm aluminium oxide abrasive at approx. 1 bar. Carrying out additional heat treatment (cleaning bake) on the densely sintered framework delivers no further benefits. 1.0* 2.0* 1.0* 2.0* 1.0* 2.0* Ensure that the surface to be veneered is free of dirt and grease. To do this, clean the framework in a steam jet and / or in an ultrasonic cleaner. 1.0* 1.5* Framework wall thickness min mm * Specifications in mm 12
12 Trimming the framework Unlike when working with PFM techniques, it is important to avoid using rotary instruments on the whole of the veneered surface of zirconium oxide frameworks. Only the margins should be trimmed and if necessary shortened to allow for a layered ceramic shoulder. When grinding zirconium oxide, keep contact pressure to a minimum. Always ensure adequate cooling (e. g. water drip or water-cooled turbine). Use only suitable trimming instruments. Under no circumstances, use cutting discs to separate the sintered bridge framework. Always round off sharp edges and corners. Important! After trimming/correcting, the framework must still have the minimum thicknesses specified. Cementing Zirconium oxide frameworks can be cemented conventionally with glasionomer or zinc oxide phosphate cement or bonded with an adhesive composite (e.g. RelyX Unicem from M ESPE or Panavia F 2.0 from KURARAY). Note! We advise against using compomers, acrylic modified glasionomer cements and cements with a high coefficient of expansion. Required substructure dimensions Single coping Single anterior coping, fixed Single lateral coping, fixed Telescopic unit Three-unit anterior bridge Four-unit anterior bridge Three-unit premolar-anterior bridge Four-unit premolar-anterior bridge Three-unit lateral bridge Four-unit lateral bridge (2 premolars) Four-unit lateral bridge (1 premolar, 1 molar) Four-unit molar bridge (2 molars) 5 / 4 9 / 9 5 / 4 7 / 6 7 / 9 9 / 12 9 / / / / 18 Diameter of cross section (mm 2 ) upper/lower Wall thickness (mm) Connector design 1


13 Incisal Incisal Dentine Incisal Dentine Liner Substructure Dentine 14 Standard build-up procedure Shades Liner Dentine Incisal Opale Incisal Color combination for standard build-up A1 A2 A A.5 A4 B1 B2 B B4 C1 C2 C C4 D2 D D4 A1 A2 A A.5 A4 B1 B2 B B4 C1 C2 C C4 D2 D D4 A1 A2 A A.5 A4 B1 B2 B B4 C1 C2 C C4 D2 D D
. Apply a thin layer of liner evenly to the coping or bridge framework.")

14 Note Before carrying out the liner bake, first apply and finish the shoulder material. 1 st liner bake After the substructure has been suitably prepared, the first layer of liner can be applied. The liner is supplied as a powder. To apply the liner, use a suitable instrument (glass applicator or spatula). Apply a thin layer of liner evenly to the coping or bridge framework. Please ensure that this first layer is not too thick. If the liner is applied too thickly, uncontrollable amounts of liquid can evaporate during preheating and cause bubbles to form. Then the first liner bake is carried out. For firing temperatures and times please refer to the firing programmes given at the end of these instructions. 2 nd liner bake (optional the 2 nd liner bake may be omitted if you choose) The second step is to apply liner once more. Here too, it is important for the reasons given above that the liner is not applied too thickly. Even so, the liner must completely cover the substructure so as to ensure that the crown is uniform in color. Liner ZIROX Liner is only available as a powder. For reasons of handling, ZIROX powder must not be mixed with distilled water. Use only ZIROX Liner Liquid Optimix, since this ensures that the material will stay in place during application. Substructure ready for the 1 st liner bake Note The liner should be applied evenly with an applicator or a brush. The consistency should be neither too thick nor too thin. Avoid excessive riffling and do not allow thick layers of liner to coalesce in the occlusal, approx. or marginal areas. Thick layers of liner can crack during firing. Problems can also occur if the liner is dried too quickly. If the recommended pre-drying and drying times are not adhered to, small cavities may form or the liner may flake off. This occurs if the liner passes too quickly from a liquid to gaseous state. Copings before the liner bake 15


15 1 st dentine bake Mix the dentine and incisal powders together in the usual manner with the carving liquid provided. Then build the crown up, starting with dentine and then completing with the incisal area. Although the shrinkage of ZIROX after firing has been minimized, it is still necessary to build the crown up in a slightly larger dimension. Now bake the ceramic according to the recommendations in the table attached. Crowns after the build-up of the first dentine layer For extended restorations, solid bridge elements or several small units, the drying and final cooling times should be extended as necessary. The HDAM microstructure of ZIROX gives the surface a high shine after the 1 st and 2 nd dentine bakes. Dentine / incisal build-up Dentine / incisal build-up after the 1 st dentine bake 16

16 2 nd dentine bake After the first dentine bake, trim with diamond burs, making sure to provide adequate cooling (water drip) during this stage of the process; then clean in a steam jet as for the second dentine bake. Here, any missing ceramic is corrected by adding a further layer of dentine and / or incisal. Correction material The correction material is colorless and should be fired in a vacuum at 850 C for one minute. This ceramic is suitable for minor corrections such as applying contact points, cusp tips and basal reinforcement for pontics. Note Correction material The correction material must always be used undiluted. It is not recommended to mix it with other materials! The firing parameters given below apply when veneering with ZIROX. Important! Under no circumstances use ZIROX ceramics together with other ceramic powders of any type whatsoever. Since ZIROX has a unique HDAM microstructure it is not compatible with other ceramics. It is extremely important to avoid applying too much pressure when trimming ceramic materials. With every ceramic, excessive grinding and selective overheating causes micro cracks and can lead to failure through flaking, cracking, fissures or fracture. The corrected build-up ready for the 2 nd dentine bake Stains and glaze After the shape has again been trimmed and corrected, stains and/ or glaze can be used to give the crown its individual character. Note Glaze By modifying the firing temperature and holding time, the degree of glaze can be varied from matt to a high shine to suit individual requirements. Please use only ZIROX stains and glazes. The use of other components always entails a risk of uncontrolled stress and therefore the risk of the veneer failing through pressure or tension cracks or the use of unsuitable firing parameters. Please mix the stains and glazes only with the stain and glaze liquids supplied. Apply with a conventional staining brush. The finished crowns after the glaze firing 17

17 ZIROX Stain Set Indication ZIROX Stains are not compatible with REFLEX, HITEX TM and ALLUX. Firing temperature For firing temperatures and times please refer to the firing programmes given at the end of these instructions. The shade palette is a logical and easy to use stain mixing system It enables the dental technician to reproduce all the 75 shades depicted on the palette in a simple and logical way, using the eight colors shown on the angles of the octagon plus White and Grey. In addition to the eight colors shown on the angles, eight additional predefined stains make up the full complement of the ZIROX Sets. Using the measures included in the set (small and large measures) together with the mixing chart ensures an exact reproduction of the various shades. Select the size of the measure according to the total volume required. Important! Do not change the measure during color mixing since these bear no relationship to one another. Exact reproduction of the required shade is guaranteed only if measuring is exact. The shade palette By Angela Helbig 18
18 Procedure Select a shade on the shade palette shown on the left. Note the number on the color tab. Find this number in the chart below. Mix the components according to the chart to obtain the required shade nuance. Example: Shade No.18 1 x small measure of Peach 1 x small measure of Orange 2 x small measures of White or... 1 x large measure of Peach 1 x large measure of Orange 2 x large measures of White Color mixing chart 0 White Blue 5 Steel Melon 15 Peach Orange Olive Marone Ivory No. on the shade palette mixture of (p = part/s) 1 p. Blue + p. White 1 p. Blue + 1 p. White p. Blue + 1 p. White p. Blue + 1 p. Grey 1 p. Blue + 1 p. Grey 1 p. Blue + 1 p. Peach + 2 p. White p. Blue + p. Peach + 2 p. White 1 p. Blue + 1 p. Peach p. Blue + p. Peach + 2 p. Grey 1 p. Blue + 1 p. Peach + 2 p. Grey 1 p. Peach + p. White 1 p. Peach + 1 p. White p. Peach + 1 p. White p. Peach + 1 p. Grey 1 p. Peach + 1 p. Grey 1 p. Peach + 1 p. Orange + 2 p. White p. Peach + p. Orange + 2 p. White 1 p. Peach + 1 p. Orange p. Peach + p. Orange + 2 p. Grey 1 p. Peach + 1 p. Orange + 2 p. Grey 1 p. Orange + p. White 1 p. Orange + 1 p. White p. Orange + 1 p. White p. Orange + 1 p. Grey 1 p. Orange + 1 p. Grey 1 p. Orange + 1 p. Marone + 2 p. White p. Orange + p. Marone + 2 p. White 1 p. Orange + 1 p. Marone p. Orange + p. Marone + 2 p. Grey 1 p. Orange + 1 p. Marone + 2 p. Grey 1 p. Marone + p. White 1 p. Marone + 1 p. White p. Marone + 1 p. White p. Marone + 1 p. Grey 1 p. Marone + 1 p. Grey 1 p. Marone + 1 p. Caramel + 2 p. White p. Marone + p. Caramel + 2 p. White 1 p. Marone + 1 p. Caramel p. Marone + p. Caramel + 2 p. Grey 1 p. Marone + 1 p. Caramel + 2 p. Grey 1 p. Caramel + p. White Caramel Ocker Yellow Gum Violett Grey 90 Black No. on the shade palette mixture of (p = part/s) 1 p. Caramel + 1 p. White p. Caramel + 1 p. White p. Caramel + 1 p. Grey 1 p. Caramel + 1 p. Grey 1 p. Caramel + 1 p. Ocker + 2 p. White p. Caramel + p. Ocker + 2 p. White 1 p. Caramel + 1 p. Ocker p. Caramel + p. Ocker + 2 p. Grey 1 p. Caramel + 1 p. Ocker + 2 p. Grey 1 p. Ocker + p. White 1 p. Ocker + 1 p. White p. Ocker + 1 p. White p. Ocker + 1 p. Grey 1 p. Ocker + 1 p. Grey 1 p. Ocker + 1 p. Yellow + 2 p. White p. Ocker + p. Yellow + 2 p. White 1 p. Ocker + 1 p. Yellow p. Ocker + p. Yellow + 2 p. Grey 1 p. Ocker + 1 p. Yellow + 2 p. Grey 1 p. Yellow + p. White 1 p. Yellow + 1 p. White p. Yellow + 1 p. White p. Yellow + 1 p. Grey 1 p. Yellow + 1 p. Grey 1 p. Yellow + 1 p. Gum + 2 p. White p. Yellow + p. Gum + 2 p. White 1 p. Yellow + 1 p. Gum p. Yellow + p. Gum + 2 p. Grey 1 p. Yellow + 1 p. Gum + 2 p. Grey 1 p. Gum + p. White 1 p. Gum + 1 p. White p. Gum + 1 p. White p. Gum + 1 p. Grey 1 p. Gum + 1 p. Grey 1 p. Gum + 1 p. Blue + 2 p. White p. Gum + p. Blue + 2 p. White 1 p. Gum + 1 p. Blue p. Gum + p. Blue + 2 p. Grey 1 p. Gum + 1 p. Blue + 2 p. Grey 1 p. Black + 1 p. White 19

19 Professional build-up procedure 20
20 21

21 Professional build-up procedure ZIROX Professional by Christian Ferrari Nature knows no bounds when it comes to the interplay of light, form and color. Time and time again, nature surprises us with the perfection and harmony of creation. We are faced with the difficult task of imitating this vibrant world with our limited technical means. In order to do justice to this task I need materials which do not restrict my creativity but give me the freedom to imitate nature. With conventional materials we were able to influence three properties of the ceramic layers: chroma, brightness and transparency. With ZIROX, as with ALLUX and REFLEX, I have a further dimension at my fingertips: depth of color through contrast. By using the Chromatix dentine materials I can control contrasts and achieve unique depth of color which enables me to imitate the actual play of light found in natural dentition. To achieve this goal I build up the restoration as follows: After the liner bakes I apply Chromatix Dentin onto the whole substructure, keeping the final shape in mind and characterising certain areas of the dentine core still further by using effect materials (dentine modifiers and opal materials). Then I fire the dentine materials, which I reduce a little in order to make space for the materials that follow. At this stage a variety of different dentine modifiers and opal materials can be applied in order to obtain the desired effects in the mamelon area. In the incisal area I use Flu Dentin in the areas on which light is to be reflected (on the mamelons). It is important that the light is absorbed between the mamelons as in natural teeth. The next step is to define the external contour of the tooth with Incisal Aquamarin, if required. Then I apply alternate layers of Incisal and Opale materials and buildup the final shape with Transpa materials. If necessary, the first firing can be complemented by a correction firing with Transpa materials. ZIROX enables me to achieve excellent results in my laboratory, even with the most demanding of cases. Professional build-up In addition to the standard threelayer technique, it is also possible to produce an advanced, professional build-up. The following materials are available for this purpose: Chromatix Flu Dentine Dentine Modifier Opale Incisal Opale Effect Incisal Incisal Modifier Transpa Neutral Transpa Clear Stain These modifiers can be mixed together in any way you like. The most popular uses of these materials are shown in the watercolor illustration on page
, even with relatively thin layers of ceramic.")

22 The ZIROX Chromatix materials Applications Chromatix materials are dentine modifiers used to control and individualise chroma and opacity. By increasing opacity the ZrO 2 framework can be more effectively concealed whilst simultaneously intensifying the chroma (depth of shade), even with relatively thin layers of ceramic. Chromatix can be mixed with normal dentine to modify chroma and opacity. Alternatively, it may, if the case requires, be used on its own. Important! Always use Chromatix in conjunction with our X Carving Liquid. Only then are you assured of maximum brightness, translucency and ideal handling properties. The Chromatix layer (controlling the chroma) Firing temperature For firing programmes please follow the recommendations set out in the firing table at the end of these instructions. 2

23 The ZIROX Expert Set (Professional Set) ZIROX Expert Set: Reference No SET 1 x Liner Modifier Gum 10 g 5 x Dentine Gum 12 g each 2 x Dentine Modifier *1 12 g each 8 x Incisal Modifier *14 12 g each 4 x Opale Effect *15 12 g each x Bleach Dentine *16 12 g each 1 x Bleach Flu Dentine 12 g 1 x Bleach Incisal Blue 12 g 1 x Bleach Shoulder High 12 g 7 x Stain *17 2 g each 1 x X Carving Liquid Retain 50 ml 1 x X Carving Liquid Blue 15 ml 1 x X Carving Liquid Yellow 15 ml 1 x X Carving Liquid Red 15 ml 2 x Shade guide Incisal Modifier Label description Incisal Topas Incisal Anthrazit Incisal Amethist Incisal Aquamarin Incisal Citrin Incisal Rubin Incisal Lemon Incisal Melon Shade intense orange intense grey greyish-violet intense blue intense yellow redish yellowish orange Area of application The Expert Set now offers you even more scope to individualise the features of your restorations In addition to the Crystal and Gum materials, you have 8 Incisal Modifiers and 4 Opale Effect powders to choose from. Incisal Modifiers and Opale Effect powders are not color-keyed and may be used on their own or mixed with other materials. They are used to individually enhance internal enamel and opalescence characteristics. Special characteristics of Opale Effect powders In contrast to the standard Opale Incisals, which are color-keyed, the Opale Effect materials are characterised by linearly diminishing translucency and opalescence. Moreover, analogous to the diminishing translucency, the fluorescence of these materials shows a linear increase. This makes them ideal for simultaneously enhancing and regulating the brightness of the veneer in the incisal area. Example 1: Opale Effect Frosty has the highest translucency and opalescence and the lowest fluorescence. Example 2: Opale Effect Snow has the lowest translucency and opalescence and the highest fluorescence. Shade guide The individual color shades and translucency are shown on the enclosed shade guide. Like all ZIROX shade guides this has color samples in the original ceramic, which enables you to make an exact color identification of the individual powders in a wide variety of lighting conditions (incident light and transmitted light). * 1 Mocca, Caramel, Khaki, Brown, Yellow, Ivory * 2 Flamingo, Straw * 2, * 4 Flu, 2, * 5 Clear, Neutral * 6 Caramel, Peach, Marone * 7 White, Yellow, Orange, Brown, Violet * 8 Bright, Sunny * 9 1,4 * 10 Red, 1, 4 * 11 White, Black, Orange, Ocker, Blue, Yellow * 12 A, B, C, D * 1 Corn, Mango * 14 Topas, Anthrazit, Amethist, Aquamarin, Citrin, Rubin, Lemon, Melon * 15 Frosty, Milky, Ice, Snow * 16 Light, Pearl, Creme * 17 Grey, Melon, Steel, Violet, Gum, Olive, Ivory 24

24 Opale / Transpa Opale Incisal Flu Dentine Transpa / Incisal Aquamarin Modifier Dentine Liner Opale Dentine Modifier Chromatix Color combination Flu Dentine (Fluorescent Dentine) Bright Flamingo Straw Sunny Dentine Modifier Ivory Corn Mango Mocca Caramel Khaki Yellow Brown A1 A2 B1 B2 C1 D2 A2 A D A.5 A4 B B4 C C4 B2 B B4 C2 D4 A1 B1 B2 B B4 B4 A2 A C1 D2 A.5 A4 B4 D C2 C C4 D4 Fluorescent modifiers with marked fluorescence. They intensify the luminosity of the veneer. Short-wave light in the invisible range is absorbed and long-wave light in the visible range is emitted. For all other colors, to increase the level of brightness. Specially for application in the cervical region. Specially for application in the cervical region. For all colors individually, without any specific color combination. For all colors individually, without any specific color combination. Opale Effect Opale Effect Frosty = see page 24 Opale Effect Milky = see page 24 Opale Effect Snow = see page 24 Opale Effect Ice = see page 24 Incisal (Incisal Modifier) / Transpa (Transpa material) Incisal Topas Incisal Anthrazit Incisal Amethist Incisal Aquamarin Incisal Citrin = intense orange = intense grey = greyish-violet = intense blue = intense yellow With Opale Effect Milky and Snow the level of brightness in the incisal powders can also be controlled. All Opale Incisals can be used for the all V shades if the specific combinations are observed. Incisal Rubin Incisal Lemon Incisal Melon Transpa Neutral Transpa Clear = reddish = yellowish = orange = transparent = extremely transparent All, Transpa Incisal modifiers can be used individually with all colors without any specific combination 25


25 Clinical situation Zirconium oxide bridge in situ Zirconium oxide framework placed on the master-model Liner application Chromatix built-up 26


26 Opale Effect Snow layer Creating mamelons with Dentine Modifier Caramel Insert of Flu Dentine Straw Forming of palatinal characteristica with a mixture of Dentine and Gum Finalizing the anatomical appearance with Dentine 27


27 Cut-back of the dentine core Creating fluorescent effects with Flu Dentine Flamingo Detailed view of mamelon layering Additional layering of Chromatix and Opale Effect Snow Detailed view of Chromatix and Opale Effect Snow layering 28


28 Individual incisal color variations by using Incisal Aquamarin Built-up Opale and Incisal Enlarged image of the incisal area Finished layering with Transpa Neutral and Transpa Clear Bridge after the 1 st dentine bake Readjusting with Opale Incisal, Transpa Neutral and Transpa Clear 29


29 The ZIROX Shoulder materials Firing temperature The shoulder materials are fired at a temperature of 980 C with a holding time of one minute before the first liner bake. Areas of application The Shoulder High Flu material can be used to conceal dark areas such as discolored tooth enamel or discoloration at the edges of crowns, to improve brightness and enhance transparency. Shoulder High Red can be used to quickly and easily modify the transition between the prepared stump, the ceramic shoulder and the gingiva. The main properties of Shoulder High are: Minimal shrinkage during firing High form stability even after repeated dentine and glaze firings Excellent marginal fit Perfect color matching Trouble-free control of transparency, fluorescence and reflection Good firing stability The shoulder materials can easily be mixed with one another (see mixing chart) Preparation To obtain classical ceramic shoulders the tooth stump must be prepared with a step or pronounced chamfer. Designing the substructure In preparation for the attachmentof the ceramic shoulder, (labial orcircular), the outer edges of the substructure are slightly reduced (approx mm) to the inner rim of the previously prepared step or chamfer. The framework edge resulting from this reduction must then be smoothed out into a thin layer. Finally condition the substructure in the usual way. The liner is applied after the shoulder bake. Well prepared die Preparing the die Before creating the ceramic shoulder the die must be thoroughly insulated by using the WIELAND IsoPen. Insulating the die with the IsoPen Mixing liquid ZIROX Shoulder is mixed with X Carving Liquid Retain. Prepared substructure 0


30 First Shoulder High layer Depending on the tooth color to be obtained the Shoulder High is mixed with X Carving Liquid Retain and applied in the cervical region. After modelling and smoothing the ceramic shoulder, dry the shoulder margin carefully with a hand-held dryer until a uniform white color is obtained. The coping can then be removed and fired. Correction layer After firing, check the marginal fit. Correct any changes caused by sintering. Insulate the die once more. Prepare and mix the Shoulder High powder as for the first layer. Next smooth out any unevenness filling the Shoulder powder into the gap created during the first firing, ensuring that the ceramic shoulder is a good fit. Finish off the shoulder and dry. Carefully remove the substructure with the shoulder powder applied from the die and position it on the firing tray. To avoid baking on care must be taken to ensure that the ceramic shoulder does not come into contact with the tray. If necessary, the shoulder must be fitted onto the model again after the correction firing. The final stage is to completely veneer the shoulder with ZIROX. Application of Shoulder powder Correction layer ready for 2 nd bake Color combination table ZIROX Shoulder Powders SH SH 1 SH 2 SH SH 4 SH Red SH Flu Shoulder powder after 1 st bake Shoulder after 2 nd bake Note In order to prevent it from adhering to the material of the tray, make sure that the ceramic shoulder does not come into contact with the firing tray. A1 A2 A A.5 A4 B1 B2 B B4 C1 C2 C C4 D2 D D4 Shades Shoulder mixture SM 1 + SM Flu / 1:1 SM 1 SM 1 SM 2 + SM /1:1 SM + SM 4 /1:1 SM 1 + SM Flu / 1:1 SM 2 + SM Flu / 1:1 SM 2 SM 2 + SM 4 / 1:1 SM 4 + SM Flu / 1:1 SM 4 + SM Flu / 1:1 SM 4 SM 4 SM 1 + SM 4 /1:1 SM 1 + SM 4 /1:1 SM 2 + SM 4 /1:1 Ceramic shoulder inside view The aesthetic final result 1

31 The ZIROX Gingiva materials Area of application With their variety of colors (5 differently shaded powders), the Gum Dentines may be used to accurately reproduce the exact color of the gingiva. Particularly in the case of ceramic veneers over an implanted superstructure, it is essential to ensure anatomically correct results when repairing abraded soft tissue surfaces. But extractions or periodontal procedures can also lead to soft tissue defects after the healing process is complete. In the interests of both aesthetics and periodontal hygiene, these defects must always be repaired by the dental technician using suitable ceramic materials. With their wide range of colors and excellent handling properties, the Gum Dentines facilitate an anatomically exact and colormatched reconstruction of the gingiva to meet the demands of both patient and dental practitioner. Procedure and firing temperature Gum materials can be used on their own or mixed with one another. This gives rise to a virtually unlimited range of possible gingival colors. For information on preparation and firing please refer to the recommendations for Dentines in the instructions starting on page 16. Veneer with Gum Dentine 2
.")
32 The ZIROX Bleach concept More and more patients would like to have perfect, bright white teeth. With natural dentition, this can be achieved by bleaching or by incorporating bright restorations (e. g. veneers). When we observe the results obtained by bleaching natural teeth, however, it immediately becomes clear that the effect is not pure white and that even extremely bright teeth also reveal the characteristic shade of the patient s natural teeth. The explanation for this can be found in the bleaching process. The substance works from the outside to the inside, giving at first a whitened layer of enamel, whilst the dentine is unaffected and therefore still present in its original shade. Only after repeated bleaching does the bleach penetrate to the inner layers, which then in addition results in a whiter dentine in addition to the bleached enamel. However, this only occurs in a rare number of cases and only after excessive bleaching. Traditionally, a white liner, a white dentine and a very bright incisal are used for a bleach shade. This procedure gives a white restoration which appears grey and lifeless when in-corporated into bleached natural dentition. This is because of the process described above which always brightens a tooth from the outside to the inside. This phenomenon has already been taken into account in the development of the ZIROX Bleach shades. In other words, the Bleach shades are used to faithfully reproduce the color of teeth which have been bleached by the dentist or which are naturally extremely white. Since the result of bleaching depends to a great deal on the degree of brightening, a range of different shades and intensities are available to create a perfect match between the restoration and the natural teeth. It is recommended to select the correct shade at the chairside. Example Color combination Liner/Dentine combinations Crystal Dentine Light (lowest chroma) Crystal Dentine Pearl (medium chroma) Crystal Dentine Creme (highest chroma) Liner White (purewhite) Brightest shade of white Medium shade of white Most chromatic shade of white Brightest A shade Liner A1 (reddish brown) Medium A shade Most chromatic A shade Brightest B shade Liner B1 (reddish yellow) Medium B shade Most chromatic B shade Crystal Flu Dentine may be used individually as a modifier.

.")

33 Description of the ZIROX Bleach materials Liner: The liner affects the shade of the restoration from deep down. Here you can choose between a white liner for extremely bright restorations or the shaded A1 and B1 liners. Bleach Dentines: The three Bleach Dentines differ mainly in their chroma: Bleach Dentine Light has the lowest color intensity and tends towards white. Compared to Bleach Dentine Light, Bleach Dentine Pearl is a somewhat more intense shade and tends towards reddish brown (A shades). Bleach Dentine Crème has the highest chroma of the three Bleach Dentines and tends towards the reddish yellow (B shades). Flu Dentine Bleach is much brighter than the other dentines and has the highest degree of fluorescence. This dentine can therefore be used to control the fluorescent properties and the brightness. Opale Effect Incisals: The four Opale Effect Incisals offer various degrees of transparency, shade intensity and opalescence: Frosty is the transparent incisal with a very pronounced opal effect (followed by Ice, Milky and Snow), whereby the Opale Effect Incisal Snow has the lowest degree of transparency. The Opale Effect Incisals Milky and Snow are used as standard incisals when no specific incisal is required. the Opale Effect incisals Frosty and Ice have a pronounced opal effect and are used particularly on the incisal edge and at the tooth flanks. Incisal Modifier: The Incisal Bleach Blue can be used as a standard incisal or as a modifier. It features a whitish blue opalescent effect similar to juvenile dentition. The Incisal Aquamarin is used as a modifier for bluish bars and wedges. Transpa materials: Here two materials in different transparencies are available: Transpa Clear is very transparent (glass-like). Transpa Neutral is somewhat less transparent. Transpa Neutral can be used to provide added control over the shade intensity of ceramic materials. Here it is important to note that adding Transpa Neutral increases the transparency and at the same time reduces the intensity of the shade. Bleach Shoulder materials: ZIROX shoulder materials are available to match the bleach shades. If the shoulder is to have a different shade, the standard ZIROX shoulder materials can be used. 4
: Controls brightness.")
 Build-up concept variant Brightest bleach variant with lowest chroma Example")
34 -D Build-up concept Brightness + Liner: Controls color shade. I-Snow Dentine: Controls chroma. Incisal (Opale Effect): Controls brightness. I-Milky I-Blue Chroma D-Light D-Pearl D-Creme L-White L-B1 L-A1 Color shade + Materials used Example 1 Liner White Bleach Dentine Light Incisal Snow Result Bleach Snow White (pure white) Build-up concept variant Brightest bleach variant with lowest chroma Example 2 Liner A1 Bleach Dentine Creme Incisal Snow Bleach tooth color range A (reddish white) Darkest bleach variant with highest chroma 5

35 Recommendations for firing 1. Zirconium oxide is a poor thermal conductor. For this reason, the framework should be preheated in the closed furnace for at least minutes. It is absolutely essential to adhere to the recommended firing parameters. 2. The heat rise must not exceed C per minute.. Solid firing trays absorb more heat during firing and can therefore influence the effect of firing on the ceramic. For this reason and to obtain the best possible results, use honeycomb firing trays or if solid ones are used, increase the firing temperatures by 10 C. Best results are obtained by using honeycomb firing trays and fan-type firing pins. 4. With larger framework designs, solid pontics or several small units, the firing temperatures for the first and second dentine bakes should be increased according to the following formula: Rule of thumb! Increase the end temperature by 2 C for each additional unit of the framework (crown, pontic). Example 1: 1. dentine bake 6-unit bridge or 6 single crowns = 5 additional units -> 900 C + (5 x 2 C) => 910 C end temperature 5. Do not overfill the firing trays, since increasing the number of items necessitates a considerably higher firing temperature. (See rule of thumb). Note The work should not be positioned in the centre of the firing tray but always aligned to the heating elements. Important! You can avoid underfiring the veneering ceramic by regularly calibrating your furnace. This can easily be done by using the ZIROX Calibration Set (Fig. 1). 6. In order to minimise the risk of thermal stresses caused by too rapid cooling, it is essential to open the firing chamber gradually (slow cooling). Following the ceramic bake, the veneered zirconium frameworks should be left on the firing tray and allowed to cool slowly to room temperature next to the furnace. Circular heating element in the furnace and frameworks correctly arranged within the recommended temperature range. Note Make sure that no draughts or cold air from outside can cause the work to cool too quickly, since this can likewise lead to thermal stress. Fig. 1: ZIROX Calibration Set (Ref. No SET) Calculating the value of X Along with incorrect framework design, too low a setting at the furnace is the most common cause of failure. It is therefore absolutely crucial to set the firing temperature of your furnace correctly. This is very easy to do by firing a sample with the aid of the ZIROX calibration set (Fig. 1). In order to adjust the firing temperature to each individual furnace used, the actual firing temperature of the furnace must first be determined, since this can differ from the temperature shown in the display. It is not unusual to find a deviation of 20 0 C. To do this, a sample of ZIROX Transpa Clear is fired in the lab and compared to the reference sample supplied. Transparency values and surface roughness should be the same for the firing sample and the reference sample. If this is not the case, then the firing temperature must be adjusted until the required degree of firing is attained. The difference in temperature between the value indicated and the actual temperature corresponds to the value X and must accordingly be added to the value given in the table for each individual firing. For larger firing batches, the drying and closing times should be extended accordingly. 6
36 Firing programme ZIROX with slow cooling General firing programme 1 st shoulder bake 2 nd shoulder bake Liner bake 1 st dentine bake 2 nd dentine bake Glaze Correction 8:00 8:00 8:00 9:00 8:00 5:00 5:00 Preheat temp. ( C) Drying time (min:sec) Temperaturerise ( C/ min) Firing temp. ( C) Holdingtime (min:sec) Vacuum (%) Slow cooling X X :00 1:0-2: :00 4:00 4:00 4:00 Austromat st shoulder bake 2 nd shoulder bake Liner bake 1 st dentine bake 2 nd dentine bake Glaze Correction C T120 T180 L9 T180 V9 T0 C980 V0 T60 C0 L0 T2 C C T120 T180 L9 T180 V9 T0 C960 V0 T60 C0 L0 T2 C C T120 T180 L9 T180 V9 T0 C90 V0 T60 C0 L0 T2 C C T180 T180 L9 T180 V9 T0 C900 + X V0 T120 C0 T240 L0 T2 C C T120 T180 L9 T180 V9 T0 C890 + X V0 T60 C0 T240 L0 T2 C C T60 T120 L9 T120 T0 C880 T60 C0 T240 L0 T2 C C T60 T120 L9 T120 V9 T0 C850 V0 T60 C0 T240 L0 T2 C Austromat M 1 st shoulder bake 2 nd shoulder bake Liner bake 1 st dentine bake 2 nd dentine bake Glaze Correction START ( C) 2:00 2:00 2:00 :00 2:00 Drying time (min:sec) Vac. Level ( C/min) X X END ( C) 2:00 (min) :00 4:00 4:00 4:00 Important! Firing temperatures are for guidance only. Variations may occur depending on the furnace used and the temperatures may need to be adjusted accordingly. For extended restaurations the drying and final cooling times should be extended as necessary. 7
37 Firing programme for ZIROX Austromat D4 Austromat D4 Professional Mode Drying time (min:sec) Close (min:sec) Preheat temp. ( C) min:sec Temp. 1 ( C) Temp. rise ( C/min) Holding time (min:sec) Temperature 2 ( C) Temp. rise ( C/min) Holding time (min:sec) Temperature ( C) Temp. rise ( C/min) Holding time (min:sec) Vac. (off/level/hold) ( C) Vacuum % 2:00 :00 : st shoulder bake 2:00 :00 : nd shoulder bake 2:00 :00 : Liner bake :00 :00 : X 2: MAX st dentine bake 2:00 :00 : X 770 MAX Glaze 2 nd dentine bake 2:00 2: MAX :00 2: MAX Correction Drying time (min:sec) Close (min:sec) Preheat temp. ( C) min:sec Temp. 1 ( C) Temp. rise ( C/min) Holding time (min:sec) Temperature 2 ( C) Temp. rise ( C/min) Holding time (min:sec) Temperature ( C) Temp. rise ( C/min) Holding time (min:sec) Vac. (off/level/hold) ( C) Vacuum % Important! Firing temperatures are for guidance only. Variations may occur depending on the furnace used and the temperatures may need to be adjusted accordingly. For extended restaurations the drying and final cooling times should be extended as necessary. Important Note! Inhaling ceramic dust can be harmful to the lungs. Ceramic powders must therefore be stored in tightly sealed containers and used in accordance with the instructions provided. When grinding the fired ceramic to its final shape, always wear a mask with a P1 filter or use an approved, fully operational work bench extraction unit. 8
Zirox Guidelines. Supplement to the ZIROX Instructions for Use (dated 07/05)
") Zirox Guidelines Supplement to the ZIROX Instructions for Use (dated 07/05) - 03 Technical Hotline Germany +9 60 07 / 9 76-222 Working with ZrO 2 and Zirox Indications and contraindications ZIROX veneering
Zirox Guidelines Supplement to the ZIROX Instructions for Use (dated 07/05) - 03 Technical Hotline Germany +9 60 07 / 9 76-222 Working with ZrO 2 and Zirox Indications and contraindications ZIROX veneering
Instructions for Use 2-Color Set
 Instructions for Use -Color Set -48 Technical Hotline Germany +4967/9176- www.wieland-international.com Ceramic works and photography by Dominique Vinci Core materials designed by Ampellio, Ponchant and
BRILLIANT AESTHETICS + RELIABLE TECHNOLOGY
 BRILLIANT AESTHETICS + RELIABLE TECHNOLOGY THE VENEERING CERAMIC FOR ZIRCONIA FRAMEWORKS There can be no progress without innovation. Ever since zirconia was introduced as a framework material, the aesthetic
Product Information. Translucent Zirconium Dioxide For monolithic restorations. Giving a hand to oral health.
 Product Information Translucent Zirconium Dioxide For monolithic restorations. Giving a hand to oral health. Zr tr cara Zirconium Dioxide the ideal material for aesthetic restoration. On account of its
Screw-retained implant-supported restoration in the edentulous maxilla
 Screw-retained implant-supported restoration in the edentulous maxilla A working document for the production of a milled zirconium dioxide framework Authors: Dr Octavian Fagaras & Milos Miladinov, Romania
BASIC LINE / INDIVIDUAL LINE / TOUCH UP. Photo: Christian Ferrari. Instructions for Use. ceramotion Ti Titanium ceramic
 en BASIC LINE / INDIVIDUAL LINE / TOUCH UP Photo: Christian Ferrari Instructions for Use ceramotion Ti Titanium ceramic BASIC LINE / INDIVIDUAL LINE Contents The instruction manual is designed for practical
VITAVM 9 VENEERING MATERIAL. Working Instructions
 VENEERING MATERIAL VITAVM 9 Working Instructions For all-ceramic substructure porcelains in the CTE range of approx. 10,5 such as VITA In-Ceram YZ CUBES For individualizing VITABLOCS Mark II for CEREC
Layering Guide for Labs. Lava Ceram. Overlay Porcelain for Lava Zirconia. Esthetic Restorations that are Truly Masterpieces
 Layering Guide for Labs Lava Ceram Overlay Porcelain for Lava Zirconia Esthetic Restorations that are Truly Masterpieces The product is the essence, based on experience. An excellent match for your high
Celtra, Cercon, Celtra Ceram, Universal Stain and Glaze. All-ceramic solutions for every need. Brochure for the dental laboratory
 Celtra, Cercon, Celtra Ceram, Universal Stain and Glaze All-ceramic solutions for every need Brochure for the dental laboratory Content Celtra Ceram High esthetic veneering 4 Celtra Press Monolithic stained
Directions For Use. Zirconia. Minimum occlusal wall thickness: 0.5 mm, including a 0.1 mm reserve for occlusal adjustment
 Zirconia ht Minimum occlusal wall thickness: 0.5 mm, including a 0.1 mm reserve for occlusal adjustment Conservative circular preparation, minimum wall thickness 0.4 mm Marginal region, minimum wall thickness
TECHNICAL GUIDE. For use with CEREC
 TECHNICAL GUIDE For use with CEREC THE FUTURE AND SOLUTION OF INNOVATIVE ZIRCONIA FEATURES TRANSLUCENCY SIMILAR TO NATURAL TOOTH ENAMEL BY SPEED SINTERING The collaboration of Kuraray Noritake Dental s
CREATION WILLI GELLER INTERNATIONAL SIMPLY BRILLIANT INSTRUCTIONS FOR USE CREATION ZIRCONIUM OXIDE CERAMICS. MDT Christian Berg ZI/ZI-F
 CREATION WILLI GELLER INTERNATIONAL SIMPLY BRILLIANT INSTRUCTIONS FOR USE CREATION ZIRCONIUM OXIDE CERAMICS MDT Christian Berg ZI/ZI-F 1 CONTENT Frame 3 Frame Shade / Neck Dentine 4 Dentine and Enamel
COMPUTER AIDED OVERPRESS - A SIMPLE PROCESS
 COMPUTER AIDED OVERPRESS - A SIMPLE PROCESS HORST KOINIG The simplicity of Computer Aided Overpress (CAO) does not necessarily mean that the daily routine in dental laboratories is just as simple. Looking
Prior to use, carefully read the instructions for use.
 Prior to use, carefully read the instructions for use. GC Initial LiSi Press LITHIUM DISILICATE GLASS CERAMICS For use only by a dental professional in the recommended indications. INDICATIONS FOR USE
UTML Ultra Translucent Multi-Layered STML Super Translucent Multi-Layered ML Multi-Layered HTHigh-Translucent TECHNICAL GUIDE
 Ultra Translucent Multi-Layered STML Super Translucent Multi-Layered ML Multi-Layered HTHigh-Translucent TECHNICAL GUIDE High Esthetic Potential for Zirconia Dental Restorations * New series which features
GUM COLORS INSTRUCTIONS FOR USE
 GUM COLORS INSTRUCTIONS FOR USE The natural appearance of gingival parts is very important, especially when producing high-quality telescopic and implant supported supra constructions. The CERAMAGE GUM
GUIDELINES FOR PROCESSING CELTRA DUO
 GUIDELINES FOR PROCESSING CELTRA DUO CONTENTS Minimum wall thickness 4 CAD / CAM processing 5 Finishing / polishing 5 Staining and glazing 5 Firing recommendations 8 Cementing 9 Ordering information 10
Instructions for use Dental Direkt Color Solutions: DD Basic Shade, DD Art Elements, DD Pro Shade Z & DD Pro Shade C
 _ As we are continually developing our products, we reserve the right to change them at any time. The latest digital version of these instructions for use can be found on our homepage at www.dentaldirekt.de
RELIABLE CONSISTENT BRILLIANT
 Vintage-EP-VA_GB 04.04.2006 9:49 Uhr Seite 1 THE UNIVERSAL PORCELAIN SYSTEM RELIABLE CONSISTENT BRILLIANT INSTRUCTIONS FOR USE Vintage-EP-VA_GB 06.04.2006 11:31 Uhr Seite 2 The VINTAGE Porcelain System
GUIDELINES FOR PROCESSING CELTRA DUO
 GUIDELINES FOR PROCESSING CELTRA DUO 2 CONTENTS Minimum wall thickness 4 CAD / CAM processing 5 Finishing / polishing 5 Staining and glazing 5 Firing recommendations 8 Cementing 9 Ordering information
Every shade a masterpiece. Lava Ceram. Zirconium oxide veneer ceramic for natural aesthetics
 Every shade a masterpiece Lava Ceram Zirconium oxide veneer ceramic for natural aesthetics Effortlessly natural elegance The tooth a miracle of nature! Reconstructing its perfect beauty in a lifelike way
GUIDELINES FOR PROCESSING CELTRA DUO
 GUIDELINES FOR PROCESSING CELTRA DUO 2 CONTENTS Minimum wall thickness 4 CAD / CAM processing 5 Finishing / polishing 5 Staining and glazing 5 Glaze-firing 7 Firing recommendations 8 Cementing 9 Ordering
Leading material offering and application range. Straumann CARES CADCAM
 Leading material offering and application range Straumann CARES CADCAM content Leading material offering 2 Applications at a glance 5 Features & benefits ceramics 6 Features & benefits metals 8 Features
Lava Ceram. Overlay Porcelain for Lava Frameworks
 Lava Ceram Overlay Porcelain for Lava Frameworks An excellent match for your high standards Developed as a part of the Lava system, Lava Ceram Overlay Porcelain is the choice for restorations that are
Kiss. Veneering Porcelain. Craft meets creativity. Brochure for the dental laboratory
 Kiss Veneering Porcelain Craft meets creativity Brochure for the dental laboratory For all framework materials 3 Kiss ceramic lines DUCERAGOLD KISS High-expansion alloys DUCERAM KISS Classic alloys, bio-alloys,
Tizian Blank. Tizian Zirconia Reinforced Composite
 Tizian Blank Tizian Zirconia Reinforced Composite Inspired by Nature This innovative combination of materials offers both the advantages of high-performance acrylics and zirconium dioxide: The CAD/CAM
ICE ZIRCONIA CERAMIC. The Love of Perfection ENGLISH
 ICE ZIRCONIA CERAMIC The Love of Perfection ENGLISH The Love of Perfection Copying nature to perfection is always an exciting challenge. The ingredients for success are talent, tireless effort and personal
INSTRUCTIONS FOR USE CREATION CLASSIC GINGIVA CERAMICS
 CREATION WILLI GELLER INTERNATIONAL SIMPLY BRILLIANT INSTRUCTIONS FOR USE CREATION CLASSIC GINGIVA CERAMICS MDT Ralf Bahle CC 1 CONTENT Introduction 3 Frame 4 Opaque / 1 st Build-Up 5 Dentine Firing /
TECHNICAL GUIDE KATANA ZIRCONIA MULTI-LAYERED SERIES
 TECHNICAL GUIDE KATANA ZIRCONIA MULTI-LAYERED SERIES HIGH ESTHETIC WITH KATANA ZIRCONIA* New series which features translucency similar to natural tooth enamel is now available. Introducing the new series
love Product Information all you need Table of Contents CERCON CERAM LOVE Introduction 4 5 The 2-in-1 principle 6 9 Basic build-up 10 11
 love all you need Product Information CERCON CERAM LOVE Table of Contents Introduction 45 The 2-in-1 principle 69 Basic build-up 1011 Material properties 1215 Custom build-up 1625 The team behind 2627
Dentium Workflow Solution for Labs
 lab system 2 Dentium Workflow Solution for Labs Contents Dentium Lab Products Publishing information Dec. 2016, Vol. 1 Publisher Head office 501 Gyeonggi R&DB Center, 105 Gwanggyo-ro, Yeongtong-gu, Suwon-si,
Wirobond C+ Processing information for CAD/CAM-produced restorations. Partners in Progress
 Wirobond C+ Processing information for CAD/CAM-produced restorations Partners in Progress CAD/CAM-PRODUCED RESTORATIONS MADE OF Wirobond C+ Wirobond C+ As the Wirobond C+ alloy (manufactured by BEGO Bremer
esthetic.line The lithium disilicate press ceramic system. Soprano 10 Livento press
 esthetic.line Livento press Soprano 10 The lithium disilicate press ceramic system. Livento press and Soprano 10 Cendres+Métaux introduces a commercially viable material combined with highend aesthetics
CERASMART for PlanMill
 CERASMART for PlanMill 2 introducing CERASMART for PlanMill the first FORCE ABSORBING FLEXIBLE NANO CERAMIC CERASMART is a revolutionary block. It combines exceptional strength and unparalleled aesthetics.
IPS. Empress Esthetic. NEWS from the IPS Empress Original System
 IPS Empress Esthetic NEWS from the IPS Empress Original System A tried-and-tested system with NEW aesthetic properties The IPS Empress pressed ceramic system, which has been clinically proven for more
VITA VMK Master. Masterful in all cases. VITA shade, VITA made. VITA shade control. VITA shade reproduction. Date of issue 06.16
 Masterful in all cases VITA shade determination VITA shade communication VITA shade reproduction VITA shade control Date of issue 06.16 VITA shade, VITA made. Masterful to give you the best results Masterful
The product must be only used by specifically trained personnel and under the relevant application by proven techniques.
 Instruction manual Intended use: DD Bio ZX² monolith zero Liquids are indicated for coloring of pre-sintered Dental Direkt Zirconia milling blanks for the manufacture of dental restorations. Application:
IPS Empress System Information for the. Laboratory. Confidence. Reliability. Esthetics. Empress IPS. System. The ultimate esthetic restorative system
 IPS Empress System Information for the Laboratory Confidence Reliability Esthetics IPS Empress The ultimate esthetic restorative system System A time-tested system offers new possibilities For nearly 20
VITA AKZENT. for natural surface colour effects. VITA shade, VITA made.
 VITA AKZENT for natural surface colour effects Date of issue: 0912 VITA shade, VITA made. VITA AKZENT stands for a concept which replaces the previous generation of stains and thus enables the dental technician
IPS InLine System. Instructions for Use
 IPS InLine System Instructions for Use IPS InLine One One-Layer Metal-Ceramic IPS InLine Conventional Metal-Ceramic IPS InLine PoM Press-on-Metal Ceramic Optimize your working procedures and simultaneously
VITA Akzent stands for a concept which replaces the previous generation of stains and thus enables the dental technician to achieve even more natural
 for natural surface colour effects Date of issue: 08-08 Teeth Veneering Materials Vita System Service 3D - Master Equipment All-Ceramics stands for a concept which replaces the previous generation of stains
SPECIAL REPRINT c Light and Shadow by Haristos Girinis, Nagold B 2129 E. Die ganze Welt der Zahntechnik.
 B 2129 E Die ganze Welt der Zahntechnik SPECIAL REPRINT c by Haristos Girinis, Nagold www.wieland-international.com WIELAND Dental +Technik GmbH & Co. KG Schwenninger Straße 13, 75179 Pforzheim, Germany
Clinical Guideline. for full contour zirconia restorations produced chairside with CEREC Zirconia (milling process).
.") Clinical Guideline for full contour zirconia restorations produced chairside with CEREC Zirconia (milling process). University of Zurich / University of Michigan CEREC.com/zirconia Clinical workflow step
Clinical Guideline for full contour zirconia restorations produced chairside with CEREC Zirconia (milling process). University of Zurich / University of Michigan CEREC.com/zirconia Clinical workflow step
HIGH CLASS PORCELAIN. Designed for Beauty. a relaiable brand manufacturer of dental materials. Yamamoto, Osaka JAPAN
 HIGH CLASS PORCELAIN a relaiable brand manufacturer of dental materials Designed for Beauty Yamamoto, Osaka JAPAN Designed for Beauty, Designed for That Special Someone Giving patients security and Making
Technical Instructions
 Technical Instructions Screening Porcelain is to be used in combination with Noritake Super Porcelain EX-3 to make all-ceramic restorations, porcelain laminate veneers and jacket crowns as well as porcelain
Empress * CAD IPS. Confidence. Reliability. Esthetics. IPS Empress CAD for the CAD/CAM Technology Information for Dentists
 Empress CAD for the CAD/CAM Technology Information for Dentists Confidence Reliability Esthetics Empress * CAD * The ultimate esthetic restorative system Empress System A time-tested system. with new possibilities
BLOCK RANGE CAD. IPS e.max
 BLOCK RANGE 682185 / en / 2015-11-16 www.ivoclarvivadent.com Ivoclar Vivadent AG Bendererstr. 2 9494 Schaan Liechtenstein Tel.: +423 235 35 35 Fax: +423 235 33 60 FOR A COMPREHENSIVE RANGE OF INDICATIONS
VITA VMK Master Quickstart Instructions
 VITA VMK Master Quickstart Instructions For full veneering of metal frameworks in the conventional CTE range (13.8 15.2). Available in VITA SYSTEM 3D-MASTER and VITA classical A1 D4 shades. VITA VMK Master
Metal Ceramic. Perfect shades straight from the bottle. Instruction Manual. Products for better dentistry
 Metal Ceramic MC Perfect shades straight from the bottle Instruction Manual Products for better dentistry Metal Ceramic Metal Ceramic MC Perfect shades straight from the bottle is a complete bonded crown
CERAMAGE UP. Indirect Flowable with Revolutionary Handling Characteristics. Visit or call
 CERAMAGE UP Indirect Flowable with Revolutionary Handling Characteristics Visit www.shofu.com or call 800-827-4638 Revolutionary Handling Informed and educated patients demand treatments that are not only
A lasting connection: Esthetic implantborne single-tooth restorations. Part 1
 Clinical A lasting connection: Esthetic implantborne single-tooth restorations. Part 1 Oliver Morhofer, 1 Bernd Kobus 1 Introduction Restoring complex patient cases in such a way that the tooth shades
Empress *CAD IPS. Confidence. Reliability. Aesthetics. The world s leading all-ceramic
 Empress CAD for the CAD/CAM Technology Information for Dentists Confidence Reliability Aesthetics IPS Empress *CAD * The world s leading all-ceramic Empress System A time-tested system. with new possibilities
NEW IPS Ivocolor. Universal stains and glazes
 NEW IPS Ivocolor Universal stains and glazes One staining material for all IPS ceramics * IPS Style individualize IPS e.m flexible IPS Empress esthetic customize stains ceramics IPS InLine IPS e.max stains
Gingiva Solution SR Phonares II, IvoBase, SR Nexco
 Gingiva Solution SR Phonares II, IvoBase, SR Nexco Preface 5 Framework design 6 Framework preparation 8 Finishing of the denture base 10 Gingival modification 12 Mobile mucosa 14 Immobile mucosa 16 Lip
VITABLOCS Mark II for KaVo Everest Working Instructions. Always on the safe side
 VITABLOCS Mark II for KaVo Everest Working Instructions Always on the safe side Vertrieb: KaVo Dental GmbH Bismarckring 39 D-88400 Biberach Tel. +49 7351 56-0 Fax +49 7351 56-1488 Hersteller: VITA Zahnfabrik
Straumann n!ce Turn time spent milling into time spent smiling. Quick Guide
 Straumann n!ce Turn time spent milling into time spent smiling. Quick Guide n!ce processing polish only 1 2 3 MILL POLISH SEAT Prepare the tooth, digitize and design the desired restoration as usual. 1
F R A M E W O R K D E S I G N F O R M E T A L - C E R A M I C R E S T O R A T I O N S. Manual
 F R A M E W O R K D E S I G N F O R M E T A L - C E R A M I C R E S T O R A T I O N S Manual The fabrication of aesthetic and functional metal-supported ceramic restorations requires both comprehensive
VITA INTERNO. For natural, in-depth colour effects. VITA perfect match. Date of issue: 09.17
 For natural, in-depth colour effects Date of issue: 09.17 VITA perfect match. The ceramics enable the ceramist to achieve an even more perfect reproduction of in-depth shade effects. white smoke - Int
CEREC Blocs C In for CEREC / inlab Industrially manufactured silicate glass ceramic blocks
 New as of: 09.2017 CEREC Blocs C In for CEREC / inlab Industrially manufactured silicate glass ceramic blocks Processing instructions English Table of contents Table of contents 1 Symbols used... 3 2 Material...
BEGO COMPETENCE IN CERAMICS. Aesthetic restorations easy, customised and functional. Partners in Progress
 BEGO COMPETENCE IN CERAMICS Aesthetic restorations easy, customised and functional Partners in Progress Sandra Tjarks Master Dental Technician, Product Manager BEGO Fabrication of all-ceramic restorations
Ceramic Based Aesthetic CAD/CAM Restorative
 Ceramic Based Aesthetic CAD/CAM Restorative Create Natural Aesthetics with High-Strength Materials SHOFU Block HC and Disk HC are the latest generation of hybrid-ceramic restorative materials for use with
CLINICAL GUIDELINE. FOR FULL CONTOUR ZIRCONIA RESTORATIONS PRODUCED CHAIRSIDE WITH CEREC ZIRCONIA (MILLING PROCESS). CEREC.
. CEREC.") CEREC.COM/ZIRCONIA CLINICAL GUIDELINE. FOR FULL CONTOUR ZIRCONIA RESTORATIONS PRODUCED CHAIRSIDE WITH CEREC ZIRCONIA (MILLING PROCESS). SIRONA / UNIVERSITY OF ZURICH / UNIVERSITY OF MICHIGAN MAY 2016 CLINICAL
CEREC.COM/ZIRCONIA CLINICAL GUIDELINE. FOR FULL CONTOUR ZIRCONIA RESTORATIONS PRODUCED CHAIRSIDE WITH CEREC ZIRCONIA (MILLING PROCESS). SIRONA / UNIVERSITY OF ZURICH / UNIVERSITY OF MICHIGAN MAY 2016 CLINICAL
BLOCK RANGE CAD. IPS e.max
 BLOCK RANGE 682185 / en / 2018-01-24 www.ivoclarvivadent.com Ivoclar Vivadent AG Bendererstr. 2 9494 Schaan Liechtenstein Tel.: +423 235 35 35 Fax: +423 235 33 60 FOR A COMPREHENSIVE RANGE OF INDICATIONS
Lithium Disilicate. Zirconia
 e.max CAD e.max Press e.max ZirCAD CadCAM Milled Crystalized Lithium Disilicate Pressed Lithium Disilicate CadCAM Milled Sintered Yttrium Zirconia 360 Lithium Disilicate Zirconia 400 1,000 Esthetic anterior
VITA Akzent. for natural surface colour effects. Date of issue: T e e t h V e n e e r i n g M a t e r i a ls. S e r v ic e
 for natural surface colour effects Date of issue: 06-07 T e e t h V e n e e r i n g M a t e r i a ls Vita System S e r v ic e 3 D -Master E q u i p m e n t A l l - C e r a m i c s stands for aconcept which
Empress System IPS. Empress CAD IPS. Instructions for Use LABSIDE
 IPS Empress System IPS Empress CAD Instructions for Use LABSIDE Table of Contents Product Information IPS Empress CAD Product Information 4 Material Uses Composition Block concept Product overview and
VITAVM 9 Quickstart Working Instructions
 VITAVM 9 Quickstart Working Instructions For veneering zirconia substructures and for individualizing VITABLOCS and VITA PM 9 restorations. Available in VITA SYSTEM 3D-MASTER and VITA classical A1 D4 shades.
SHOFU BLOCK & DISK CAD/CAM CERAMIC-BASED RESTORATIVE. Visit or call mm x 12mm x 16mm. 98mm x 14mm. 12mm x 14mm x 18mm
 SHOFU BLOCK & DISK CAD/CAM CERAMIC-BASED RESTORATIVE 1mm x 12mm x 16mm 12mm x 14mm x 18mm 98mm x 14mm Visit www.shofu.com or call 8.827.4638 Created through a rigorous manufacturing process, Shofu Blocks
BEGO PMMA Multicolor Processing information for CAD/CAM-produced restorations
 BEGO PMMA Multicolor Processing information for CAD/CAM-produced restorations Partners in Progress CAD/CAM-PRODUCED RESTORATIONS FROM BEGO PMMA Multicolor High-performance PMMA with color gradient BEGO
SHOFU BLOCK & DISK CAD/CAM CERAMIC-BASED RESTORATIVE. Visit or call mm x 14mm
 SHOFU BLOCK & DISK CAD/CAM CERAMIC-BASED RESTORATIVE 12mm x 14mm x 18mm 98mm x 14mm Visit www.shofu.com or call 8.827.4638 Created through a rigorous manufacturing process, Shofu Blocks & Disks HC demonstrate
The Sof-Lex Finishing and Polishing System 3ESPE
 The Sof-Lex Finishing and Polishing System 3ESPE 3M ESPE is a recognized leader in dental innovation. Introduced in the mid-1970s, the Sof-Lex Finishing and Polishing System was a revolutionary breakthrough
E x p r e s s 2. Clinical Cases. VPS Impression Material. Clinical case 1:
 E x p r e s s 2 VPS Impression Material Clinical case 1: Anterior all-ceramic Lava Zirconia Bridge using Express 2 Penta Putty Soft in combination with Express 2 Regular Body VPS Impression Material in
How to build up the perfect tooth
 Clinical How to build up the perfect tooth Ulf Krueger-Janson 1 The natural appearance of a tooth can be successfully reconstructed with a composite resin that is based on an integrated shade and layering
VITAVMK 95 VITA METAL CERAMICS. Working instructions Date of issue: 12/06. Vita System. 3D - Master
 VITAVMK 95 VITA METAL CERAMICS Working instructions Date of issue: 2/06 Teeth Veneering Materials Vita System Service 3D - Master Equipment All-Ceramics VITA VMK 95 METAL CERAMICS Directions for use VITA
Empress *CAD. Confidence. Reliability. Esthetics. IPS Empress CAD for the CAD/CAM Technology Information for Dentists
 Empress CAD for the CAD/CAM Technology Information for Dentists Confidence Reliability Esthetics Empress *CAD * The ultimate esthetic restorative system Empress System A time-tested system. with new possibilities
Ceram INSTRUCTIONS FOR USE
 Ceram INSTRUCTIONS FOR USE TABLE OF CONTENTS 3 IPS e.max System all you need 4 IPS e.max Ceram Product Information Material Usage Composition Firing behaviour and firing process Questions and Answers Product
Developed to make a difference
 Developed to make a difference Any block can make a restoration Celtra Duo (ZLS) provides the freedom to work your way Finally, a CEREC block that gives you total control. You choose the processing pathway.
natural-looking fillings
 IPS Empress The highly esthetic composite Direct Create natural-looking fillings HIGH EASY ESTHETICS HANDLING The material for highly esthetic fillings Easy to master effortlessly reproduced IPS Empress
all ceramic all you need LABSIDE Instructions for Use
 all ceramic all you need LABSIDE Instructions for Use Table of Contents 3 IPS e.max System Practical Procedure Product Information 4 IPS e.max ZirCAD Scientific data Material Technical data Uses and safety
Product Information. HeraCeram Zirkonia 750 The cool solution for LiSi and zirconia. Giving a hand to oral health.
 Product Information HeraCeram Zirkonia 750 The cool solution for LiSi and zirconia. Giving a hand to oral health. xxx HeraCeram Zirkonia 750 XXX The cool solution for LiSi and zirconia. Why use two ceramics
allinone... unbelievable? But true! Picture: Dr. Thano Kristallis
 allinone... unbelievable? But true! Picture: Dr. Thano Kristallis A well-made provisional is the basis of a successful restorative treatment 2 It is desirable that a provisional system is strong and durable,
GUM COLORS THE AESTHETICS OF PORCELAIN WITH THE BENEFITS OF INNOVATIVE COMPOSITE TECHNOLOGY
 & GUM COLORS THE AESTHETICS OF PORCELAIN WITH THE BENEFITS OF INNOVATIVE COMPOSITE TECHNOLOGY OUTSTANDING FEATURES THANKS TO HOMOGENEOUS MICROSTRUCTURES Light-curing tooth restoring materials such as micro-filled
Direct composite restorations for large posterior cavities extended range of applications for high-performance materials
 Direct composite restorations for large posterior cavities extended range of applications for high-performance materials A case study by Ann-Christin Meier, Dr. med. dent., Stapelfeld, Germany When large
Implant-supported crowns Working Instructions
 VITA ENAMIC Implant-supported crowns Working Instructions VITA shade determination VITA shade communication VITA shade reproduction VITA shade control Date of issue: 11.18 VITA perfect match. VITA ENAMIC
Celtra Press Developed to make a difference
 Celtra Press Developed to make a difference Information for the dental laboratory Celtra Press The structure makes the difference Celtra is the new generation of high strength glass ceramics, zirconia
IPS Ivocolor Universal stains and glazes
 IPS Ivocolor Universal stains and glazes One staining material for all IPS ceramics * IPS Style individualize IPS e.m flexible IPS Empress esthetic customize stains ceramics IPS InLine IPS e.max glaze
Powerful, Affordable 3D Printers for Professionals
 Wright products, Wright quality, at the right price Valid September - November 2017 Powerful, Affordable 3D Printers for Professionals Form 2 Complete Package The most advanced desktop 3D printer ever
Tradition and Innovation in Ceramic Technology
 0120 N02_2012.11.5K C o n t e n t s Distinctive Features Principal Features 3 Recreation of Natural Dentition 5 Basic Technique Metal Framework Preparation Metal Framework Adjustment Preparation 6 Tradition
5Recommended Shade-Matching Protocol
 5Recommended Shade-Matching Protocol In this chapter: Seven steps to a successful shade match 5 Recommended Shade-Matching Protocol Figs 5-1 and 5-2 Conventional methods of shade selection, when used alone,
COLOURS ON CERAMIC PRODUCTS FOR DENTAL USE
 COLOURS ON CERAMIC PRODUCTS FOR DENTAL USE BTEETH : COLOUR LINE FOR DENTAL CERAMICS ZIRCONIA The technological evolution of dental laboratories will be increasingly based on the use of innovative materials
Predictable Real World Aesthetics. The Key to Success with Natural Restorations
 The Insiders Guide to Quality Dentistry Predictable Real World Aesthetics The Key to Success with Natural Restorations ISUS CAD/CAM Implant Supra-Structures: Accuracy, durability and precision Conscious
VITAVM 9 Product information
 VITAVM 9 Product information VITA shade determination VITA shade communication VITA shade reproduction VITA shade control Date of issue: 09.15 VITA shade, VITA made. For veneering zirconia substructures
Removable Partial Dentures
 Removable Partial Dentures Replacement of missing teeth Fixed partial denture Removable partial denture Complete removable Transitional denture Partial removable Implant retained prosthodontics No prosthetic
I N F O R M A T I O N F O R D E N T I S T S. IPS e.max one system for every indication
 I N F O R M A T I O N F O R D E N T I S T S IPS e.max one system for every indication all ceramic all you all need you IPS e.max one system for every indication Dental patients of today are looking for
CERASMART. The new leader in hybrid ceramic blocks
 The new leader in hybrid ceramic blocks Introducing, a new force absorbing hybrid ceramic block 20 µm Contains high density of ultra fine homogeneously-dispersed fillers in a highly cross-linked resin
Lava Lava Network Open Interface CAD Design: 3M ESPE AG 3M ESPE
 Lava Lava Network Open Interface Instructions for Use CAD Design: Lava Frame Lava DVS Lava Wax 3M ESPE AG Dental Products D-82229 Seefeld - Germany 3M ESPE Dental Products St. Paul, MN 55144-1000 U.S.A.
Nexco. Lifelike appearance. made easy. The light-curing lab composite
 SR Nexco The light-curing lab composite Lifelike appearance made easy There are lab composites for everybody. SR Nexco is for you. Modern lab composites offer outstanding material and processing properties,
Clinical report. Drs Paul and Alexandre MIARA and F. CONNOLLY COMPOSITE POSTERIOR FILLINGS. How to control. layering? 8 - Dentoscope n 124
 COMPOSITE POSTERIOR FILLINGS How to control layering? 8 - Dentoscope n 124 CV FLASH Dr Paul MIARA Dental surgeon Dr Alexandre MIARA Dental surgeon Dr F. CONNOLLY Dental surgeon Thanks to continuous improvements