Blood Glucose Monitoring System OWNER S GUIDE
|
|
|
- Beatrice Patrick
- 6 years ago
- Views:
Transcription


1 Blood Glucose Monitoring System OWNER S GUIDE
2 Key Features of the BGStar No Coding Required - The BGStar doesn t require you to enter a code. Insert a test strip and you are ready to start the test. Pre/Post Meal Tagging - After you test, tag your reading with the mealtime. You can organise your data and see how your test results change before and after meals. Positive Feedback - The BGStar will also display a smiley face icon if your result is within the target range. Customer Care: In case of emergency, contact your healthcare professional or emergency medical response. Manufacturer: AgaMatrix, Inc. 7C Raymond Avenue, Salem, NH USA 2010 sanofi-aventis Meter Firmware 2010 AgaMatrix, Inc. U.S. and International Patents Pending. All rights reserved. All trademarks and/or copyrights are the property of their respective owners. <MAT> MDSS GmbH Schiffgraben Hannover, Germany Distributor: sanofi-aventis UK, One OnslowStreet, Guildford, Surrey, GU1 4YS 1
3 Contents CHAPTER TITLE PAGE CHAPTER TITLE PAGE 1 Getting Started 4 11 Setting the Mealtime Tag 40 2 Important Health-related Information 4 12 Setting Meter Volume Important Information about Your BGStar System About the BGStar System Meter Basics Preparing For a Test With Your BGStar Meter Performing a Control Solution Test How To Test Your Blood Glucose Level Testing on Your Palm or Forearm Data Management Features Viewing Individual Results Viewing 14 Day Statistics Viewing 14, 30, and 90 Day Averages Viewing Pre/Post Mealtime Averages and Glucose Variability Tracking Viewing 1 Month, 2 Week, and 3 Day Trend Graphs Setting the Time Setting the Date Setting Hypoglycaemic Warning Alarms Setting Hyperglycaemic Warning Alarms Setting the Glucose Target Range Setting Alarms Errors and Troubleshooting Display Messages Batteries Caring For Your Meter and Lancing Device Meter Specifications Symbols
4 CHAPTER 1 Getting Started Unpack your BGStar System Kit. Dispose of the packing material properly. IMPORTANT: To ensure accurate use of meter, verify the time, date and units of measure. For step-by-step instructions on changing the time and date settings, please refer to chapters 13 and 14. CHAPTER 2 Important Health-related Information Please Read the Following: [1] Inaccurate results may occur in severely hypotensive individuals or patients in shock. Inaccurate low results may occur for individuals experiencing a hyperglycaemic-hyperosmolar state, with or without ketosis. Critically ill patients should not be tested with blood glucose meters. [2] Severe dehydration and excessive water loss may yield inaccurate results. If you believe you are suffering from severe dehydration, consult your healthcare professional immediately. [3] Patients undergoing oxygen therapy may receive inaccurate results. [4] Results below 3.9 mmol/l may mean low blood glucose levels (hypoglycaemia). [5] Results over 13.3 mmol/l may mean high blood glucose levels (hyperglycaemia). Checking ketones may be advisable. [6] If you get results below 3.9 mmol/l or above 13.3 mmol/l and do not have symptoms of hypoglycaemia or hyperglycaemia, repeat the test. If you have symptoms, or continue to get results below 3.9 mmol/l or above 13.3 mmol/l, contact your healthcare professional immediately. [7] If you are experiencing symptoms that are not consistent with your blood glucose test and you have followed all instructions described in the BGStar Owner s Guide, follow the treatment plan recommended by your healthcare team or contact your healthcare professional immediately. [8] Do not use test strips that are expired or appear to be damaged as they may return inaccurate results. [9] Healthcare professionals should follow their institution s infection control protocols. [10] Always follow your healthcare professional s recommendations. CHAPTER Important Information about 3 Your BGStar System The BGStar System should be used: [1] For measuring blood glucose levels from fresh capillary whole blood samples taken from the fingertip, palms (at the base of the thumb), or forearms. 4 5
5 [2] For in vitro diagnostic (i.e. outside of the body) use only. [3] With BGStar Test Strips and BGStar Control Solution only. Do not use other brands of test strips and control solution with this meter. This may produce inaccurate results. [4] For use at home (over the counter (OTC)) by persons with diabetes, or in a clinical setting by healthcare professionals, as an aid to monitor the effectiveness of diabetes control. Do not use the BGStar System for: [1] The diagnosis of diabetes. Physiological differences in circulation between the fingertip, palm (at the base of the thumb), and forearm may result in differences in blood glucose measurements between these sites. Differences in glucose concentrations may be observed after eating, taking insulin, medication, or exercise. Changes in blood glucose may be detected at the fingertips before the palm (at the base of the thumb) and forearm. [2] Testing the glucose levels of neonates (children under 4 weeks). [3] Testing glucose levels of arterial or venous blood. [4] Testing glucose from sites other than the fingertip, palm (at the base of the thumb), or forearm. Possible test sites: The BGStar System requires only 0.5 μl of blood to perform a glucose test. For best results, test using blood from the tip of any finger. The palm (at the base of the thumb) and forearm are alternate, but less accurate test sites. Only select soft and fleshy areas to lance. Avoid lancing any bony areas, obvious veins and moles. It is recommended that you use a fingertip sample if: [1] You are testing for hypoglycaemia or if you suffer from hypoglycaemia unawareness, [2] You are testing your blood glucose within 2 hours of eating, taking insulin or medication, exercising, or [3] Your blood glucose results obtained from the palm (at the base of the thumb) or forearm are not consistent with the way you feel. CAUTION: Please read all the instructions provided in this Owner s Guide and practice the testing procedures before using the BGStar Blood Glucose Monitoring System. Blood glucose monitoring should be done under the guidance of your healthcare professional. 6 7
6 CHAPTER 4 About the BGStar System CAUTION: Dispose used test strips properly. IMPORTANT: Use BGStar Test Strips only once. Your BGStar System includes: BGStar Blood Glucose Meter Two Pre-installed CR2032, 3 Volt, Lithium Batteries Lancing Device with Cap Clear AST Lancing Device Cap 10 Sterile Lancets About the BGStar Test Strip Compact Carrying Case 1 Vial of 25 Test Strips Control Solution Owner s Guide Reference Guide Warranty Card IMPORTANT: Only use BGStar Test Strips with the BGStar or ibgstar System. Important Test Strip Information: [1] Store the BGStar Test Strip vial in a cool, dry place at 8 C to 30 C (46 F to 86 F). [2] Use BGStar Test Strips only within the system operating temperature range of 10 C to 40 C (50 F to 104 F). With your BGStar System, you can test your blood glucose on your fingertips, palms (at the base of the thumb) or forearms. Testing with the BGStar System requires a small sample size, 0.5 μl of blood, about the size of a pinhead. (1) Front of the Test Strip: The front of the test strip is black in colour. Ensure that the 3 front (black-coloured) side of the test strip is facing up when inserting a test strip into the meter s test strip port. 1 (2) Back of the Test Strip: The back of the test strip is white in colour. Ensure that the back 5 (white-coloured) side of the test strip is facing down when inserting a test strip into the meter s test strip port. (3) Contact Bars: This end is inserted, front of the test strip facing up, into the meter s test strip port. 4 (4) Sample Area: Blood or control solution should be applied to the tip of the test strip here. (5) Visual Fill Window: The window will turn red when enough blood has been applied or blue when enough control solution has been applied. 2 [3] Keep away from direct sunlight and heat. [4] Store your BGStar Test Strips in their original vial only; never store them in another vial, any other container, or outside the vial. [5] After removing a BGStar Test Strip from the vial, immediately close the vial cap tightly. [6] With clean, dry hands you may gently handle the BGStar Test Strip when removing it from the vial or inserting it into the meter. [7] Do not use BGStar Test Strips beyond the expiration date or 90 days after first opening the vial. This may cause inaccurate results. Write the discard date (90 days from the first opening) on the test strip vial. [8] Do not bend, cut or alter BGStar Test Strips. 8 9
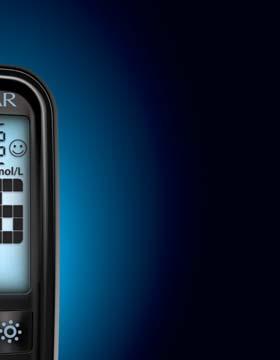
![[9] Apply only fresh capillary blood or control solution to the sample area of the BGStar Test Strip.](/docs-images/72/67204177/images/7-0.jpg "About the BGStar Meter (1) Display: Glucose test results, symbols, messages, and graphs appear here.")
 DOWN Arrow ( ) Button: Use the DOWN arrow button to scroll forward through options. (5) BACKLIGHT ( ) Button: Use the BACKLIGHT button to turn the backlight ON and OFF.")
 Date and Time: Appears here, including when the meter is deactivated.")
 Temperature Symbol: Appears when the meter is outside its operating temperature range of 10 C to 40 C. (6) Ketone Symbol: Appears when your glucose test results are higher than 13.")
7 [9] Apply only fresh capillary blood or control solution to the sample area of the BGStar Test Strip. About the BGStar Meter (1) Display: Glucose test results, symbols, messages, and graphs appear here. (2) CHECK ( ) Button: Use the CHECK button to confirm an option or make a selection in a menu. (3) UP Arrow ( ) Button: Use the UP arrow button to scroll backward through options. (4) DOWN Arrow ( ) Button: Use the DOWN arrow button to scroll forward through options. (5) BACKLIGHT ( ) Button: Use the BACKLIGHT button to turn the backlight ON and OFF. (6) Test Strip Port: Insert the BGStar Test Strip, with the contact bars facing up, into the test strip port About the BGStar Meter Display Symbols/Messages (1) Date and Time: Appears here, including when the meter is deactivated. (2) Glucose Test Results (3) Low Battery Message: Appears when battery #2 in your meter is running low. (4) Dead Battery Message: Appears when battery #2 in your meter is dead. (5) Temperature Symbol: Appears when the meter is outside its operating temperature range of 10 C to 40 C. (6) Ketone Symbol: Appears when your glucose test results are higher than 13.3 mmol/l. (7) Control Solution message: Appears after you have performed a control solution test. (8) Units of Measurement symbol: Results will be displayed in mmol/l. (9) Apply Sample to Test Strip message: The flashing droplet symbol and the word fill will signal you to apply a sample to the test strip
8 (10) Volume Message: Can be set to ON or OFF. (11) 1 Month, 2 Week, 3 Day Indicators: The appropriate number of days will appear when viewing graphical averages. About the BGStar Lancing System (1) Cocking Handle: Cocks the device so it is ready to lance. 1 (12) 1,2,3 Countdown: The 1, 2 and 3 symbols will appear during a glucose test. (13) Graphing Area: Areas of the dot matrix will appear during a test and when displaying graphs. (14) Happy Face Symbol: The happy face is displayed with glucose test results that fall within specific pre and post meal target ranges. (15) Mealtime Tags: The mealtime tags appear after a test is complete and will help categorise your results. (16) /D, SD, and AVG Symbols: These symbols appear in the meter s data management functions. (2) Depth Adjustment Dial: Adjusts how deep the lancet will lance the skin. (3) Depth Indicator Window: Displays the depth setting of the lancing device. (4) Release Button: Fires the lancet. (5) Lancet: Lances the skin to produce a drop of blood. (6) Lancet Cover: Covers the lancet for safety. (7) Lancing Device Cap: Covers the lancet when in lancing device. (8) Alternate Site Testing Cap: An AST clear lancing device cap used for obtaining a blood sample on the palm (at the base of the thumb) or forearm (9) Lancet Holder Cup: Holds the lancet into place inside the lancing device
9 CHAPTER 5 Meter Basics METER SYSTEM CHECK Each time your meter is activated, the meter will perform a meter system check. All display segments and the backlight will briefly flash ON. IMPORTANT: If all the display segments DO NOT flash ON (each time your meter is activated), do not use the meter. Call Customer Care immediately. HOW TO ACTIVATE THE METER AND ENTER MENU MODE [1] When your meter is deactivated, press the CHECK ( ) button to enter the menu mode. [2] Press the DOWN ( ) or UP ( ) arrow buttons to view the options: MEM, STATS, AVG, MEAL, GRAPH, TIME, DATE, TAG, RANGE, BEEP, HYPO, HYPER, and ALARM. To view/alter any of these options or settings press the CHECK ( ) button. HOW TO ACTIVATE THE METER AND VIEW INDIVIDUAL RESULTS [1] When your meter is deactivated, press the CHECK ( ) button to enter menu mode. The word MEM is displayed. Press the CHECK ( test result. ) button again to see your most recent [2] Press the DOWN ( ) or UP ( ) arrow buttons repeatedly to scroll through every test result, starting from the most recent and ending with the oldest. HOW TO ACTIVATE THE METER AND VIEW MEALTIME AVERAGES [1] When your meter is deactivated, press the CHECK ( ) button once to enter Menu mode. The word MEM is displayed. Press the DOWN ( ) or UP ( ) arrow buttons until the word MEAL appears in the lower part of the display. Press the CHECK ( ) button again to see your most recent test result. [2] Press the DOWN ( ) or UP ( ) arrow buttons repeatedly to scroll through your Breakfast, Lunch, Dinner, and Bedtime Averages. HOW TO DEACTIVATE THE METER To deactivate the meter, press and hold the CHECK ( ) for 2 seconds. If the meter is inactive for 3 minutes, the meter will be deactivated automatically. HOW TO ACCELERATE THROUGH OPTIONS Hold down the DOWN ( ) or UP ( ) arrow buttons to accelerate through options or results
10 CHAPTER 6 Preparing For a Test With Your BGStar Meter [1] Insert a BGStar Test Strip: Insert a new BGStar Test Strip into the meter. Make sure you insert the test strip, with the contact bars facing up, into the test strip port. The meter will be activated automatically. Note: If you do not start the test within 5 minutes, the meter will be deactivated. To reactivate your meter, press the CHECK ( ) button or remove the unused BGStar Test Strip and reinsert it into the meter. [2] Meter Ready for Test: The meter now displays the blood drop symbol and the word Fill. The BGStar System is now ready for you to apply control solution or blood. CHAPTER 7 Performing a Control Solution Test The control solution is used to: [1] Ensure that your BGStar Meter and Test Strips are working together properly. [2] Practice testing without having to use your own blood. Control solution tests should be performed when you: [1] First get your meter. [2] Suspect that your meter or test strips are not working properly. [3] Think your test results are not accurate. [4] Have dropped or damaged your meter or exposed your meter to liquids. [5] Are advised by your healthcare professional to do so. Control solution should only be used for 90 days after first opening the bottle or until the expiration date printed on the label, whichever comes first. IMPORTANT: Count forward 90 days from the date you open a new bottle of BGStar Control Solution. This is your discard date. Write the discard date on the BGStar Control Solution bottle
![Important BGStar Control Solution information: [1] Use only BGStar Control Solution with your BGStar System. [2] Always replace the cap on the control solution bottle immediately after use.](/docs-images/72/67204177/images/11-0.jpg "[3] Do not add water or any other liquid to control solution. [4] Control solution tests should be performed within the system operating temperature range of 10 C to 40 C (50 F to 104 F).")

![How to perform a control solution test: [1] Inserting a BGStar Test Strip: Insert a new BGStar Test Strip into the meter. The meter will be activated when the test strip is fully inserted.](/docs-images/72/67204177/images/11-2.jpg "The entire visual fill window will turn blue. [2] Meter Ready for Test: The meter now displays the droplet symbol and the word Fill. The BGStar System is now ready for you to apply control solution.")
11 Important BGStar Control Solution information: [1] Use only BGStar Control Solution with your BGStar System. [2] Always replace the cap on the control solution bottle immediately after use. [3] Do not add water or any other liquid to control solution. [4] Control solution tests should be performed within the system operating temperature range of 10 C to 40 C (50 F to 104 F). onto a clean surface, such as an unused resealable plastic bag. Bring the tip of the test strip to the control solution sample. The BGStar System will automatically detect if a test is performed with BGStar Control Solution. This is the visual fill window. DO NOT PUT CONTROL SOLUTION HERE. Apply control solution here. How to perform a control solution test: [1] Inserting a BGStar Test Strip: Insert a new BGStar Test Strip into the meter. The meter will be activated when the test strip is fully inserted. The entire visual fill window will turn blue. [2] Meter Ready for Test: The meter now displays the droplet symbol and the word Fill. The BGStar System is now ready for you to apply control solution. You do not need to set a calibration code for this meter. [3] Applying Control Solution: Shake the control solution bottle. Discard the first drop of control solution and wipe the bottle tip clean using a clean tissue or paper towel. Dispense a second drop When control solution is applied, the visual fill window on the BGStar Test Strip turns blue. Your meter will beep once indicating that you should remove the tip of the BGStar Test Strip from the control solution sample. On the meter display, the droplet symbol fills. The scrolling bar and indicates that the meter is calculating your results. Droplet Symbol: 18 19
12 [4] Viewing Control Solution Test Result: The result will appear on the display and, if the volume is enabled, your meter will beep. The date and the abbreviation Ctrl will also appear on the display. Compare the result of your control solution test to the range printed on the BGStar Test Strip vial label for the control solution level that you used. Your control solution result should fall within this range. The control solution test result is stored in memory. [4] Watered-down control solution. [5] Meter malfunction. [6] Control solution test done outside the system operating temperature of 10 C to 40 C (50 F to 104 F). [7] Failure to shake the control solution bottle vigorously before using. [8] Failure to discard the first drop of control solution and to wipe the bottle tip clean. To deactivate the meter, remove the used BGStar Test Strip. Dispose of used materials properly. If your control solution test results are out of the range, repeat the test. If the results from the control solution tests continue to fall outside that range, do not use the BGStar System to test your blood glucose. Call Customer Care. Normal: mmol/l FOR EXAMPLE ONLY. Refer to your test strip vial label for corresponding range. CAUTION: Results from control solution tests do not reflect your blood glucose level. The control solution range is a target range for control solution only. It is not a target range for your blood glucose level. IMPORTANT: Out-of-range test results may be due to one or more of the following factors: [1] Expired or defective control solution. [2] Expired or defective test strip. [3] Error in performing test
13 CHAPTER 8 How to Test Your Blood Glucose Level CAUTION: To ensure accurate results, wash your hands with warm, soapy water and dry before every test. Make sure there is no grease, oil or lotion on the test site. Use lancets only once. Do not use any lancet or lancing device that has been used by another person. Unwashed hands may lead to inaccurate results. How to test your blood glucose level: [1] Preparing the BGStar Lancing Device: Use the gray cap for testing on a fingertip and the clear cap for testing on the palm (at the base of the thumb) or forearm. Remove Lancing Device Cap: Snap off the cap from the lancing device. Replace Lancing Device Cap: Replace the lancing device cap until it snaps into place. Be careful not to touch the exposed needle on the lancet. Set the Lancing Level: The BGStar Lancing Device offers 8 depth settings. Rotate the dial to the desired setting as shown in the depth indicator window. Level 1 is the most shallow; level 8 is the deepest. If you have never lanced before, it is recommended that you start at level 3. If necessary, set the depth level to a deeper setting to produce enough blood to fill the test strip (0.5 μl). Cock the Handle: Pull the cocking handle out until it clicks. You may have already cocked the handle accidentally while inserting the lancet; this is OK. The lancing device is now ready for use. Insert New Lancet: Insert a new BGStar Lancet firmly into the lancet holder cup. Pushing the lancet into the lancet holder cup may cock the device; this is OK. Twist the Lancet Cover Off: Hold the lancet firmly in place with one hand and use your other hand to twist off the lancet cover. Do not discard the lancet cover. It should be used when discarding your used lancet. [2] Insert a BGStar Test Strip: Insert a new BGStar Test Strip into the test strip port of the meter. Make sure you insert the test strip, with the contact bars facing up, into the test strip port. The meter will be activated when the test strip is fully inserted. Note: If you do not start the test within 5 minutes, the meter will be deactivated. To reactivate your meter, take out the unused BGStar Test Strip and reinsert it into the meter


![Press the release button. Release Button [4] Applying Blood Sample Bring Test Strip to Blood Sample: The meter now displays the droplet symbol and the word Fill.](/docs-images/72/67204177/images/14-2.jpg "This means your BGStar System is now ready for you to apply blood. Immediately bring the BGStar Test Strip to the blood sample. The test strip fills from the tip.")


14 Meter Ready for Test: The meter now displays the droplet symbol and the word Fill. The BGStar System is now ready for you to apply blood. You do not need to set a calibration code for this meter. [3] Lancing: To ensure accurate results, wash hands with warm, soapy water and dry before every glucose test. For details on possible test sites, refer to chapter 3. For instructions on how to test on your palm or forearm, please refer to chapter 9. Note: Keep your hand warm or gently massage the site you are lancing to stimulate blood flow. Lance Test Site: Press the lancing device against the site to be lanced. Press the release button. Release Button [4] Applying Blood Sample Bring Test Strip to Blood Sample: The meter now displays the droplet symbol and the word Fill. This means your BGStar System is now ready for you to apply blood. Immediately bring the BGStar Test Strip to the blood sample. The test strip fills from the tip. Do not apply blood on the top surface of the test strip. The BGStar Test Strip acts like a sponge and draws the blood into the test strip through the sample area. The visual fill window of the BGStar Test Strip will turn red. Obtain Blood Drop: When testing on a finger tip, wipe away the first blood drop that appears using a clean tissue or paper towel. Squeeze from the base of your finger up towards the tip, until a second small blood drop forms. Do not squeeze directly around the lanced area. If necessary, set the lancing device to a deeper setting or use a larger lancet to produce enough blood. WARNING: If the visual fill window does not completely fill, you may get an inaccurate result. Retest and ensure that the visual fill window is completely full. The entire visual fill window will turn red. This is the visual fill window. DO NOT PUT BLOOD HERE. Apply blood here
![IMPORTANT: [1] Remove the test strip from the blood sample as soon as you hear the beep. [2] Do not press the BGStar Test Strip against the test site.](/docs-images/72/67204177/images/15-0.jpg "[3] Do not scrape blood onto the BGStar Test Strip. [4] Do not apply blood to the top side of the BGStar Test Strip.")

![[6] Do not put blood or foreign objects into the BGStar strip port. Doing so may lead to system failure. [7] Do not apply more blood after beep.](/docs-images/72/67204177/images/15-3.jpg "[8] Carefully read the test results on the display before making any treatment decisions.")
15 IMPORTANT: [1] Remove the test strip from the blood sample as soon as you hear the beep. [2] Do not press the BGStar Test Strip against the test site. [3] Do not scrape blood onto the BGStar Test Strip. [4] Do not apply blood to the top side of the BGStar Test Strip. Your test is completed when your blood glucose test result with time and date is shown on the display. If the volume is ON, you will hear a beep. Your test result is now stored in the memory. [5] Test Result Mealtime Tagging and Feedback [5] Do not apply blood to the BGStar Test Strip when the test strip is out of the meter. [6] Do not put blood or foreign objects into the BGStar strip port. Doing so may lead to system failure. [7] Do not apply more blood after beep. [8] Carefully read the test results on the display before making any treatment decisions. Remove Test Strip from Blood Sample when you hear the beep: Your meter will beep once, when you should remove the tip of the BGStar Test Strip from the blood sample. On the meter display, the droplet symbol fills. The scrolling bar and indicates that the meter is calculating your results. Droplet Symbol: If the Mealtime Tag Feature is Enabled: The BGStar Meter allows you to add a tag to your test result. Tagging results allows you to view averages before and after meals to see what effect food has on your blood glucose levels. After your result appears, a tag will flash on the display suggesting a mealtime tag (Breakfast, Post Breakfast, Lunch, Post Lunch, Dinner, Post Dinner, and Night). For example, if you test at 12:30, the meter will flash the word POST LUNCH. If the tag is incorrect, you can change it by pressing the DOWN ( ) or UP ( ) arrow buttons. Pressing the UP ( ) arrow button would change the tag to Lunch, pressing the DOWN ( ) arrow button would change the tag to Dinner. Pressing the CHECK ( ) button confirms the mealtime tag and it stops flashing. Your test result s mealtime tag is now stored in the memory. Example of Mealtime Tag: POST LUNCH 26 27
16 You can still change this setting by pressing the DOWN ( ) or UP ( ) arrow buttons, if you haven t removed the test strip from the meter yet. If you don t want to tag a reading, scroll through the options by pressing the DOWN ( ) or UP ( ) arrow buttons. One of the options will leave the tag field blank. If you do not want to tag meals, this feature can be turned OFF in the menu mode. Tagging Values: The BGStar Meter suggests mealtime tagging values according to this chart: Example of Mealtime Tag: POST BREAKFAST Feedback: Depending on the mealtime tag and your test result, the meter will display positive feedback in the form of a happy face. The happy face symbol is displayed with glucose test results that fall within specific pre and post meal target ranges. Example of Mealtime Tag: NO TAG (BLANK) Breakfast: 5:00-7:59 Post Breakfast: 8:00-9:59 Lunch: 10:00-11:59 Post Lunch: 12:00-14:59 Dinner: 15:00-17:59 Post Dinner: 18:00-20:59 Night: 21:00-4:59 IMPORTANT: If you do not remove the used test strip after 3 minutes of testing, the meter will deactivate. To activate your meter with a used test strip still in the meter, press the CHECK ( ) button once. Do not attempt to apply blood or control solution to an already used test strip. Remove the Lancet: When you have finished testing, snap off the cap from the lancing device. While the lancet is still in the lancing device, replace the lancet cover onto the lancet. You can then safely handle the used lancet. Extract the lancet from the lancet holder cup by pulling on the plastic collar of the lancet (near the middle of the lancet). Replace the lancing device cap onto the lancing device until it snaps or clicks into place. Discard Properly: Discard the used BGStar Test Strip and Lancet properly. [6] Final Steps Remove the Test Strip: Remove the used BGStar Test Strip. The BGStar Meter will automatically deactivate. WARNING: The lancing device and lancets should only be used by one person. Never share lancing devices or lancets. Used test strips, lancets, and lancing devices may be considered biohazardous or medical waste in your city or town. Follow all local regulations for proper disposal
17 CHAPTER 9 Testing on Your Palm or Forearm Testing glucose levels with blood obtained from the palm (at the base of the thumb) or forearm may reduce the pain of testing. The technique for testing on the palm and forearm is slightly different than testing on the finger. Always discuss changes to your testing habits with your healthcare professional. IMPORTANT: When testing on the palm (at the base of the thumb) or forearm, you may need to set the lancing device to a deeper setting or use a larger lancet to obtain enough whole blood to perform a test. Consult your healthcare professional for a recommendation. will be testing. Ensure that your palm or forearm is facing up and held level. [3] Lance Test Site: Press the tip of the clear cap against your skin on the palm of your hand (at the base of the thumb) or forearm. Hold the tip to the test site for a few seconds before pressing the release button. Palm: Forearm: Release Button CAUTION: To ensure accurate results, wash your hands with warm, soapy water and dry before every test. Clean and make sure there is no grease, oil or lotion on the test site. Follow Chapter 8, steps 1-2, to begin blood glucose testing. For testing on your palm or forearm: [1] Prepare Lancing Device: Always use the AST clear lancing device cap on the lancing device. [2] Rub Test Site: To increase the blood flow in your palm (at the base of the thumb) or forearm, rub the area that you Palm: Forearm: [4] Obtain Blood Drop: After lancing, hold the lancing device against your skin until a blood droplet forms. Make sure the blood drop is large enough to completely fill the visual fill window of the test strip. Pull the lancing device directly off your palm or forearm to ensure that you do not smear the blood drop. Palm: Palm: Forearm: Forearm: Return to Chapter 8, step 4 to continue with testing instructions
18 CHAPTER 10 Data Management Features IMPORTANT: Results, averages and graphs stored in memory should only be used as a reference. Do not make treatment decisions based solely on stored results, averages and graphs. Consult with your healthcare professional regarding treatment options. This chapter covers the steps on how to view your: Individual Results (1865 past results, with time and date) 14 Day Statistics 14, 30, and 90 Day Averages Pre/Post Mealtime Averages and Glucose Variability Tracking 1 Month, 2 Week, 3 Day Trend Graphs How to access all data management features: All past test results are accessed the same way. The following instructions will explain how to get to the different types of data. [1] When your meter is deactivated, press the CHECK ( ) button to enter menu mode. The word MEM is displayed. [2] Press the DOWN ( ) arrow button to scroll forward and press the UP ( ) arrow button to move backward through the categories of data. About averages and standard deviations: Control solution, out-of-temperature-range results, and results without a valid time or date are not included in averages, standard deviations and trend graphs. Hi and Lo test results will be included in averages as values of 33.3 mmol/l and 1.1 mmol/l respectively. 14, 30, and 90 day averages and trend graphs are calculated by taking the average of all readings within the respective time period. Standard deviations, averages and trend graphs do not include the current day in their calculations. The standard deviation is an expression of the variation of readings from the average reading. The greater this value the more variation exists between individual readings and the average. The standard deviation feature is a way to track your glucose variability Viewing Individual Results [1] When your meter is deactivated, press the CHECK ( ) button once to enter menu mode. The word MEM is displayed. [2] Press the CHECK ( ) button again to enter the individual results section. [3] Press the DOWN ( ) arrow button to scroll through the individual readings. Press the UP ( ) arrow button to scroll backwards. [3] Press the CHECK ( ) button to enter into a category and view features. Note: When scrolling through, the oldest test result will cycle back to the most recent test result. To return to the menu, press the CHECK ( ) button
19 10.2 Viewing 14 Day Statistics The stats feature allows you to compare your average test result, the standard deviation between test results, and the average number of tests per day over the last 14 day period. [1] When your meter is deactivated, press the CHECK ( ) button once to enter menu mode. The word MEM is displayed. [2] Press the DOWN ( ) or UP ( ) arrow buttons until the word STATS appears on the display. [3] Press the CHECK ( ) button again to enter the statistics section. Note: To return to the menu, press the CHECK ( ) button Average number of tests per day Standard Deviation Average Test Result Viewing 14, 30, and 90 Day Averages [1] When your meter is deactivated, press the CHECK ( ) button once to enter menu mode. The word MEM is displayed. [2] Press the DOWN ( ) arrow button until the word AVG appears in the lower part of the display. [4] Press the DOWN ( ) arrow button. The display now shows your 30 day average and average number of tests per day. [5] Press the DOWN ( ) arrow button. The display now shows your 90 day average and average number of tests per day. Note: Press the UP ( ) arrow button to scroll backwards. When scrolling, you will cycle through the 14, 30 and 90 Day Averages. To return to the menu, press the CHECK ( ) button Average Number of Tests Per Day 14 Day Average Test Result Average Number of Tests Per Day 30 Day Average Test Result Average Number of Tests Per Day 90 Day Average Test Result Viewing Pre/Post Mealtime Averages & Glucose Variability Tracking The BGStar Meter categorises readings as happening before or after meals. These averages allow you to see how your blood glucose levels vary by time of day. The pre/post mealtime averages and standard deviations only include the first instance of a particular mealtime tag (breakfast, post breakfast, lunch, post lunch, etc.) per day over the last 14 day period. The second and subsequent tests marked with the same time tag (on the same day) are not included. The standard deviation feature is a way to track your glucose variability. [3] Press the CHECK ( ) button again to enter the 14, 30, and 90 day averages section. The display now shows your 14 day average and average number of tests per day. Note: Standard deviation is always displayed with a decimal point. Example of a standard deviation of
20 [1] When your meter is deactivated, press the CHECK ( ) button once to enter menu mode. The word MEM is displayed. [2] Press the DOWN ( ) or UP ( ) arrow buttons until the word MEAL appears in the lower part of the display. [3] Press the CHECK ( ) button again to enter the mealtime averages section. The display now shows your breakfast average. Test Result [4] Press the DOWN ( ) arrow button. The display now shows your post breakfast average. [5] Press the DOWN ( ) arrow button. The display now shows your lunch average. Number of results tagged Standard Deviation Average Note: Press the UP ( ) arrow button to scroll backwards. When scrolling, you will cycle through the Pre/Post Mealtime Averages. To return to the menu, press the CHECK ( ) button Viewing 1 Month, 2 Week, and 3 Day Trend Graphs [1] When your meter is deactivated, press the CHECK ( ) button once to enter menu mode. The word MEM is displayed. [2] Press the DOWN ( ) or UP ( ) arrow buttons until the abbreviation GRAPH appears in the lower part of the display. [3] Press the CHECK ( ) button again to enter the graph section. The display now shows your 1 month graph. [6] Press the DOWN ( ) arrow button. The display now shows your post lunch average. [7] Press the DOWN ( ) arrow button. The display now shows your dinner average. [8] Press the DOWN ( ) arrow button. The display now shows your post dinner average. [9] Press the DOWN ( ) arrow button. The display now shows your bedtime average. [4] Press the DOWN ( ) arrow button. The display now shows your 2 week trend graph. [5] Press the DOWN ( ) arrow button. The display now shows your 3 day trend graph. Note: Press the UP ( ) arrow button to scroll backwards. When scrolling, you will cycle through the Trend Graphs. To return to the menu, press the CHECK ( ) button
21 1 Month Trend Graph: 3 Day Trend Graph: mmol/l mmol/l Days Each bar represents a test result average from 3 days. Each vertical unit represents about 2.8 mmol/l. The most recent result is on the right side of the screen. Days Each bar represents a test result average from 1 day. Each vertical unit represents about 2.8 mmol/l. The most recent result is on the right side of the screen. 2 Week Trend Graph: mmol/l Days Each bar represents a test result average from 1 day. Each vertical unit represents about 2.8 mmol/l. The most recent result is on the right side of the screen. IMPORTANT: Averages above 16.7 mmol/l will not be represented in the trend graphs. mmol/l Any bars represented at 16.7 mmol/l may represent a value higher than 16.7 mmol/l
22 CHAPTER The BGStar Meter allows you to turn ON or OFF the feature that tags results as having occurred before or after a meal. [1] When your meter is deactivated, press the CHECK ( ) button once to enter menu mode. The word MEM is displayed. [2] Press the DOWN ( ) or UP ( ) arrow buttons until the word TAG is displayed. [3] Press the CHECK ( ) button to enter and edit the tag setting. [4] Turn the tagging feature ON or OFF with the DOWN ( ) or UP ( ) arrow buttons. Your selection will be highlighted by the blinking of the symbol. Press the CHECK ( ) button to confirm your selection and return to the menu. CHAPTER Setting the Mealtime Tag Setting Meter Volume [1] When your meter is deactivated, press the CHECK ( ) button once to enter menu mode. The word MEM is displayed. [3] Press the CHECK ( ) button to enter and edit the alarm volume setting. [4] Turn the volume ON or OFF with the DOWN ( ) or UP ( ) arrow buttons. Your selection will be highlighted by the blinking of the symbol. Press the CHECK ( ) button to confirm your selection and return to the menu. Note: The meter will always produce a beeping sound after you have applied blood or control solution to a test strip. This sound lets you know when to take your blood sample or control solution away from the test strip. You will hear this sound if the volume is set to ON or OFF. CHAPTER 13 Setting the Time IMPORTANT: Check the Time and Date settings before testing. In order to properly use the meter it is important to ensure that the time and date are set correctly. [1] When your meter is deactivated, press the CHECK ( ) button once to enter menu mode. The word MEM is displayed. [2] Press the DOWN ( ) or UP ( ) arrow buttons until the word TIME is displayed. Press the CHECK ( ) button to enter and edit the time settings. [2] Press the DOWN ( ) or UP ( ) arrow buttons until the word BEEP is displayed. [3] You should see a display with the message blinking 12hr or 24hr, this means you are ready to set the meter s time
23 Select the 12 or 24 hour clock format with the DOWN ( ) or UP ( ) arrow buttons. The 12 hour clock display option is indicated by a 12hr. The 24 hour clock display option is indicated by a 24hr. Your selection will be highlighted by the blinking of the symbol. Press the CHECK ( ) button to confirm your selection and continue on to the hour setting. [4] Set the hour (flashing) with the DOWN ( ) or UP ( ) arrow buttons. Press the CHECK ( ) button to confirm your selection and continue on to the minute setting. [5] Set the minute (flashing) with the DOWN ( ) or UP ( ) arrow buttons. Press the CHECK ( ) button to confirm and return to the menu. CHAPTER 14 Setting the Date [1] When your meter is deactivated, press the CHECK ( ) button once to enter menu mode. The word MEM is displayed. [3] You should see a display with the message blinking M-d or d-m, this means you are ready to set the meter s date. Select the M-d (Month-Day) or d-m (Day-Month) date format with the DOWN ( ) or UP ( ) arrow buttons. Your selection will be highlighted by the blinking of the symbol. Press the CHECK ( ) button to confirm your selection and continue on to the year setting. [4] Set the year (flashing) with the DOWN ( ) or UP ( ) arrow buttons. Your selection will be highlighted by the blinking of the symbol. Press the CHECK ( ) button to confirm your selection and continue on to the month setting. [5] Set the month (flashing) with the DOWN ( ) or UP ( ) arrow buttons. Press the CHECK ( ) button to confirm your selection and continue on to the day setting. [6] Set the day (flashing) with the DOWN ( ) or UP ( ) arrow buttons. Press the CHECK ( ) button to confirm your selection and return to the menu. [2] Press the DOWN ( ) or UP ( ) arrow buttons until the word DATE is displayed. Press the CHECK ( ) button to enter and edit the date settings
24 CHAPTER Setting 15 Hypoglycaemic Warning Alarms The Hypoglycaemic Warning Alarm alerts you when your glucose test results are below the hypoglycaemic threshold you have set. The meter is pre-set to a hypoglycaemic threshold of 3.9 mmol/l. Always consult your healthcare professional for your recommended target ranges. When your glucose test results are below your set hypoglycaemic threshold, the meter display will flash your test results, the abbreviation HYPO, time, and date repeatedly. WARNING: Your healthcare professional should recommend what your hypoglycaemic limit is. [1] When your meter is deactivated, press the CHECK ( ) button once to enter menu mode. The word MEM is displayed. [2] Press the DOWN ( ) or UP ( ) arrow buttons until the abbreviation HYPO is displayed. [3] Press the CHECK ( ) button to enter and edit the Hypoglycaemic Warning Alarm settings. [4] Set the Hypoglycaemic Alarm ON or OFF with the DOWN ( ) or UP ( ) arrow buttons. Your selection will be highlighted by the blinking of the symbol. Press the CHECK ( ) button to confirm your selection and move on to the hypoglycaemic threshold setting. [5] Set the hypoglycaemic threshold (flashing) with the DOWN ( ) or UP ( ) arrow buttons. Press the CHECK ( ) button to confirm your selection and return to the menu. CHAPTER Setting 16 Hyperglycaemic Warning Alarms The Hyperglycaemic Warning Alarm alerts you when your glucose test results are above the hyperglycaemic threshold you have set. The meter is pre-set to a hyperglycaemic threshold of 13.3 mmol/l. Always consult your healthcare professional for your recommended target ranges. When your glucose test results are above your set hyperglycaemic threshold, the meter display will flash your test results, the abbreviation HYPr, time, and date repeatedly. WARNING: Your healthcare professional should recommend what your hyperglycaemic limit is. [1] When your meter is deactivated, press the CHECK ( ) button once to enter menu mode. The word MEM is displayed. [2] Press the DOWN ( ) or UP ( ) arrow buttons until the abbreviation HYPER is displayed. [3] Press the CHECK ( ) button to enter and edit the Hyperglycaemic Warning Alarm settings
25 [4] Set the Hyperglycaemic Alarm ON or OFF with the DOWN ( ) or UP ( ) arrow buttons. Your selection will be highlighted by the blinking of the symbol. Press the CHECK ( ) button to confirm your selection and move on to the hyperglycaemic threshold setting. For example: If you want the pre meal target range to begin at 5.0 mmol/l, then the hypoglycaemic alarm needs to be set at 5.0 mmol/l or less; or if you want the post meal target range to end at 10.0 mmol/l, then the hyperglycaemic alarm needs to be set at 10.0 mmol/l or higher. [5] Set the hyperglycaemic threshold (flashing) with the DOWN ( ) or UP ( ) arrow buttons. Press the CHECK ( ) button to confirm your selection and return to the menu. CHAPTER Setting 17 The Glucose Target Range The BGStar includes a unique positive feedback feature where a happy face symbol is displayed with test results that fall within the glucose target range. By setting a target range for what your glucose levels should be before or after a meal, you customise when this symbol appears. Always consult your healthcare professional for your recommended target ranges. IMPORTANT: First set the hypoglycaemic and hyperglycaemic warning alarms to your recommended thresholds before making changes within the glucose target range menu (refer to chapters for setting these alarms). [1] When your meter is deactivated, press the CHECK ( ) button once to enter menu mode. The word MEM is displayed. [2] Press the DOWN ( ) or UP ( ) arrow buttons until the word RANGE is displayed. [3] Press the CHECK ( ) button to enter and edit the glucose target range settings. [4] Set the lower limit of the pre meal glucose target range (flashing) with the DOWN ( ) or UP ( ) arrow buttons. Press the CHECK ( ) button to confirm your selection and continue on to the upper limit pre meal setting. Note: The glucose target range is limited by the values set for your hypoglycaemic and hyperglycaemic warning alarms. Your meter will not allow you to select a number beyond these alarm settings, even if the warning alarm is turned off. [5] Set the upper limit of the pre meal glucose target range (flashing) with the DOWN ( ) or UP ( ) arrow buttons. Press the CHECK ( ) button to confirm your 46 47
26 selection and continue on to the lower limit post meal setting. will alarm after the meter is deactivated. [6] Set the lower limit of the post meal glucose target range (flashing) with the DOWN ( ) or UP ( ) arrow buttons. Press the CHECK ( ) button to confirm your selection and continue on to the upper limit post meal setting. [7] Set the upper limit of the post meal glucose target range (flashing) with the DOWN ( ) or UP ( ) arrow buttons. Press the CHECK ( ) button to confirm your selection and return to the menu. CHAPTER 18 Setting Alarms There are 7 alarms you can set to remind you when to test your glucose levels. When alarms are activated: [1] If an alarm is set and the BGStar Meter is deactivated, the alarm will activate the meter. AL1 through AL7 (depending which alarm is set) is displayed. The display backlight flashes, and the meter will beep repeatedly for 15 seconds. [2] You can turn the alarm OFF by pressing any button. [3] The alarms will not appear during menu and test modes. If an alarm is set to sound or flash while using these modes, it CAUTION: Follow your healthcare professional s recommendations on when and how often to test your glucose. How to set alarms: [1] Enter MEM Mode: When your meter is deactivated, press the CHECK ( ) button once to enter menu mode. The word MEM is displayed. [2] Enter Alarm Option: Press the DOWN ( ) or UP ( ) arrow buttons until the word ALARM is displayed. Press the CHECK ( ) button to enter and set an alarm. [3] Select An Alarm to Set: Choose the alarm you want to set with the DOWN ( ) or UP ( ) arrow buttons. If this is your first time setting an alarm, use AL1. Press the CHECK ( ) button to confirm your selection and advance to the alarm ON or OFF section. [4] Turning Alarms ON or OFF: Turn the alarm ON or OFF with the DOWN ( ) or UP ( ) arrow buttons. Your selection will be highlighted by the blinking of the symbol. Press the CHECK ( ) button to confirm your selection and move to the set alarm time section. [5] Set Alarm Time: You can now set the alarm time. First, set the hour (flashing numbers) with the DOWN ( ) or UP ( ) arrow buttons
27 Accelerated change is possible by holding down the arrow buttons. Press the CHECK ( ) button to confirm the hour and advance to the minutes. Set the minute (flashing numbers) with the DOWN ( ) or UP ( ) arrow buttons. Press the CHECK ( ) button to confirm the minutes and return to the MENU Mode. Note: The volume of an alarm will be affected by your meter s volume setting, which can be changed in the meter s BEEP option. If your meter has the volume turned OFF, then the alarm will not sound, but the backlight will flash. [6] Setting Multiple Alarms: To set other alarms, press the DOWN ( ) or UP ( ) arrow buttons until the alarm you want to set (AL1 to AL7) is displayed. Follow the previous steps in this section. CHAPTER 19 Errors and Troubleshooting The BGStar Blood Glucose Monitoring System has been designed to work accurately under normal conditions. On rare occasions, the meter will display an error message instead of a glucose result. The BGStar System is able to detect specific problems which may allow you to determine the cause of the error without wasting valuable test strips. When you are presented with an error message, check for common problems within this chapter that may explain the source of the error. CAUTION: In certain cases, the meter may return an error code or provide an inaccurate result if it is being used near electrical equipment, like a power generator or a computer monitor. If this is the case, move the meter away from the source of electrical interference. Error 1: Problems have occurred that are related to test strip use. [1] If this message appears the moment the test strip is inserted, the test strip may be wet or damaged. [2] If the message appears during a test, the test strip may have been removed too early. [3] If this message appears after the last progress bar instead of a result, it may indicate that you applied more blood after testing began. Error 2: The meter has detected an irregularity with the sample. [1] The test strip may be partially filled; you should check the window of the test strip to confirm that it is full. [2] The sample may not be blood or control solution. Error 3: The meter has detected that the test strip is in poor condition. [1] The test strip may have been improperly stored (e.g. hot, humid conditions) or may be expired. [2] The test strip may have been mishandled by vigorous bending or shaking
28 [3] Parts of the test strip may have become covered in grease, oil, or lotion. [4] The strip port connector may be dirty. Error 4: Unusual test strip problems have occurred that may be related to extreme conditions. [1] Retest where it is closer to a room temperature of 21 C to 24 C (70 F to 75 F) Error 5: The meter was unable to produce a reliable result. [1] This may be caused by a non-blood sample, or a combination of high glucose and other medical conditions. [2] If this error code persists on retesting, consult your healthcare professional. Error 7: Meter problems have occurred that are beyond your control. Contact Customer Care for assistance. Temp Icon: Test was performed outside the system operating temperature range of 10 C to 40 C (50 F to 104 F). Move to an area with an ambient temperature of 10 C to 40 C (50 F to 104 F). Wait for the meter and test strips to reach the new temperature (usually minutes) and retest. Battery Icon: Battery #2 has died during test. Replace battery #2 immediately before retesting. Error 6: The test strip has taken too long to generate a signal. [1] This may be caused by a combination of cold operating temperature and high haematocrit levels. Retest in a warmer location. [2] If this error code persists on retesting, consult your healthcare professional. Troubleshooting Situation #1: Meter does not enter the test mode after inserting a BGStar Test Strip. [1] CAUSE: The batteries have insufficient power. ACTION: Replace the batteries, set time and date, and test. [2] CAUSE: The batteries are installed incorrectly or there are no batteries in the meter. ACTION: Check that both batteries are installed correctly, with the positive (+) sign facing up towards you. [3] CAUSE: BGStar Test Strip has been inserted upside down, wrong end in, or incompletely inserted into the meter
Blood Glucose Monitoring System OWNER S GUIDE. For use with the ibgstar Diabetes Manager. Application on iphone or ipod touch
 Blood Glucose Monitoring System OWNER S GUIDE For use with the ibgstar Diabetes Manager Application on iphone or ipod touch Key Features ibgstar Diabetes Manager Application - an iphone and ipod touch
Glucose Meter. User Guide. Veterinary Monitoring System. For dog and cat use only
 Glucose Meter User Guide Veterinary Monitoring System For dog and cat use only Gpet instruction Manual 31/5/09 18:06 Page 2 Gpet instruction Manual 31/5/09 18:06 Page 3 TABLE OF CONTENTS Your g-pet system
Blood Glucose Monitoring System. Owner s Booklet
 Blood Glucose Monitoring System Owner s Booklet The FreeStyle Freedom Lite Meter and How It Works System Check Screen This display always appears when the meter is turned on. You should check that your
Blood Glucose Monitoring System. User Guide
 Blood Glucose Monitoring System User Guide Table of Contents Introduction...2 Important Safety Instructions...2 About ipet PRO Blood Glucose Monitoring System...3 About ipet PRO Meter...4 About the ipet
Logic. Owner s Guide. Blood Glucose Monitor
 Owner s Guide Logic Blood Glucose Monitor TM You will notice these symbols on your vials of test strips and control solution as well as the label on the back of your BD Logic TM Blood Glucose Monitor.
Blood Glucose & Ketone Monitoring System
 Blood Glucose & Ketone Monitoring System Self monitoring of blood glucose is an integral part of diabetes care, but the high cost of testing can make this impossible. At ACON, our goal is to provide high
ISO IVD 13485: : :2015
 ISO ISO 15197:2013 9001:2015 ISO 13485:2016 IVD Table of Contents Important Information About Your Gluco Spark Monitoring System... 1 Important Health-Related Information... 1 Alternate Test Site... 2
Blood Glucose Monitoring System. Link the Effects of Food to Glucose Results. Owner s Booklet
 Blood Glucose Monitoring System Link the Effects of Food to Glucose Results Owner s Booklet Welcome to the OneTouch family! We know diabetes can be difficult to understand and manage. The right products
System Requirements (One Drop Meter and One Drop App)
") Welcome to Your One Drop Blood Glucose Monitoring System The One Drop Meter works with the One Drop for Diabetes App for ios, or Android (the One Drop App or App ) installed on a supported device. Data
Welcome to Your One Drop Blood Glucose Monitoring System The One Drop Meter works with the One Drop for Diabetes App for ios, or Android (the One Drop App or App ) installed on a supported device. Data
Blood Glucose Monitoring System 12:24 PM 10/13/12. mg/dl. Before Meal. See Options. Uses only Contour Next blood glucose test strips USER GUIDE
 Blood Glucose Monitoring System 10/13/12 See Options 12:24 PM mg/dl 93 Before Meal Uses only Contour Next blood glucose test strips USER GUIDE INDICATIONS FOR USE The Contour Next blood glucose monitoring
Blood Glucose Monitoring System
 Blood Glucose Monitoring System Self monitoring of blood glucose (SMBG) is an important part of diabetes care, but the high cost of testing can make it difficult. At ACON, our goal is to provide high quality
Dear Wellion LEONARDO GLU/CHOL (plus) Owner,
 Owner,") OWNER S GUIDE Dear Wellion LEONARDO GLU/CHOL (plus) Owner, Thank you for choosing the Wellion LEONARDO GLU/CHOL (plus) Blood Glucose and Cholesterol Monitoring System to help you easily monitor your blood
OWNER S GUIDE Dear Wellion LEONARDO GLU/CHOL (plus) Owner, Thank you for choosing the Wellion LEONARDO GLU/CHOL (plus) Blood Glucose and Cholesterol Monitoring System to help you easily monitor your blood
User Instruction Manual. Read this User Instruction Manual carefully before you start testing.
 User Instruction Manual Read this User Instruction Manual carefully before you start testing. TABLE OF CONTENTS Introduction........................................... 4 Intended Use..........................................
Blood Glucose Monitoring System USER GUIDE. AW A Rev. date: 01/2017 AW A
 Blood Glucose Monitoring System USER GUIDE AW 06629404A Rev. date: 01/2017 AW 06629404A Contents: Getting to know your system 1 Setting the time and date, and coding your meter 4 Testing your blood glucose
Blood Glucose Monitoring System. mmol/l 5.2. Before Meal. See Options. Uses only CONTOUR NEXT blood glucose test strips from Bayer USER GUIDE
 Blood Glucose Monitoring System 13.10.12 12:24 mmol/l 5.2 See Options Before Meal Uses only CONTOUR NEXT blood glucose test strips from Bayer USER GUIDE INTENDED USE The CONTOUR NEXT blood glucose monitoring
Blood Glucose Monitoring System
 Blood Glucose Monitoring System Self monitoring of blood glucose (SMBG) is an important part of diabetes care. But the high cost of testing can make this impossible. At ACON, our goal is to provide high
Blood Glucose Monitoring System USER GUIDE. AW A Rev. date: 04/2010. Downloaded from manuals search engine
 Blood Glucose Monitoring System USER GUIDE AW 06629202A Rev. date: 04/2010 Contents: Getting to know your system 1 Setting the time and date, and coding your meter 4 Testing your blood glucose 8 Reviewing
Control D. User Manual. Blood Glucose Monitor. Subscribe on MYCONTROL.life HAIDEN
 Blood Glucose Monitor User Manual Log using MYCONTROL Mobile App Subscribe on MYCONTROL.life Table of Contents Important Information About Your CONTROL D Glucose Monitoring System... 1 Important Health-Related
GlucCell TM SYSTEM USER S GUIDE Ver 2.1 CELL CULTURE GLUCOSE METER. Important Information. Intended Use. Caution. About the System
 GlucCell TM SYSTEM USER S GUIDE Ver 2.1 Intended Use The GlucCell TM Glucose Monitoring System (The GlucCell TM System) is designed to quantitatively measure the concentration of glucose during cell culture.
Blood Glucose Monitoring System USER GUIDE
 Blood Glucose Monitoring System USER GUIDE AW 06629402C Rev. date: 07/2012 Contents: Getting to know your system 1 Setting the time and date, and coding your meter 4 Testing your blood glucose 8 Reviewing
Chapter 1 Introduction
 MASTER 2.2 What You Need for Each Test Operating manual Thank you for choosing the GLUCOCARD TM MX. We have designed this compact blood glucose meter for faster and easier testing of your blood glucose.
User s Manual Blood Glucose Meter
 User s Manual Blood Glucose Meter Contents Introduction...3 Chapter 1: Your New System...5 Chapter 2: Blood Glucose Tests...13 Chapter 3: Control Tests...25 Chapter 4: Meter Settings...31 Chapter 5: Review
User Guide For in vitro Diagnostic Use in Animals Featuring the AlphaTRAK 2 Meter
 Distributed by Zoetis Inc. Kalamazoo, MI 49007 BLOOD GLUCOSE MONITORING SYSTEM SYSTÈME DE SURVEILLANCE DE LA GLYCÉMIE www.alphatrakmeter.com Contact Customer Care at 1-888-963-8471 User Guide For in vitro
Dear HighQ Check System Owner :
 Dear HighQ Check System Owner : Thank you for purchasing the HighQ Check Blood Glucose Monitoring System. This manual provides important information to help you to use the system properly. Before using
User s Manual Blood Glucose Meter
 User s Manual Blood Glucose Meter This file may not print or view at 100%. Die lines and color breaks do not print. Holding Area text, box and rules do not print. Roche USA 54082 V2/1 07790953001 07790953001(01)
Blood Glucose Monitoring System USER GUIDE. Replaces Owner s Booklet. AW A Rev. date: 11/2017 AW A
 Blood Glucose Monitoring System USER GUIDE Replaces Owner s Booklet AW 06650005A Rev. date: 11/2017 AW 06650005A Contents: Getting to know your system 1 Setting up your meter 4 Testing your blood glucose
PRIMA. Blood Glucose Monitoring System. Owner s Manual
 PRIMA Blood Glucose Monitoring System Owner s Manual English Dear FORA Diamond PRIMA System Owner: Thank you for purchasing the FORA Diamond PRIMA Blood Glucose Monitoring System. This manual provides
Blood Glucose Monitoring System. Owner's Booklet. Instructions for use
 Blood Glucose Monitoring System Owner's Booklet Instructions for use Verio Blood Glucose Monitoring System Owner's Booklet 1 Thanks for choosing OneTouch! The OneTouch Verio Blood Glucose Monitoring System
GM700S USER S MANUAL. Blood Glucose Monitoring System
 GM700S BIONIME GmbH Tramstrasse 16, 9442 Berneck Switzerland E-mail: info@bionime.ch 0197 101-3GM780-011 EN Rev. Date: September/2014 BIONIME CORPORATION No. 100, Sec. 2, Daqing St., South Dist., Taichung
Items in the package:
 Intended Use: The EasyLife Hb Monitoring System is designed for in vitro diagnostic use only (external use only), and is suitable for self-testing. The system is for healthcare professionals and persons
PLUS One. Blood Glucose Monitoring System. Owner s Manual
 PLUS One Blood Glucose Monitoring System Owner s Manual Dear PLUS One System Owner: Thank you for purchasing the PLUS One Blood Glucose Monitoring System. This manual provides important information to
USER GUIDE. Works with the CONTOUR DIABETES app available for download on the App Store SM or on Google Play.
 Blood Glucose Monitoring System Works with the CONTOUR DIABETES app available for download on the App Store SM or on Google Play. Uses only CONTOUR NEXT blood glucose test strips. USER GUIDE INTENDED USE
Blood Glucose Monitoring System
 Blood Glucose Monitoring System Thank you for choosing the On Call Pro Blood Glucose Monitoring System. The System will provide accurate blood glucose results in just a few simple steps. The On Call Pro
GlucCell TM SYSTEM USER S GUIDE ver 2.3 CELL CULTURE GLUCOSE METER. Important Information. Intended Use. Caution. About the System
 GlucCell TM SYSTEM USER S GUIDE ver 2.3 Intended Use The GlucCell TM Cell Culture Glucose Monitoring System (The GlucCell TM System) is designed to quantitatively measure the concentration of glucose during
Blood Glucose Monitoring System. Owner's Booklet. Instructions for Use
 Blood Glucose Monitoring System Owner's Booklet Instructions for Use Blood Glucose Monitoring System Owner's Booklet 1 Thanks for choosing OneTouch! The OneTouch Verio Blood Glucose Monitoring System
GlucoCheck BLOOD GLUCOSE MONITORING SYSTEM OWNER'S MANUAL
 GlucoCheck BLOOD GLUCOSE MONITORING SYSTEM OWNER'S MANUAL GlucoCheck BLOOD GLUCOSE MONITORING SYSTEM OWNER'S MANUAL Version 1.0 January, 2010 311-4277100-001 Dear GlucoCheck XL System Owner: Thank you
Blood Glucose Monitoring System. Owner's Booklet. Instructions for Use
 Blood Glucose Monitoring System Owner's Booklet Instructions for Use Select Plus Flex Blood Glucose Monitoring System Owner's Booklet 1 Thanks for choosing OneTouch! The OneTouch Select Plus Flex Blood
CentriVet GK Blood Glucose & Ketone Monitoring System
 CentriVet GK Blood Glucose & Ketone Monitoring System FOR ANIMAL USE. NOT FOR HUMAN USE. Welcome and thank you for choosing the CentriVet GK Blood Glucose & Ketone Monitoring System. The CentriVet GK Blood
Blood Glucose Monitoring System. Owner's Booklet. Instructions for use.
 Blood Glucose Monitoring System Owner's Booklet Instructions for use. Verio IQ Blood Glucose Monitoring System Owner s Booklet 1 Owner s Booklet Thanks for choosing OneTouch! The OneTouch Verio IQ Blood
VOICE. Blood Glucose Monitoring System. Owner s Manual
 VOICE Blood Glucose Monitoring System Owner s Manual English Dear FORA Diamond VOICE System Owner: Thank you for purchasing the FORA Diamond VOICE Blood Glucose Monitoring System. This manual provides
Owner s Booklet. Wirelessly sends accurate glucose results to MiniMed Paradigm and Guardian Devices. Blood Glucose Monitoring System
 TM Blood Glucose Monitoring System Wirelessly sends accurate glucose results to MiniMed Paradigm and Guardian Devices Owner s Booklet Applies to compatible Medtronic MiniMed Paradigm insulin pumps and
Owner's Booklet. Blood Glucose Monitoring System. Accurate, complete blood glucose monitoring through advanced biosensor technology
 Owner's Booklet Blood Glucose Monitoring System Accurate, complete blood glucose monitoring through advanced biosensor technology i-sens, Inc. 465-6 Wolgye4-dong, Nowon-gu Seoul 139-845, Korea www.i-sens.com
MDT2. Self-Monitoring Blood Glucose System. Quick Reference Guide
 MDT2 Self-Monitoring Blood Glucose System Quick Reference Guide Inserting Batteries 1. Open the battery door on the back of the meter by pushing the tab in the direction of the arrow. 2. Insert two batteries.
Dear Embrace Owner Embrace N0 Code
 Dear Embrace Owner, Dear Embrace Owner Embrace N0 Code Thank you for choosing the Embrace No Code Blood Glucose Monitoring System to help you manage your diabetes. We designed the Embrace No Code Blood
Blood Glucose Meter Owner s Manual
 89115-0055-01 Meter Owner s Manual Preface Thank you for selecting the McKesson Quintet AC Monitoring System. Please read this manual thoroughly before you start testing. This User s Manual provides all
INTRODUCTION: TRUE METRIX
 INTRODUCTION: TRUE METRIX Self Monitoring Blood Glucose System TRUE METRIX is a simple, accurate way to test your whole blood glucose (sugar) level, anytime, anywhere. Our goal is to provide quality healthcare
Dear Wellion GALILEO GLU/KET (plus) Owner,
 Owner,") OWNER S GUIDE Dear Wellion GALILEO GLU/KET (plus) Owner, Thank you for choosing the Wellion GALILEO GLU/KET (plus) Blood Glucose and Ketone Monitoring System to help you easily monitor your blood sugar
OWNER S GUIDE Dear Wellion GALILEO GLU/KET (plus) Owner, Thank you for choosing the Wellion GALILEO GLU/KET (plus) Blood Glucose and Ketone Monitoring System to help you easily monitor your blood sugar
Blood Glucose Monitoring System. Owner's Booklet. Instructions for Use
 Blood Glucose Monitoring System Owner's Booklet Instructions for Use Verio Flex Blood Glucose Monitoring System Owner's Booklet 1 Thanks for choosing OneTouch! The OneTouch Verio Flex Blood Glucose Monitoring
Meter and Electronic Logbook In One. Owner s Booklet
 Meter and Electronic Logbook In One Owner s Booklet Dear OneTouch UltraSmart System Owner: You have chosen one of the best blood glucose monitoring systems available. This booklet has important information
OneTouch Customer Care Line: Canada U.S.A Monday-Friday 9am-8pm Eastern Time 6am-5pm Pacific Time.
 OneTouch Customer Care Line: Canada 1 800 663-5521 U.S.A. 1 800 227-8862 Monday-Friday 9am-8pm Eastern Time 6am-5pm Pacific Time www.onetouch.ca Distributed by: LifeScan Canada Ltd. Burnaby, B.C. V5C 6C6
Table of Contents Information Preparation Testing Additional Functions Maintenance
 Table of Contents Information Important Information: Read This First! 4 Specifications 6 CareSens N POP Blood Glucose Monitoring System 7 Inserting or Replacing the Batteries 8 CareSens N Blood Glucose
Important Safety Instructions
 Dear Embrace EVO Owner Thank you for choosing the Embrace EVO Blood Glucose Meter to help you manage your diabetes. We designed the Embrace EVO Blood Glucose Meter to be accurate and easy to use. The added
Blood Glucose Monitoring System. User s Manual for Single Patient Use Only Blood Glucose Meter
 Blood Glucose Monitoring System User s Manual for Single Patient Use Only Blood Glucose Meter Contents Important Safety Information...3 Chapter 1: Your New System...9 Chapter 2: The Accu Chek FastClix
5.2 mmol USER GUIDE. 5.2 mmol/l. Bolus Reminder Notes. 12:00 PM l 10/13. Uses only Contour Next blood glucose test strips.
 Wireless Blood Glucose Monitoring System 12:00 PM l 10/13 5.2 mmol Before Meal L Bolus Reminder Notes 12:00 PM BG 5.2 mmol/l Active Insulin 1.5 u MiniMed 670G Pump is shown USER GUIDE Uses only Contour
Blood Ketone and Glucose Monitoring System Owner s Guide For Veterinary Animal Use Only Not For Human Use
 Blood Ketone and Glucose Monitoring System Owner s Guide For Veterinary Animal Use Only Not For Human Use Nova Vet Monitor OG PN52899E EN.indd 1 Nova Vet Monitor OG PN52899E EN.indd 2 Nova Vet Blood Ketone
Blood Glucose Monitoring System
 Blood Glucose Monitoring System Dear Voyage TM System User, Thank you for choosing the Voyage TM system! The Voyage TM blood glucose monitoring system is designed for easy testing of blood glucose and
INTRODUCTION: McKesson TRUE METRIX Self Monitoring Blood Glucose System
 INTRODUCTION: McKesson TRUE METRIX Self Monitoring Blood Glucose System McKesson TRUE METRIX is a simple, accurate way to test your whole blood glucose (sugar) level, anytime, anywhere. Our goal is to
BLOOD GLUCOSE MONITORING SYSTEM OWNER'S MANUAL
 Voice TD-4280 BLOOD GLUCOSE MONITORING SYSTEM OWNER'S MANUAL Dear GlucoRx Nexus Voice TD-4280 System Owner: Thank you for using the GlucoRx Nexus Voice TD-4280 Blood Glucose Monitoring System. This manual
2. Before Testing Monitor Checker Test...10 Inserting Lancets into Lancing Device...11 Quality Control Testing...13
 Table of Contents 1. About your HemoSmart Haemoglobin Screening System Contents of Kit...4 HemoSmart Haemoglobin Meter...5 HemoSmart Haemoglobin Test Strip...7 Adjustable Lancing Device and Lancets...8
5.2 mmol USER GUIDE 5.2. Uses only CONTOUR NEXT blood glucose test strips from Bayer. Wireless Blood Glucose Monitoring System 12:00 PM METER BG
 Wireless Blood Glucose Monitoring System 5.2 mmol L Before Meal 12:00 PM l 10/13 Reminder Notes 12:00 PM METER BG 5.2 mmol/l Uses only CONTOUR NEXT blood glucose test strips from Bayer USER GUIDE INTENDED
5.2mmol/L. 5.2 mmol USER GUIDE. Uses only CONTOUR NEXT blood glucose test strips from Bayer. Wireless Blood Glucose Monitoring System
 Wireless Blood Glucose Monitoring System 5.2 mmol L Before Meal 12:00 PM l 10/13 Bolus Bolus Reminder Notes 12:00 PM l 10/13 12:00 PM BG 5.2mmol/L Active Insulin 1.5 u Bolus Basal Uses only CONTOUR NEXT
Dear HemoSmart GOLD Owner
 Dear HemoSmart GOLD Owner Thank you for choosing the HemoSmart GOLD. All the information that will be needed to use and maintain the HemoSmart GOLD System is included in this manual. Read it carefully
User Manual second language
 User Manual second language GlucoTel Blood Glucose Monitoring and Diabetes Management System must be used with cell phones that have: Table of contents 2 3 Introduction 4 Bluetooth Wireless Technology
Blood Glucose Monitoring System. Owner's Booklet. Instructions for Use
 Blood Glucose Monitoring System Owner's Booklet Instructions for Use Blood Glucose Monitoring System Owner's Booklet 1 Thanks for choosing OneTouch! The OneTouch Verio Blood Glucose Monitoring System
BLOOD GLUCOSE MONITORING SYSTEM USER GUIDE
 BLOOD GLUCOSE MONITORING SYSTEM USER GUIDE Thank you for choosing the Contour blood glucose monitoring system! We are proud to be your partner in helping you manage your diabetes. Our goal is to make this
If you have questions or simply want more information, please call your veterinarian or visit our website at
 OWNERS GUIDE 2 Dear WellionVet GLUCO CALEA Owner, Thank you for choosing the WellionVet GLUCO CALEA Blood Glucose Monitor System that will help you monitoring the blood sugar levels of your pet. We designed
Blood Glucose & Ketone Monitoring System. User s Manual
 Blood Glucose & Ketone Monitoring System User s Manual Definition of Symbols These symbols are associated with your meter. Batch code This packaging is capable of being recycled Catalog number Manufacturer
Prodigy Talking Meter Owner s Manual. Dear Prodigy Owner:
 Dear Prodigy Owner: Thank you for choosing the Prodigy AutoCode Talking blood glucose monitoring system. Please read this manual carefully as it contains important information about your new Prodigy system.
EME. Self-Monitoring Blood Glucose System. Quick Reference Guide
 EME Self-Monitoring Blood Glucose System Quick Reference Guide Inserting Batteries 1. Open the battery door on the back of the meter by pushing the tab in the direction of the arrow and pulling the door
User Manual. For single user / home use only
 User Manual For single user / home use only Welcome to the GLUCOCARD Shine Blood Glucose Monitoring System Thank you for choosing the GLUCOCARD Shine Blood Glucose Monitoring System. The system provides
EasyMax Voice III Self-Monitoring Blood Glucose System. Quick Reference Guide
 EasyMax Voice III Self-Monitoring Blood Glucose System Quick Reference Guide 1 Installing Batteries 1. Open the battery door on the back of the meter by pushing the tab in the direction of the arrow and
Owner s Booklet. 24/7 Customer Care English or Spanish Manufactured by:
 Owner s Booklet 24/7 Customer Care English or Spanish 1-800-803-6025 www.niprodiagnostics.com Manufactured by: Fort Lauderdale, FL 33309 U.S.A. 2014 Nipro Diagnostics, Inc. TRUEtrack and the Nipro Diagnostics
Blood Glucose Monitoring System
 Blood Glucose Monitoring System Contents Chapter 1 OMRON Blood Glucose Monitoring System HEA-232 1.1 Introduction 1.2 List of Kit Contents 1.3 Product and Meter Display Chapter 2 Installing and Setting
The performance of Microdot Test Strips has been evaluated both in laboratory and in clinical tests.
 Chemical Composition Each Microdot strip contains the enzyme glucose dehydrogenase (Bacillus Sp.) = 1 IU and other ingredients (mediator, NAD, lysing agents etc.) = 200 µg. Test Strips When blood is added
User Manual. For single user / home use only
 User Manual For single user / home use only Table of Contents Information Important Information:Read this First! 4 Important Health-Related Information 5 Specifications 6 GLUCOCARD Shine Blood Glucose
If you have questions or simply want more information, please call your veterinarian or visit our website at
 OWNERS GUIDE 2 Dear WellionVet GLUCO CALEA Owner, Thank you for choosing the WellionVet GLUCO CALEA Blood Glucose Monitor System that will help you monitoring the blood sugar levels of your pet. We designed
Blood Glucose Measurement. Omnitest 5 & Omnican Lance FAQ Frequently Asked Questions
 Blood Glucose Measurement Omnitest 5 & Omnican Lance FAQ Frequently Asked Questions FAQ Omnitest 5 & Omnican Lance CONTENT Omnitest 5 Overview 3 Application Range 5 Target Groups 5 Test Strips 5 Settings
Symbols & Messages Refer to the MyStar Extra Owner s Guide for complete instructions for use.
 Symbols & Messages Meter Modes Logbook Averages Estimated A1c Settings s Trending s Viewing Averages (in Logbook Mode ) (in Averages Mode ) (and in ~A1c Mode ) Trending Up Trending Down Steady No Tag Pre
User s Manual. Blood Glucose Meter
 User s Manual Blood Glucose Meter This User s Manual features the following 3 symbols: W This symbol indicates a possible risk of injury or of damage to your own health or the health of others. H This
Integrated Multiparameter Monitoring System. Owner s Manual
 Integrated Multiparameter Monitoring System Owner s Manual Dear GlucoRx HCT Connect System Owner: Thank you for choosing the GlucoRx HCT Connect Integrated Multiparameter Monitoring System. This manual
Wireless Blood Glucose Monitoring System. 93 mg 12:24 PM METER BG. Mg/dL. Uses only CONTOUR NEXT blood glucose test strips from Bayer USER GUIDE
 Wireless Blood Glucose Monitoring System 93 mg dl Before Meal 12:24PM l 11/10 Reminder Notes 12:24 PM METER BG 93 Mg/dL Uses only CONTOUR NEXT blood glucose test strips from Bayer USER GUIDE Indications
USER GUIDE. The NO CODING technology provides accurate and fast blood glucose monitoring. Uses only Bayer s CONTOUR PLUS blood glucose test strips
 Blood Glucose Monitoring System The NO CODING technology provides accurate and fast blood glucose monitoring Uses only Bayer s CONTOUR PLUS blood glucose test strips USER GUIDE INTENDED USE Bayer's CONTOUR
Omnitest 5. Blood Glucose Monitoring System
 Omnitest 5 Blood Glucose Monitoring System 2 Important notes The Omnitest 5 system provides a quick and easy way to measure the blood glucose level. It can be used for selfmonitoring of blood glucose levels
Blood Glucose Monitoring System. Owner's Booklet. Instructions for Use
 Blood Glucose Monitoring System Owner's Booklet Instructions for Use Blood Glucose Monitoring System Owner's Booklet 1 Thank you for choosing OneTouch Verio Flex! The OneTouch Verio Flex Blood Glucose
EasyPlus mini 2IN1. Self-Monitoring Blood Glucose System. User s Manual
 EasyPlus mini 2IN1 Self-Monitoring Blood Glucose System User s Manual Dear EasyPlus mini 2IN1 SMBG System Owner, Thank you for using the EasyPlus mini 2IN1 Self-Monitoring Blood Glucose (SMBG) System.
balance Owner s Booklet 24/7 Customer Consultation English or Spanish Manufactured by:
 balance Owner s Booklet 24/7 Customer Consultation English or Spanish 1-800-803-6025 www.niprodiagnostics.com Manufactured by: Fort Lauderdale, FL 33309 U.S.A. 2015 Nipro Diagnostics, Inc. TRUEbalance
Blood glucose monitor. MediTouch 2
 Blood glucose monitor for self-testing MediTouch 2 Quick Reference Guide GB Art. 79034 0483 EXACT MDD 93/42/EWG WARNING Before using the MediTouch 2 blood glucose monitor from MEDISANA for the first time,
ACE. Accurate, Compact & Economical Blood Glucose Meter. User Guide
 ACE Accurate, Compact & Economical Blood Glucose Meter User Guide NOTICE: The essential features of the type described and illustrations herein remaining unaltered, Pulsatom Healthcare Pvt. Ltd. reserves
GM550 USER S MANUAL. Blood Glucose Monitoring System
 Blood Glucose Monitoring System BIONIME GmbH Tramstrasse 16, 9442 Berneck Switzerland E-mail: info@bionime.ch 101-3GM550-234 EN BIONIME CORPORATION No. 100, Sec. 2, Daqing St., South Dist., Taichung City
CoaguChek S System. Quick Reference Guide. This is a CLIA-waived System. Coagulation Testing with Fresh Whole Blood
 CoaguChek S System This is a CLIA-waived System Quick Reference Guide Coagulation Testing with Fresh Whole Blood May not print or view at 100% All unmarked prints black. Coag Swoosh prints gradients of
Good to know. Tips and tricks for accurate blood glucose monitoring
 Good to know Tips and tricks for accurate blood glucose monitoring Tip 1 Washing your hands No place for dirt Accurate blood glucose readings are essential for your diabetes care. Correct self-testing
GM210 USER S MANUAL. Blood Glucose Monitoring System
 GM210 Monitoring System BIONIME CORPORATION 694, Renhua Road, Dali City, Taichung County, Taiwan 412 Tel: +886 4 24951268 Fax: +886 4 24952568 http: //www.bionime.com E-mail: info@bionime.com BIONIME GmbH
Performa BLOOD GLUCOSE METER. Operator s Manual
 Performa BLOOD GLUCOSE METER Operator s Manual The Accu Chek Performa System Intended Use The Accu Chek Performa Meter is designed to be used with the Accu Chek Inform II Test Strip to quantitatively
For further information on. please contact your SD BIOSENSOR, Inc. Representative
 For further information on please contact your SD BIOSENSOR, Inc. Representative 01GM11/01GC110 series Head Office C-4th&5th, 16, Deogyeong-daero 1556beon-gil, Yeongtong-gu, Suwon-si, Gyeonggi-do, 16690,
PROCEDURE. TITLE: Bedside Glucose Monitoring PC Laboratory. Issuing Department: Clinical Director Signature: Departments Involved:
 PROCEDURE TITLE: Bedside Glucose Monitoring Issuing Department: Clinical Director Signature: Departments Involved: Laboratory Nursing Effective Date: 10/97 Review Dates: 09/01, 07/02, 05/13 Revision Dates:
W IMPORTANT INFORMATION FOR PERFORMING A BLOOD GLUCOSE TEST
 W IMPORTANT INFORMATION FOR PERFORMING A BLOOD GLUCOSE TEST W An incorrectly performed blood glucose test may lead to incorrect test results which can cause the wrong therapy recommendation to be made
EVENCARE G3 BLOOD GLUCOSE MONITORING SYSTEM USER S GUIDE
 EVENCARE G3 BLOOD GLUCOSE MONITORING SYSTEM USER S GUIDE Introduction Thank you for choosing the EVENCARE G3 Blood Glucose Monitoring System to help monitor your patients blood glucose levels. The EVENCARE
EG V1(BL) User s Manual. Self-Monitoring Blood Glucose System. Please read this User s Manual thoroughly before using your blood glucose meter.
 User s Manual. Self-Monitoring Blood Glucose System. Please read this User s Manual thoroughly before using your blood glucose meter.") EG V1(BL) Self-Monitoring Blood Glucose System User s Manual Please read this User s Manual thoroughly before using your blood glucose meter. Dear EG V1(BL) SMBG System Owner, Thank you for using the EG
EG V1(BL) Self-Monitoring Blood Glucose System User s Manual Please read this User s Manual thoroughly before using your blood glucose meter. Dear EG V1(BL) SMBG System Owner, Thank you for using the EG
Blood Glucose and ß-Ketone Self-Monitoring System
 MASTER 2. System overview 2.1 Meter FRONT TEST STRIP PORT Blood Glucose and ß-Ketone Self-Monitoring System ENTER ( ) BUTTON UP/DOWN ( / ) BUTTONS USER MANUAL TEST STRIP PORT Test strip should be inserted
User s Manual Please read this User s Manual thoroughly before using your blood glucose meter.
 Self-Monitoring Speaking Blood Glucose System User s Manual Please read this User s Manual thoroughly before using your blood glucose meter. Dear EasyMax V SMBG System Owner, Thank you for using the EasyMax