TORNIER SIMPLICITI. Shoulder System SURGICAL TECHNIQUE
|
|
|
- Emil Eaton
- 6 years ago
- Views:
Transcription


1 TORNIER SIMPLICITI Shoulder System SURGICAL TECHNIQUE
2
3 Table of Contents: Indications & Contraindications... 4 System Compatibility & Pre-operative Planning... 4 Humeral Head Resection... 6 Freehand Resection & Guided Resection... 7 Sizing & Centering... 8 Preparing the Metaphysis Selecting the Humeral Head System...12 Sizing the Humeral Head...12 Trial Reduction...13 Mobility Testing...13 Planning the Subscapularis Repair...13 Implanting the Final Prosthesis...14 Closure & Post-operative Rehabilitation...15 Consideration for Revision Surgery SIMPLICITI General Instrument Tray...18 SIMPLICITI STB Head Tray...19 SIMPLICITI Trial Head Tray...20 SIMPLICITI Revision Tray...21 SIMPLICITI Implants
4 Indications The SIMPLICITI Shoulder System is intended for total arthroplasty of the shoulder. Severely painful and/or disabled joint resulting from osteoarthritis or traumatic arthritis. Note: The metaphyseal humeral components are indicated for uncemented use only. Glenoid components are labeled for cemented use only and are indicated only for use with bone cement. These devices are for single use only. Contraindications For Total Shoulder: The SIMPLICITI Shoulder System is contraindicated in the following situations: Lack of sufficient sound bone to seat and support the implant, a condition that results from skeletal immaturity, osteoporosis or erosive arthritis. Metal allergies or sensitivity. Infection at or near the site of implantation. Distant or systemic infection. System Compatibility The SIMPLICITI nucleus has been designed to be compatible with the humeral head components for both the SIMPLICITI and SIMPLICITI STB Systems. Additionally, both humeral head systems, in certain combinations, are compatible with the AEQUALIS Shoulder System and AFFINITI glenoid systems. For more information on the cleared combinations, refer to SIMPLICITI mismatch charts (CAW-3185). Pre-Operative Planning Four shoulder X-rays are recommended: 1. A-P View 2. True A-P (Grashey View) 3. Supraspinatus Outlet View (SOV) 4. Axillary View CT scan may be appropriate to assist in evaluating glenoid morphology. MRI scan may be appropriate for some shoulders to assess the rotator cuff muscles and tendons. Using a glenoid prosthesis in patients with cuff tear arthropathy could increase the risk of glenoid loosening due to proximal migration and non-anatomic loading. 4
5 Exposure Position the patient in a beach chair position with the operative arm draped free. For optimal access, the patient should be positioned near the edge of the operating table such that the shoulder can be fully extended. A bump can be placed under the operative shoulder to stabilize the scapula. Using a standard delto-pectoral approach, releases are performed and the subscapularis is prepared per surgeon discretion. It is not advisable to perform a complete lesser tuberosity osteotomy. The shoulder is gently dislocated anteriorly. This is facilitated by placing a Darrach retractor within the glenohumeral joint and performing gentle adduction and external rotation of the humerus. As the humeral head is fully dislocated, the inferior capsule is released up to the posterior aspect of the humeral head. Identification, palpation and protection of the axillary nerve during this release is important. An anterior capsulotomy is performed with a release of the middle and inferior glenohumeral ligaments off the glenoid. Mobilization of the subscapularis muscle is necessary to allow for tension-free reinsertion following the procedure. Once these releases have been performed, the humeral head is fully dislocated by adduction of the arm with progressive external rotation and extension. Consider further release of the pectoralis insertion if full external rotation is not obtained. 5

 Figure 1 This is done by pulling down on the trigger and pivoting the proximal body.")
6 Humeral Head Resection Before making the humeral head resection, it may be helpful to remove all humeral osteophytes. After the osteophytes have been removed, the shaft of the inclination guide can be aligned with the humeral diaphysis to assist in determining the native inclination. Next, align the proximal body of the guide with the anatomic neck of the humerus. (Figure 1) Figure 1 This is done by pulling down on the trigger and pivoting the proximal body. (Figure 2) Releasing the trigger will lock the guide in the selected position, providing a reference for the native humeral inclination. Once the guide has been properly aligned, the neck angle may be marked with electrocautery. Figure 2 6

7 Freehand Resection If a freehand resection is to be made, consider placing the Crego retractor under the biceps tendon, if it is still present, and around the humeral head. This will help protect the biceps and rotator cuff tendons. With the Crego in place, cut along the previously marked neck angle. (Figure 3) Figure 3 Note: Take special care to direct the saw blade or osteotome directly towards the Crego retractor. A misdirected cut has the potential to damage the rotator cuff tendons. Guided Resection If a guided resection is preferred, use one of the four cut rings provided. To use the cut rings, select the size cut ring that most closely matches the humeral head diameter. Align the top of the cut ring with the anatomic neck and place the 3 mm guide pins through the cut rings using the pin driver. (Figure 4) Figure 4 Use the flat superior surface of the guide to make the humeral head resection. Once the resection is complete, remove the pins and guide. 7

 Incorrect Fit Good Fit Overhang Figure 6 Center the sizer on the resected humerus, checking for a consistent gap between the edge of the sizer and the anterior,")
 With the sizer centered and flat on the resected humerus, place the guide pin by hand into the central hole of the sizer.")
 Figure 7 Remove the sizer disk and visually assess the position, orientation and stability of the pin.")

8 Sizing & Centering Note: If the humeral osteophytes were not removed before the humeral resections, they must be removed prior to sizing the osteotomy. To size for the humeral implant, attach one of the three sizer disks to the self-leveling handle and place the sizer onto the resected humerus. (Figure 5) Figure 5 Choose the largest sizer that does not overhang the humerus at any point. (Figure 6) Incorrect Fit Good Fit Overhang Figure 6 Center the sizer on the resected humerus, checking for a consistent gap between the edge of the sizer and the anterior, superolateral and posterior aspects of the humerus. (Any excess medial bone can be trimmed with Rongeurs once the definitive implant is in place.) With the sizer centered and flat on the resected humerus, place the guide pin by hand into the central hole of the sizer. Attach the pin driver to power and advance the pin until it engages the lateral cortex. The pin must engage the lateral cortex, but doesn t need to penetrate the lateral cortex. (Figure 7) Figure 7 Remove the sizer disk and visually assess the position, orientation and stability of the pin. The pin should be centered anterior to posterior and just slightly superior and perpendicular to the resection plane. If the pin is not in the correct orientation or position, remove the pin, re-center the sizer disk and reinsert the pin in the correct orientation. If the pin is not stable, place the sizer disk over the pin and advance the pin to ensure that it has reached the lateral cortex. If the pin is still not stable due to poor patient bone quality, it may be advisable to switch to a stemmed implant. Note: It is important that the pin remains perpendicular to the resection throughout the surgical procedure. If the pin is damaged or bent during preparation, replace it with a new pin. 8


9 Preparing the Metaphysis With the guide pin in place, select the surface planer that corresponds with the sizer disk from the previous step. The instrument set has been color coded by size for the operative team s convenience. Attach the surface planer to power and place it over the guide pin. (Figure 8) Figure 8 Before initiating power, place the planer flat on the humeral cut and assess the planer s fit to the bone. An ideal fit would cover the entire resected surface without interfering with the rotator cuff. Once the planer size has been deemed appropriate, back the planer off the bone, initiate power and advance the planer to engage the bone. Windows have been provided in the planer to allow the surgeon to see the bone surface. Using these windows, watch for small concentric witness marks that will be created by the planer. When all aspects of the humerus show the witness marks, the surface is perfectly flat and no additional planing is necessary. (Figure 9) Partially Flat Flat Figure 9 Next, attach the core drill to power, place it over the guide pin and drill until the collar is flush against the cut humerus surface. (Figure 10) Figure 10 9
 Figure 11 Position the blazer so that one fin points directly superiolaterally.")
 It is important to note that the fin blazer will also act as the trial and is to be left in place after impaction.")
10 Preparing the Metaphysis continued To prepare the fin tracks, attach the previously selected size fin blazer to the fin blazer impactor handle and place it over the guide pin. (Figure 11) Figure 11 Position the blazer so that one fin points directly superiolaterally. (Figure 12) Figure 12 Figure 13 Impact the fin blazer until the collar is flush with the cut surface of the humerus, taking care not to advance the collar of the handle into the bone. (Figure 13) It is important to note that the fin blazer will also act as the trial and is to be left in place after impaction. To remove the handle, simply unthread it from the fin blazer and then remove the guide pin. 10

11 A cut protector can be attached to the fin blazer to protect the humeral cut surface from retractors during glenoid preparation. Attach the handle to the side of the cut protector that is laser etched, This side up. This is done by applying inward pressure on each side of the handle and then inserting the feet of the handle into the holes of the cut protector. When the inward pressure is released, the handle will securely hold the cut protector. (Figure 14) Figure 14 To attach the cut protector to the fin blazer, align the laser marks and place the cut protector onto the fin blazer. Next, turn the cut protector 90 degrees or until it is securely attached to the fin blazer. (Figure 15) Figure 15 When the cut protector is stable, apply inward pressure on each side of the handle and remove the handle. The glenoid can now be prepared. Safe Combination Please refer to the safe combination of Humeral Heads and Glenoids. The information is provided in document reference number CAW Once the glenoid has been implanted, the cut protector can be removed. To remove the cut protector, attach the handle and rotate the cut protector to align the marks on both the cut protector and blazer. Next, simply lift the cut protector off the blazer. 11


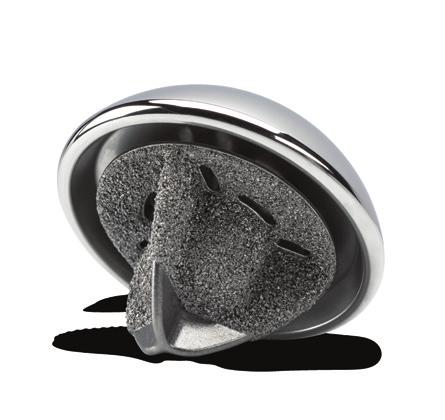
12 Selecting the Humeral Head System Two humeral head options are compatible with the SIMPLICITI metaphyseal implant, which is referred to as the nucleus. Both humeral head options attach to the nucleus via a Morse taper and have unique advantages that are described in detail below. Option 1: Soft-Tissue Balancing Approach The SIMPLICITI STB system was designed to offer surgeons intra-operative flexibility when treating diseased and deformed anatomy. The intra-operative flexibility is accomplished by offering three humeral head thicknesses for each of the five articular diameters, allowing the surgeon to balance the joint without changing the articular curvature and resulting glenohumeral mismatch. Option 2: Anatomic Approach The SIMPLICITI humeral heads were specifically developed for surgeons who prefer to replace the diseased humeral head based on normal (non-arthritic) anatomic parameters. Sizing the Humeral Head The initial size of the trial head can be determined by mimicking the resected head, except in the case of severe deformity. This can be accomplished by placing the resected head against a trial head and determining which size trial head most closely represents the resected head. (Figure 16) In case of severe deformity of the native humeral head, pre-operative radiographic templating may be utilized to determine the optimally sized humeral implant. To place the trial head, insert the tips of the grasper into the holes of the trial head and then place the male taper of the trial head into the female taper of the fin blazer. (Figure 17) Evaluate the coverage of the humeral head and adjust sizes if necessary. Figure 16 Figure 17 Note: The trial head should not be impacted once placed onto the fin blazer. The trial heads may also be used on the final implant. 12
13 Trial Reduction Reduce the humeral head trial into the glenoid. After the shoulder joint is reduced, posterior force on the humeral head should allow for subluxation of 50% of the width of the joint. If less than 50% subluxation is possible, remove the humeral head and replace it with the next smaller head. If direct posterior force dislocates the humeral head, remove the trial head and replace it with the next larger humeral head. Mobility Testing The arm is abducted to 90 degrees and internally rotated. 60 degrees of internal rotation should be obtained. If less than 60 degrees of internal rotation is demonstrated, further capsular release off the inferior humeral neck and glenoid may be necessary for optimal function. Once the humeral head size has been determined, dislocate the shoulder, remove the trial head with the grasper, re-attach the blazer impactor to the fin blazer and remove the fin blazer. Planning the Subscapularis Repair Prior to seating the final humeral assembly, the surgeon must plan the subscapularis tendon reattachment. The subscapularis is repaired per surgeon preference. If repair sutures must be placed through the humeral bone, this should be completed at this time. 13
14 Implanting the Final Prosthesis Note: The surgeon should inspect the implant taper and articular surfaces for debris or blemishes before assembly. The humeral head should be assembled to the definitive nucleus with clean gloves. To implant the final prosthesis, select the appropriately sized nucleus and attach the implant to the impactor handle via the treads in the bottom of the taper. Take care not to over tighten the threads. (Figure 18) Figure 18 Place the fins of the nucleus into the previously prepared cavity. Check to ensure that the implant is inserted perpendicular to the resected surface and impact the implant until the collar is resting a few millimeters above the resected humerus and detach the impactor handle. (Figure 19) Next, place the definitive humeral head onto the nucleus. Attach the head impactor tip onto the blazer/ head impactor handle and place the impactor tip onto the humeral head. Impact until the implant is flush against the humeral cut. Excess force should be avoided during impaction and care should be taken not to damage the articular surface of the implant. (Figure 20) Figure 19 Figure 20 Note: Some surgeons may choose to fully seat the nucleus prior to impacting the humeral head. If this is done, take care not to advance the collar of the implant into the cancellous bone as this could compromise the taper engagement of the implants. 14

15 Closure After the final implants are in position and the shoulder has been reduced, the subscapularis is repaired per surgeon preference. Following the subscapularis repair, a hemovac drain may be placed to prevent postoperative hematoma formation. The remainder of the wound closure is performed per surgeon preference. Post-operative Rehabilitation Remove sling the first morning after surgery. Begin active assisted forward elevation and external rotation on the first day after surgery. Place no limit to forward elevation, but limit external rotation to the side to 40 degrees. At two weeks, begin internal rotation stretching. Encourage active use of the arm for activities of daily living. At eight weeks, begin active shoulder strengthening as necessary. Consideration for Revision Surgery Should a revision become necessary, the SIMPLICITI system offers specific instrumentation to facilitate the removal of the humeral head and nucleus. Removal of the humeral head is accomplished by placing the tip of the humeral head distractor into the gap between the humerus and the humeral head and impacting to free the Morse taper. (Figure 21) Figure 21 15

 Figure 22 Next, place the three osteotome fins of the core extractor into the three curved slots located on the face of the implant collar.")
16 Consideration for Revision Surgery continued Once the humeral head has been disassembled, the nucleus can be removed. The first step in removing the nucleus is to separate the bone from the porous coating on the implant. A specific osteotome with depth stops is available and should be impacted through the slots located on the face of the implant collar. (Figure 22) Figure 22 Next, place the three osteotome fins of the core extractor into the three curved slots located on the face of the implant collar. Impact the osteotome fins until the core extractor is resting flush on the collar. (Figure 23) Figure 23 16
 Figure 24 While maintaining clockwise pressure on the t-handle, use the slotted mallet and backslap the core extractor to remove the nucleus.")
17 Using the t-handle, rotate the instrument clockwise. This will place the undercuts on the osteotome fins under the collar of the implant. (Figure 24) Figure 24 While maintaining clockwise pressure on the t-handle, use the slotted mallet and backslap the core extractor to remove the nucleus. (Figure 25) If it is not possible to rotate the core extractor to capture the implant, an alternative extraction method is available. First, remove the core extractor and then attach the threaded extractor to the nucleus via the female thread at the bottom of the taper. Take care not to over tighten the extractor. Next, use the slotted mallet and backslap the extractor to remove the nucleus. (Figure 26) Figure 25 Figure 26 Note: Do not use excessive force when backslapping the threaded extractor. 17

18 SIMPLICITI General Instrument Tray E A C M F I J O G H L N K Description P/N Label Small Cut Ring A Medium Cut Ring A Large Cut Ring A X-Large Cut Ring A Pin Driver B Size 1 Surface Planer C Size 2 Surface Planer C Size 3 Surface Planer C SIMPLICITI Head Distractor D Inclination Guide E Core Drill F Self-leveling Sizer Handle G Cut Protector Handle H Description P/N Label Size 1 Sizer Disk I Size 2 Sizer Disk I Size 3 Sizer Disk I Size 1 Fin Blazer Trial J Size 2 Fin Blazer Trial J Size 3 Fin Blazer Trial J Size 1 Cut Protector K Size 2 Cut Protector K Size 3 Cut Protector K SIMPLICITI Grasper L Head Impactor Tip M Blazer/Head Impactor N Nucleus Impactor O 18

19 SIMPLICITI STB Trial Head Tray A B C Description P/N Label 40 X 15 SIMPLICITI STB Head Trial A 40 X 18 SIMPLICITI STB Head Trial A 40 X 21 SIMPLICITI STB Head Trial A 44 X 15 SIMPLICITI STB Head Trial A 44 X 18 SIMPLICITI STB Head Trial A 44 X 21 SIMPLICITI STB Head Trial A 48 X 15 SIMPLICITI STB Head Trial A 48 X 18 SIMPLICITI STB Head Trial A 48 X 21 SIMPLICITI STB Head Trial A 52 X 15 SIMPLICITI STB Head Trial A 52 X 18 SIMPLICITI STB Head Trial A 52 X 21 SIMPLICITI STB Head Trial A 56 X 15 SIMPLICITI STB Head Trial A 56 X 18 SIMPLICITI STB Head Trial A 56 X 21 SIMPLICITI STB Head Trial A Crego Retractor B Plastic Darrach C 19

20 SIMPLICITI Trial Head Tray A B C Description P/N Label Wide Kolbel MWA681 A Narrow Kolbel MWD046 B 39 x 14 SIMPLICITI Humeral Head Trial C 41 x 15 SIMPLICITI Humeral Head Trial C 43 x 16 SIMPLICITI Humeral Head Trial C 46 x 17 SIMPLICITI Humeral Head Trial C 48 x 18 SIMPLICITI Humeral Head Trial C 50 x 16 SIMPLICITI Humeral Head Trial C 50 x 19 SIMPLICITI Humeral Head Trial C 52 x 19 SIMPLICITI Humeral Head Trial C 52 x 23 SIMPLICITI Humeral Head Trial C 20

21 SIMPLICITI Revision Tray A B C D E Description P/N Label Small Osteotome A Core Extractor B Slotted Mallet C Threaded Extractor D SIMPLICITI Head Distractor E 21
22 SIMPLICITI Implants Description Qty Per Pkg Catalog No. SIMPLICITI Nucleus, Size 1 1 DWG 401 SIMPLICITI Nucleus, Size 2 1 DWG 402 SIMPLICITI Nucleus, Size 3 1 DWG x 14 SIMPLICITI Humeral Head x 15 SIMPLICITI Humeral Head x 16 SIMPLICITI Humeral Head x 17 SIMPLICITI Humeral Head x 18 SIMPLICITI Humeral Head x 16 SIMPLICITI Humeral Head x 19 SIMPLICITI Humeral Head x 19 SIMPLICITI Humeral Head x 23 SIMPLICITI Humeral Head SIMPLICITI STB Heads Description Qty Per Pkg Catalog No. 40 x 15 SIMPLICITI STB Humeral Head x 18 SIMPLICITI STB Humeral Head x 21 SIMPLICITI STB Humeral Head x 15 SIMPLICITI STB Humeral Head x 18 SIMPLICITI STB Humeral Head x 21 SIMPLICITI STB Humeral Head x 15 SIMPLICITI STB Humeral Head x 18 SIMPLICITI STB Humeral Head x 21 SIMPLICITI STB Humeral Head x 15 SIMPLICITI STB Humeral Head x 18 SIMPLICITI STB Humeral Head x 21 SIMPLICITI STB Humeral Head x 15 SIMPLICITI STB Humeral Head x 18 SIMPLICITI STB Humeral Head x 21 SIMPLICITI STB Humeral Head Available Separately Description Qty Per Pkg Catalog No. SIMPLICITI Humeral Head Templates SIMPLICITI Nucleus Templates Sterile 3 x 75 mm Guide Pin 1*
23 Notes 23
24 Proper surgical procedures and techniques are the responsibility of the medical professional. This material is furnished for information purposes only. Each surgeon must evaluate the appropriateness of the material based on his or her personal medical training and experience. Prior to use of any Tornier implant system, the surgeon should refer to the product package insert for complete warnings, precautions, indications, contraindications and adverse effects. Package inserts are also available by contacting Wright. Contact information can be found in this document and the package insert Cherry Road Memphis, TN Nesbitt Avenue South Bloomington, MN and denote Trademarks and Registered Trademarks of Wright Medical Group N.V., or its affiliates Wright Medical Group N.V. or its affiliates. All Rights Reserved. CAW-7656 REV D ECN Jan-2016
Solutions by Tornier. surgical technique
 S H O U L D E R Solutions by Tornier S I M P L I C I T I S U R G I C A L T E C H N I Q U E S H O U L D E R S Y S T E M surgical technique S I M P L I C I T I S H O U L D E R S Y S T E M S U R G I C A L
TORNIER BIO-RSA. Bony Increased Offset - Reversed Shoulder Arthroplasty SURGICAL TECHNIQUE
 TORNIER BIO-RSA Bony Increased Offset - Reversed Shoulder Arthroplasty SURGICAL TECHNIQUE 2 Table of Contents: Concept...4 Bony Increased Offset Reversed Shoulder Arthroplasty (BIO-RSA ) Concept...4 Surgical
TORNIER AFFINITI EH 2. Extended Humeral Head SURGICAL TECHNIQUE
 TORNIER AFFINITI EH 2 Extended Humeral Head SURGICAL TECHNIQUE The AFFINITI Extended Humeral Head System was developed in collaboration with: John Brems, MD Cleveland, OH R. Sean Churchill, MD Milwaukee,
S H O U L D E R Solutions by Tornier. Aequalistm. Pyrocarbon Humeral Head. surgical technique
 S H O U L D E R Solutions by Tornier Aequalis TM Pyrocarbon humeral head SURGICAL TECHNIQUE Aequalistm Pyrocarbon Humeral Head surgical technique Aequalis TM Pyrocarbon humeral head surgical TECHNIQUE
BLUEPRINT. 3D Planning + PSI SURGIC AL TECHNIQUE
 TO R N I E R BLUEPRINT 3D Planning + PSI SURGIC AL TECHNIQUE V 1. 5. 3 P O LYA M I D E Contents 4 5 6 7 9 Patient Specific Instrumentation Overview 3D Planning PSI Guide Creation and Order Use of PSI
TABLE OF CONTENTS SURGICAL TECHNIQUE 1 POST-OPERATIVE REHABILITATION 18. pages 1 RADIOLOGICAL ASSESSMENT 1 2 PATIENT POSITIONING 1
 TABLE OF CONTENTS SURGICAL TECHNIQUE 1 1 RADIOLOGICAL ASSESSMENT 1 2 PATIENT POSITIONING 1 3 DELTO-PECTORAL APPROACH 2 4 HUMERAL HEAD OSTEOTOMY 6 5 CHOICE OF HUMERAL INCLINATION AND RETROVERSION 7 pages
TORNIER AEQUALIS ASCEND. Shoulder System SURGICAL TECHNIQUE
 TORNIER AEQUALIS ASCEND Shoulder System SURGICAL TECHNIQUE 2 Table of Contents: Implant/Instrument Rationale...4 Indications & Contraindications...5 Surgical Technique... 6-14 Preoperative Planning and
BLUEPRINT. 3D Planning + PSI SURGIC AL TECHNIQUE V 2.1 T I TA N I U M
 TO R N I E R BLUEPRINT 3D Planning + PSI SURGIC AL TECHNIQUE V 2.1 T I TA N I U M Contents 4 5 6 7 9 Patient-Specific Instrumentation Overview 3D Planning PSI Guide Creation and Order Use of PSI Guide
S H O U L D E R Solutions by Tornier. BIO-RSA TM ANGled SURGICAL TECHNIQUE. BIO-RSA Angled. surgical technique
 S H O U L D E R Solutions by Tornier BIO-RSA TM ANGled SURGICAL TECHNIQUE BIO-RSA Angled Bony increased offset - reversed shoulder arthroplasty surgical technique BIO-RSA TM ANGled SURGICAL TECHNIQUE BIO-RSA
Technique. Aequalis Resurfacing Humeral Head
 S u r g i c a l Technique Aequalis Resurfacing Humeral Head 1 The Aequalis Resurfacing Humeral Head has been developed in conjunction with Drew Miller, MD - Atlanta, GA. The Aequalis Resurfacing Humeral
Surgical. Technique. AEQUALIS Spherical Base Glenoid. Shoulder Prosthesis.
 Surgical Technique Shoulder Prosthesis AEQUALIS Spherical Base Glenoid www.tornier.com CONTENTS CONTENTS 1. Subscapularis 2. Anterior capsule 3. Humeral protector 4. Inserting retractors 1. DESIGN FEATURES
TORNIER AEQUALIS FX. Shoulder System SYSTEM OVERVIEW
 TORNIER AEQUALIS FX Shoulder System SYSTEM OVERVIEW Simple in design, but used for the most complex fractures Each year, approximately 4 million people in the United States seek medical care for shoulder
Anatomical Shoulder Glenoid. Surgical Technique
 Anatomical Shoulder Glenoid Surgical Technique Anatomical Shoulder Glenoid Surgical Technique 3 Table of Contents Glenoid Preparation Surgical Steps 4 Anatomical Shoulder Glenoid 4 Glenoid Components
System. Humeral Nail. Surgical Technique
 System Humeral Nail Surgical Technique Contents IMPLANT FEATURES 2 1. INDICATIONS 3 2. PRE-OPERATIVE PLANNING 3 3. PATIENT POSITIONING & FRACTURE REDUCTION 3 4. INCISION 4 5. ENTRY POINT 4-6 6. PROXIMAL
AEQUALIS ADJUSTABLE REVERSED
 TORNIER AEQUALIS ADJUSTABLE REVERSED Shoulder System SURGICAL TECHNIQUE 2 Table of Contents: Indications/Contraindications...5 Pre-Operative Planning...6 Delto-Pectoral Humeral Exposure...7 Supero-Lateral
This surgical technique describes how to perform an anatomic total shoulder arthroplasty implanting a short stem.
 INTRODUCTION This surgical technique describes how to perform an anatomic total shoulder arthroplasty implanting a short stem. CAUTION Federal law (USA) restricts this device to sale distribution and use
SURGICAL TECHNIQUE GUIDE
 DANGER indicates an imminently hazardous situation which, if not avoided, will result in death or serious injury. WARNING indicates a potentially hazardous situation which, if not avoided, could result
Aequalis Press-Fit. Shoulder Prosthesis. Surgical Technique
 Aequalis Press-Fit Shoulder Prosthesis Surgical Technique SURGICAL TECHNIQUE RATIONALE OF THE AEQUALIS PRESS-FIT PROSTHESIS p. 1 THE AEQUALIS PRESS-FIT PROSTHESIS p. 2 SURGICAL TECHNIQUE p. 3-21 1. A detailed
CANNULINK. Intraossous Fixation System SURGICAL TECHNIQUE
 CANNULINK Intraossous Fixation System SURGICAL TECHNIQUE Contents Chapter 1 4 Introduction The CANNULINK Advantage Indications for Use Preoperative Planning Chapter 2 5 Surgical Technique CANNULINK Standard
3. PATIENT POSITIONING & FRACTURE REDUCTION 3 8. DISTAL GUIDED LOCKING FOR PROXIMAL NAIL PROXIMAL LOCKING FOR LONG NAIL 13
 Contents IMPLANT FEATURES 2 1. INDICATIONS 3 2. PRE-OPERATIVE PLANNING 3 3. PATIENT POSITIONING & FRACTURE REDUCTION 3 4. INCISION 4 5. ENTRY POINT 4-6 6. PROXIMAL NAIL INSERTION 6-7 7. PROXIMAL LOCKING
Fixed and Variable Geometry Total Shoulder Arthroplasty
 Fixed and Variable Geometry Total Shoulder Arthroplasty RECOVERY FUNCTION SURVIVORSHIP DePuy believes in an approach to total shoulder replacement that places equal importance on recovery, function and
Surgical. Technique. Aequalis Press-Fit. Shoulder Prosthesis.
 Surgical Technique Shoulder Prosthesis www.tornier.com TABLE OF CONTENTS 1. Preoperative planning 2. Patient positioning 3. Delto-pectoral approach 4. Humeral head osteotomy 5. Reaming the humeral shaft
AEQUALIS ASCEND TM FLEX
 TORNIER AEQUALIS ASCEND TM FLEX Convertible Shoulder System SURGICAL TECHNIQUE Tornier Upper Extremities Contents Chapter 1 4 Chapter 2 8 8 8 9 10 12 12 14 14 16 18 22 Chapter 3 23 23 23 24 25 25 26 26
S h o u l d e r Solutions by Tornier C o n v e r T i b l e S h o u l d e r S y S T e m
 S h o u l d e r Solutions by Tornier C o n v e r t i b l e s h o u l d e r s y s t e m C o n v e r t i b l e s h o u l d e r s y s t e m A n a t o m i c Aequalis Ascend Flex - UDZF131 One System. Two Solutions.
PATIENT EDUCATION. Why Live with Chronic Shoulder Pain? Embrace life with SHOULDER REPLACEMENT
 PATIENT EDUCATION Why Live with Chronic Shoulder Pain? Embrace life with SHOULDER REPLACEMENT Restore Your Quality of Life I couldn t reach cabinets in my kitchen. It was uncomfortable to drive a lot.
Aequalis -Glenoid. Keeled and Pegged. Surgical Technique
 Aequalis -Glenoid Keeled and Pegged Surgical Technique TABLE OF CONTENTS COMMON OPERATIVE TECHNIQUES FOR THE KEELED AND PEGGED AEQUALIS-GLENOIDS p. 1-3 IMPLANTATION OF THE AEQUALIS KEELED GLENOID p. 4-5
System Overview 3. Anatomic Sizing And Design Features 4. Instrumentation 6. Indications And Contraindications 7. Surgical Technique 8
 Surgical Technique Table of Contents System Overview 3 Anatomic Sizing And Design Features 4 Instrumentation 6 Indications And Contraindications 7 Surgical Technique 8 Implant Information 22 Instrumentation
Solutions by Tornier. surgical technique
 S h o u l d e r Solutions by Tornier surgical technique C o n v e r t i b l e s h o u l d e r s y s t e m A e q u a l i s A S C E N D F L E X s u r g i c a l t e c h n i q u e s u r g i c a l t e c h n
AEQUALIS PERFORM + REVERSED
 TO R N I E R AEQUALIS PERFORM + REVERSED Glenoid WEDGED AUGMENT SURGIC AL TECHNIQUE Table of Contents: AEQUALIS PERFORM + REVERSED Glenoid...3 Overview...3 Indications/Contraindications...4 Pre-Operative
SURGICAL TECHNIQUE DUAL-PLATFORM SHOULDER ARTHROPLASTY.
 SURGICAL TECHNIQUE DUAL-PLATFORM SHOULDER ARTHROPLASTY www.fhortho.com SURGICAL TECHNIQUE REFERENCE NUMBERS HUMERAL STEMS REFERENCE DIAMETER HEIGHT 267 360 Ø 06 100 265 102 Ø 08 120 265 103 Ø 08 170 265
The Bio-Modular Choice Shoulder System,
 Surgical Technique The Bio-Modular Choice Shoulder System, designed for both total and hemiarthroplasty of the shoulder, has enjoyed nearly two decades of clinical success. The variety of head types and
Anatomic and Reverse Shoulder. Surgical Technique
 Anatomic and Reverse Shoulder Surgical Technique CONTENTS KEY SURGICAL STEPS GLOBAL UNITE Platform Shoulder System Key Surgical Steps: Anatomic 4 GLOBAL UNITE Platform Shoulder System Key Surgical Steps:
TORNIER AEQUALIS REVERSED FX. Shoulder System SURGICAL TECHNIQUE
 TORNIER AEQUALIS REVERSED FX Shoulder System SURGICAL TECHNIQUE 2 Table of Contents: Implant Description...4 Implant...6 Indications and Contraindications...6 Surgical Technique...7 Preoperative Planning...7
RESURFACING HUMERAL HEAD IMPLANT TRAUMA & EXTREMITIES GROUP
 S U R G I C A L T E C H N I Q U E RESURFACING HUMERAL HEAD IMPLANT TRAUMA & EXTREMITIES GROUP TABLE OF CONTENTS SYSTEM OVERVIEW ANATOMIC SIZING AND DESIGN FEATURES INSTRUMENTATION INDICATIONS AND CONTRAINDICATIONS
TORNIER AEQUALIS ASCEND FLEX. Convertible Shoulder System SURGICAL TECHNIQUE
 TORNIER AEQUALIS ASCEND FLEX Convertible Shoulder System SURGICAL TECHNIQUE Table of Contents: AEQUALIS ASCEND FLEX Overview...4-13 Intended Use...14 Indications/Contraindications... 14-17 Pre-Operative
Aequalis PerFORM. surgical technique
 S h o u l d e r Solutions by Tornier A e q u a l i s p e r f o r m s u r g i c a l t e c h n i q u e Aequalis PerFORM G L E N O I D S Y S T E M surgical technique A e q u a l i s p e r f o r m s u r g
Surgical Technique Guide PANTERA. Proximal Humerus Fracture Fixation Plate System
 Surgical Technique Guide PANTERA Proximal Humerus Fracture Fixation Plate System Installing the PANTERA is a 4-Step Process: The following technique is designed to optimize the surgical exercise. Step
ANATOMIC SHOULDER ARTHROPLASTY
 ANATOMIC SHOULDER ARTHROPLASTY INTRODUCTION This surgical technique describes how to perform an anatomic shoulder arthroplasty implanting a cemented pegged glenoid baseplate. CAUTION Federal law (USA)
Zimmer NexGen MIS Tibial Component. Cemented Surgical Technique IMAGE TO COME
 Zimmer NexGen MIS Tibial Component Cemented Surgical Technique IMAGE TO COME Zimmer NexGen MIS Tibial Component Cemented Surgical Technique 1 Zimmer NexGen MIS Tibial Component Cemented Surgical Technique
SHOULDER ARTHROPLASTY SYSTEM
 SURGICAL TECHNIQUE SHOULDER ARTHROPLASTY SYSTEM COMBINING SCIENCE, SIMPLICITY AND CLINICAL SUCCESS Table of Contents Design Rationale................................1 The Glenoid.................................1
Operative Technique Resurfacing Humeral Head
 EXACTECH SHOULDER Operative Technique Resurfacing Humeral Head TABLE OF CONTENTS INTRODUCTION... 1 SYSTEM SPECIFICATIONS... 1 PATIENT POSITIONING... 2 SURGICAL APPROACH... 2 SIZING THE HUMERUS FOR A RESURFACING
TOTAL KNEE ARTHROPLASTY SYSTEM
 SURGICAL TECHNIQUE TOTAL KNEE ARTHROPLASTY SYSTEM 90-SRK-700000 B.0 0 Contents 1. Implant Sizing 2. Surgical Technique a. Incision and Exposure b. Distal Femoral Resection c. Tibial Resection d. Femoral
Conventus CAGE PH Surgical Techniques
 Conventus CAGE PH Surgical Techniques Conventus Orthopaedics The Conventus CAGE PH (PH Cage) is a permanent implant comprised of an expandable scaffold, made from nitinol and titanium, which is deployed
A novel cementless option. Zimmer NexGen Trabecular Metal Primary Patella Surgical Technique
 A novel cementless option Zimmer NexGen Trabecular Metal Primary Patella Surgical Technique Zimmer Trabecular Metal Primary Patella 1 Zimmer NexGen Trabecular Metal Primary Patella Surgical Technique
DESIGN RATIONALE AND SURGICAL TECHNIQUE
 DESIGN RATIONALE AND SURGICAL TECHNIQUE ANCHOR PEG GLENOID DESIGN RATIONALE In total shoulder arthroplasty, most cases of clinical and radiographic loosening involve failure of the fixation of the glenoid
Technique Guide. 3.5 mm LCP Periarticular Proximal Humerus Plate. Part of the Synthes locking compression plate (LCP) system.
 system.") Technique Guide 3.5 mm LCP Periarticular Proximal Humerus Plate. Part of the Synthes locking compression plate (LCP) system. Table of Contents Introduction 3.5 mm LCP Proximal Humerus Plate 2 AO Principles
Technique Guide 3.5 mm LCP Periarticular Proximal Humerus Plate. Part of the Synthes locking compression plate (LCP) system. Table of Contents Introduction 3.5 mm LCP Proximal Humerus Plate 2 AO Principles
Zimmer Trabecular Metal Glenoid
 Zimmer Trabecular Metal Glenoid Surgical Technique Interference fit for secure initial fixation Trabecular Metal Glenoid Surgical Technique 1 Table of Contents Glenoid Preparation 2 Determining the Size
U2 PSA. Revision Knee. Surgical Protocol
 U2 PSA TM Revision Knee Surgical Protocol Table of Contents 1 Component Removal... 1 2 Tibial Preparation... 1 2.1 Tibial Canal Preparation... 1 2.2 Proximal Tibial Resection... 2 2.3 Non Offset Tibial
Solar Humeral Fracture System. Surgical Protocol
 Solar Humeral Fracture System Surgical Protocol Surgical Protocol Table of Contents Table of Contents Step By Step Procedure... 1 Patient Positioning... 3 Surgical Exposure... 4 Preparation of Humeral
Why Live with Chronic Shoulder Pain? Embrace life with SHOULDER REPL ACEMEN T
 PAT I E N T E D U C AT I O N Why Live with Chronic Shoulder Pain? Embrace life with SHOULDER REPL ACEMEN T Restore Your Quality of Life I couldn t reach cabinets in my kitchen. It was uncomfortable to
Zimmer Trabecular Metal Ankle Interpositional Spacer and Trabecular Metal Ankle Fusion Spacer
 Zimmer Trabecular Metal Ankle Interpositional Spacer and Trabecular Metal Ankle Fusion Spacer Surgical Technique 2 Zimmer Trabecular Metal Ankle Interpositional Spacer and Trabecular Metal Ankle Fusion
Zimmer NexGen Trabecular Metal Tibial Tray
 Zimmer NexGen Trabecular Metal Tibial Tray Surgical Technique Zimmer NexGen Trabecular Metal Tibial Tray Surgical Technique Give Bone A Solid Hold Zimmer NexGen Trabecular Metal Tibial Tray Surgical Technique
TORNIER LATITUDE EV. Total Elbow Arthroplasty
 TORNIER LATITUDE EV Total Elbow Arthroplasty LATITUDE EV TOTAL ELBOW ARTHROPLASTY Welcome to the EVOLUTION of elbow replacement The LATITUDE EV total elbow arthroplasty system is designed to replicate
TORNIER APPROACH. Shoulder Arthroplasty Program SURGICAL TECHNIQUE. Delivering efficiency & repeatability throughout the continuum of patient care
 TORNIER APPROACH Shoulder Arthroplasty Program SURGICAL TECHNIQUE Delivering efficiency & repeatability throughout the continuum of patient care 2 Table of Contents: APPROACH Program Overview...4 Instrument
Trabecular Metal Primary Patella
 Trabecular Metal Primary Patella NexGen Complete Knee Solution Surgical Technique Table of Contents Introduction... 2 Prepare the Patella... 2 Patella Reamer Technique... 3 Insetting Technique... 5 Universal
ARTHROTUNNELER TUNNELPRO SYSTEM
 TORNIER ARTHROTUNNELER TUNNELPRO SYSTEM Transosseous Rotator Cuff Repair SURGICAL TECHNIQUE ARTHROTUNNELER TUNNELPRO SYSTEM ARTHROTUNNELER Surgical Technique Step 1. Drill medial tunnel(s) to a positive
TABLE OF CONTENTS. 2 (8144 Rev 2)
") 1 (8144 Rev 2) TABLE OF CONTENTS Introduction Conventus CAGE TM - Proximal Humerus...3 Indications and Contraindications...4 Surgical Summary...5 Patient Positioning & Approach...6 Surgical Technique Plate
1 (8144 Rev 2) TABLE OF CONTENTS Introduction Conventus CAGE TM - Proximal Humerus...3 Indications and Contraindications...4 Surgical Summary...5 Patient Positioning & Approach...6 Surgical Technique Plate
MIS Cemented Tibial Component
 MIS Cemented Tibial Component NexGen Complete Knee Solution Surgical Technique Table of Contents Surgical Exposure... 2 Finish the Tibia... 2 Position Based on Anatomic Landmarks... 3 Lateral Posterior
Correction System. Surgical Technique
 Nextra Hammertoe Correction System Surgical Technique Maximized Bone Purchase* Stable and Secure Phalanx Optimized Screw Design Adjustable Bone-to-Bone Apposition Progressive Ratchet Tightening Mechanism
TaperFill. Surgical Technique
 TaperFill Surgical Technique Table of Contents Indications and Contraindications 3 TaperFill Hip Size Charts 4-5 DJO Surgical 9800 Metric Boulevard Austin, TX (800) 456-8696 www.djosurgical.com Preoperative
Integra. Modular Radial Head System SURGICAL TECHNIQUE
 Integra Modular Radial Head System SURGICAL TECHNIQUE Table of Contents System Overview...2 Indications and Contraindications... 3 Modular Radial Head Implant Technique...4 Component Dimensions...8 Implant
ReUnion. TSA Total Shoulder Arthroplasty System. Operative technique
 ReUnion TSA Total Shoulder Arthroplasty System Operative technique ReUnion TSA Shoulder System Operative technique ReUnion TSA Total Shoulder Arthroplasty System Surgical technique... 6 Patient positioning...
Zimmer Periarticular Proximal Humeral Locking Plate
 Zimmer Periarticular Proximal Humeral Locking Plate Surgical Technique The Science of the Landscape Zimmer Periarticular Proximal Humeral Locking Plate 1 Surgical Technique Table of Contents Introduction
Bigliani/Flatow The Complete Shoulder Solution TSA
 Bigliani/Flatow The Complete Shoulder Solution TSA Surgical Technique Replicates natural shoulder mobility, balance, and stability Bigliani/Flatow The Complete Shoulder Solution Surgical Technique 1 Bigliani/Flatow
Integra. Titan Modular Shoulder System, 2.5
 Titan Modular Shoulder System, 2.5 Limit uncertainty with a shoulder implant system that redefines modularity, addresses multiple indications, and allows for reproducible results. Titan Modular Shoulder
Surgical Technique. CONQUEST FN Femoral Neck Fracture System
 Surgical Technique CONQUEST FN Femoral Neck Fracture System Table of Contents Introduction... 3 Indications... 3 Product Overview... 4 Surgical Technique... 5 Patient Positioning... 5 Reduce the Fracture...
EXACTECH SHOULDER. Operative Technique. Reverse Superolateral Approach. Surgeon focused. Patient driven.
 EXACTECH SHOULDER Operative Technique Addendum to the Equinoxe Reverse Operative Technique Reverse Superolateral Approach Surgeon focused. Patient driven. TABLE OF CONTENTS INTRODUCTION... 1 OPERATIVE
AcUMEDr. Locking Proximal Humeral Plate. PoLARUSr PHPt
 AcUMEDr Locking Proximal Humeral Plate PoLARUSr PHPt PoLARUSr PHPt LOCKING PROXIMAL HUMERAL PLATE Since 1988 Acumed has been designing solutions to the demanding situations facing orthopedic surgeons,
PRIMARY POROUS PATELLA WITH TRABECULAR METAL. Surgical Technique
 PRIMARY POROUS PATELLA WITH TRABECULAR METAL Surgical Technique 1 SURGICAL TECHNIQUE FOR NEXGEN PRIMARY POROUS PATELLA * WITH TRABECULAR METAL CONTENTS PREPARE THE PATELLA............... 2 Patella Reamer
ASHCOM Shoulder. Anatomical Shoulder Stems meet Comprehensive Reverse. Surgical Technique
 ASHCOM Shoulder Anatomical Shoulder Stems meet Comprehensive Reverse Surgical Technique Table of Contents Indications and Contraindications... 2 Surgical Technique Summary... 3 Humeral Head Resection...
SHOULDER EXTRACTION INSTRUMENTS
 SHOULDER EXTRACTION INSTRUMENTS PRODUCT OVERVIEW Introducing the orthopaedic industry s first dedicated Shoulder Extraction Instrument set. DePuy Synthes Joint Reconstruction has created this set of instruments
TORNIER AEQUALIS PRESS-FIT. Shoulder System SURGICAL TECHNIQUE SURGICAL TECHNIQUE
 TORNIER AEQUALIS PRESS-FIT Shoulder System SURGICAL TECHNIQUE SURGICAL TECHNIQUE Table of Contents: Rationale of the AEQUALIS Press-Fit Prosthesis...3 The AEQUALIS Press-Fit Prosthesis...4 Surgical Technique...5
Surgical Technique. VISIONAIRE FastPak Instruments for the LEGION Total Knee System
 Surgical Technique VISIONAIRE FastPak Instruments for the LEGION Total Knee System VISIONAIRE FastPak for LEGION Instrument Technique* Nota Bene The technique description herein is made available to the
AEQUALIS TM REVERSED II
 TORNIER AEQUALIS TM REVERSED II SURGICAL TECHNIQUE Tornier Upper Extremities Contents Chapter 1 4 Chapter 2 6 6 6 6 7 24 Appendix A 26 Appendix B 27 Appendix C 35 Implant Description Surgical Technique
FUSEFORCE. Hand Fixation System SURGICAL TECHNIQUE
 FUSEFORCE Hand Fixation System SURGICAL TECHNIQUE Contents Chapter 1 3 Chapter 2 4 Appendix A 7 Intended Use Surgical Technique Ordering Information Indication Sizing Reference Proper surgical procedures
URSA HEMI-SHOULDER ARTHROPLASTY B I O T E K
 URSA HEMI-SHOULDER ARTHROPLASTY SURGICAL TECHNIQUE B I O T E K 2 Surgical Position Once general anesthesia has been satisfactorily induced, or a supraclavicular nerve block has been given, the patient
THE NATURAL FIT. Surgical Technique. Hip Knee Spine Navigation
 THE NATURAL FIT Surgical Technique Hip Knee Spine Navigation MiniMAX Surgical Technique Hip Knee Spine Navigation INTRODUCTION The MiniMAX TM is a cementless anatomic stem available in 9 right sizes and
ReUnion. TSA Total Shoulder Arthroplasty System. Operative technique
 ReUnion TSA Total Shoulder Arthroplasty System Operative technique ReUnion TSA Shoulder System Operative technique ReUnion TSA Total Shoulder Arthroplasty System Surgical technique... 6 Patient positioning...
Distal Cut First Femoral Preparation
 Surgical Technique Distal Cut First Femoral Preparation Primary Total Knee Arthroplasty LEGION Total Knee System Femoral preparation Contents Introduction...3 DCF femoral highlights...4 Preoperative planning...6
ZMR Over-the-Junction Instruments for Revision Hip Arthroplasty. Surgical Technique IMAGE TO COME
 ZMR Over-the-Junction Instruments for Revision Hip Arthroplasty Surgical Technique IMAGE TO COME ZMR Over-the-Junction Instruments for Revision Hip Arthroplasty Introduction The ZMR Over-the-Junction (OTJ)
Correction System. Surgical Technique
 Nextra Hammertoe Correction System Surgical Technique Maximized Bone Purchase* Stable and Secure Phalanx Optimized Screw Design Adjustable Bone-to-Bone Apposition Progressive Ratchet Tightening Mechanism
Arcos Modular Femoral Revision System. Broach and Calcar Proximal Bodies Surgical Technique
 Arcos Modular Femoral Revision System Broach and Calcar Proximal Bodies Surgical Technique Table of Contents Pre-operative Planning...2 Patient Positioning and Surgical Approach...2 Removal of a Cemented
D Degenerative joint disease, rotator cuff deficiency with, 149 Deltopectoral approach component removal with, 128
 Index A Abduction exercise, outpatient with, 193, 194 Acromioclavicular arthritis, with, 80 Acromiohumeral articulation, with, 149 Acromio-humeral interval (AHI), physical examination with, 9, 10 Active
Operative Technique Resurfacing Humeral Head
 EXACTECH SHOULDER Operative Technique Resurfacing Humeral Head TABLE OF CONTENTS INTRODUCTION...1 RESURFACING HUMERAL HEAD...1 SYSTEM SPECIFICATIONS...1 DETAILED OPERATIVE TECHNIQUE...2 PATIENT POSITIONING...2
Integral 180 Surgical Technique
 Integral 180 Surgical Technique The Integral 180 and 225 are part of the Alliance Family Total Hip System. The Integral 225 femoral component is marketed for use with bone cement in the United States.
LOWER EXTREMITIES SINGLE-USE INSTRUMENTATION SURGICAL IMPLANTATION TECHNIQUE. First Metatarsal Phalangeal Joint FOOT THE DIFFERENCE IS MOVING.
 LOWER EXTREMITIES SINGLE-USE INSTRUMENTATION SURGICAL IMPLANTATION TECHNIQUE First Metatarsal Phalangeal Joint FOOT THE DIFFERENCE IS MOVING. CARTIVA SYNTHETIC CARTILAGE IMPLANT SURGICAL IMPLANTATION TECHNIQUE
Silicone PIP, MCP & MCP-X (PreFlex)
") Silicone PIP, MCP & MCP-X (PreFlex) Finger Joint Arthroplasty Operative Technique Silicone PIP Silicone MCP Silicone PreFlex (MCP-X) Stryker Disclaimer This publication sets forth detailed recommended
Silicone PIP, MCP & MCP-X (PreFlex) Finger Joint Arthroplasty Operative Technique Silicone PIP Silicone MCP Silicone PreFlex (MCP-X) Stryker Disclaimer This publication sets forth detailed recommended
Turon Modular Shoulder System. Surgical Technique
 TM Turon Modular Shoulder System Surgical Technique DJO Surgical 9800 Metric Boulevard Austin, TX (800) 456-8696 www.djosurgical.com This brochure is presented to demonstrate a surgical technique. DJO
ANATOMICAL. REDEFINED.
 Operative Technique Fracture Stem Equinoxe Fracture Stem Operative Technique ANATOMICAL. REDEFINED. 352-377-1140 1-800-EXACTECH www.exac.com #718-00-33 REV A 0705 2005 EXACTECH, INC. ISO 13485 CERTIFIED
Sidus Stem-Free Shoulder. Surgical Technique
 Sidus Stem-Free Shoulder Surgical Technique Sidus Stem-Free Shoulder Surgical Technique 3 Table of Contents Enhanced Simplicity 4 Key Surgical Steps 6 Key Revision and Intra-operative Correction Surgical
LMH. Minimal Bone Resection. Lesser Metatarsal Head Implant. Thin, low-profile design for minimal bone resection
 Minimal Bone Resection LMH Lesser Metatarsal Head Implant Thin, low-profile design for minimal bone resection Stem offset dorsally for anatomically correct alignment in medullary canal Rectangular shape
Contents. Chapter 1 4 Chapter Chapter Chapter Chapter 5 15
 Contents Chapter 1 4 Chapter 2 5 5 Chapter 3 6 6 7 Chapter 4 8 8 8 8 9 10 10 11 12 13 14 14 Chapter 5 15 Introduction Intended Use Indications Device Description Implant Options and Sizing Instrumentation
PATIENT EDUCATION. Why Let Shoulder Pain Hold You Back? Embrace life with a ROTATOR CUFF REPAIR
 PATIENT EDUCATION Why Let Shoulder Pain Hold You Back? Embrace life with a ROTATOR CUFF REPAIR What to Expect Open shoulder surgery often requires a short stay in the hospital, whereas arthroscopic repairs
Total Shoulder System. Anatomic adaptability... simplified SURGICAL TECHNIQUE
 Total Shoulder System Anatomic adaptability... simplified SURGICAL TECHNIQUE Inclination Version Offset 125-140 +/- 10 3.5 mm A of Possibilities I I The Univers II Total Shoulder System was designed in
Clinical Evaluation Surgical Technique
 Clinical Evaluation Surgical Technique Table of Contents EMPERION Specifications 3 EMPERION Surgical Technique 9 EMPERION Catalog 18 Nota Bene: This technique description herein is made available to the
REVERSE SHOULDER ARTHROPLASTY
 REVERSE SHOULDER ARTHROPLASTY 1 INTRODUCTION REVERSE SHOULDER ARTHROPLASTY This surgical technique describes how to perform a reverse total shoulder arthroplasty implanting a pegged glenoid baseplate.
ACETABULAR CUP SURGICAL TECHNIQUE
 ACETABULAR CUP SURGICAL TECHNIQUE ACETABULAR CUP DEVICE INDICATIONS FOR USE The ICONACY I-Hip total hip replacement is indicated for the following conditions: 1. A severely painful and/or disabled hip
HUMELOCK II. Cemented + Graft ANATOMICAL and REVERSIBLE if REVISION SURGICAL TECHNIQUE
 TM HUMELOCK II Cemented + Graft ANATOMICAL and REVERSIBLE if REVISION SURGICAL TECHNIQUE CONTENTS - Device descriptionpage 02 - Intended use / indicationspage 03 - Warnings and precautions page 03 - Using
Encina Taper Stem. Stinson Orthopedics Inc. 303 Twin Dolphin Drive, Suite 600 Redwood City, CA
 Stinson Orthopedics Inc. 303 Twin Dolphin Drive, Suite 600 Redwood City, CA 94065 info@stinsonortho.com www.stinsonortho.com Table of Contents Introduction 3 Features 4 Surgical Technique 5 Preoperative