all ceramic all you need LABSIDE Instructions for Use
|
|
|
- Gillian Stephens
- 5 years ago
- Views:
Transcription


1 all ceramic all you need LABSIDE Instructions for Use
2 Table of Contents 3 IPS e.max System Practical Procedure Product Information 4 IPS e.max ZirCAD Scientific data Material Technical data Uses and safety information Material concept 13 Overview of the Clinical Working Steps, Fabrication Process Shade determination tooth shade, preparation shade Preparation guidelines Design criteria CAD/CAM processing 23 Processing Techniques General processing Brush infiltration of full-contour restorations Sintering Processing after sintering Staining technique Veneering technique Veneering in the layering technique Veneering in the press technique Veneering in the CAD-on technique General Information 43 Frequently Asked Questions Cementation and aftercare Sinter programs Combination tables Firing parameters Symbols in the Instructions for Use Important Information Contraindication Note on firing Tips & Tricks 2

3 Product Information System Given its versatility, its clinical long-term success and its wide range of indications, the IPS e.max System is the most successful and most used all-ceramic system throughout the world. It consists of a reliable lithium disilicate glass-ceramic (IPS e.max Press and CAD), an innovative zirconium oxide ceramic (IPS e.max ZirCAD) and a coordinated veneering ceramic (IPS e.max Ceram). The press-on ceramic IPS e.max ZirPress supplements the versatile system. Product Information IPS e.max System With the highly esthetic high-strength IPS e.max materials, all indications for fixed restorations, ranging from thin veneers to multi-unit bridges, can be realized. Hybrid restorations are also possible. The coordinated shade concept within the system and the individual products enable flexible working procedures from the shade determination up to the material selection. The ideal restoration shade is optimally reproduced by means of the IPS e.max Shade Navigation App. It facilitates the material selection, leads to results that feature optimum shade match and thus provides efficiency and reliability. IPS e.max is the comprehensive high-quality all-ceramic system for all indications, esthetic requirements and patient cases: it is all ceramic all you need. 3


 are listed in the Scientific Documentations for the")

4 No. 22 July 2016 Scientific data Since the beginning of the development, the IPS e.max System has been monitored by the scientific community. Many renowned experts have contributed to an excellent data base with their studies. The worldwide success story, the ever growing demand, as well as over 100 million fabricated restorations are testament to the success and the reliability of the system. More than 20 clinical in-vivo studies to date and even more in-vitro studies, as well as the continuously growing number of clinical studies throughout the world show the long-term success of the IPS e.max System in the oral cavities of the patients. The most important study results are compiled in the IPS e.max Scientific Report Vol. 2. Further scientific data (i.e. strength, wear, biocompatibility) are listed in the Scientific Documentations for the individual IPS e.max products. They can be obtained from Ivoclar Vivadent. For further information about all-ceramics and IPS e.max, please refer to the Ivoclar Vivadent Report No. 16 and 17 and the IPS e.max ZirCAD Scientific Documentation. More detailed information on the luting composite Variolink Esthetic can be found in the Ivoclar Vivadent Report No. 22 and the Variolink Esthetic Scientific Documentation, while details on Multilink Automix are contained in the Multilink Automix Scientific Report 2/2016. REPORT Research and Development Ivoclar Vivadent AG, 9494 Schaan / Liechtenstein Variolink Esthetic The esthetic luting composite 4

 variable incisal area, depending on the")
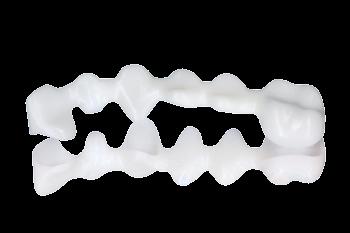
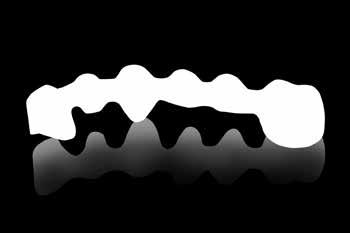
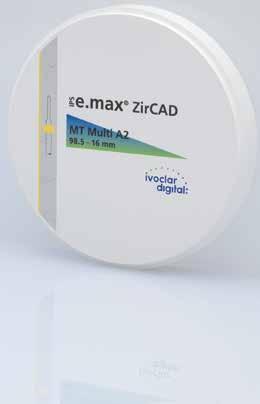
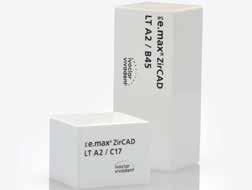
5 Product Information ZirCAD Material IPS e.max ZirCAD IPS e.max ZirCAD are materials for the universal fabrication of zirconium oxide restorations. A coordinated product portfolio and the fabrication with the modern CAD/CAM technology lead to efficient fabrication processes and reproducible esthetic results. IPS e.max ZirCAD MT Multi (Medium Translucency Multi) Product Information IPS e.max ZirCAD Material discs with shade and translucency gradation, same as in natural teeth one Bleach BL and seven A D shades (BL1, A1, A2, A3, B1, B2, C2, D2) variable incisal area, depending on the positioning in the disc good esthetics and high efficiency during fabrication individual characterization with the staining technique good reproducibility of the A-D shades disc thicknesses: 16 mm, 20 mm IPS e.max ZirCAD MT (Medium Translucency) non-shaded MT BL discs for the brush infiltration technique pre-shaded MT discs according to the A-D shade guide (A1, A2, A3, B1, B2, C2, D2) good esthetics and high efficiency during fabrication individual characterization with the infiltration technique (MT BL), cut-back and staining techniques disc thicknesses: 14 mm, 18 mm IPS e.max ZirCAD LT (Low Translucency) LT discs in seven group shades, one Bleach shade and seven A D shades (0, 1, 2, 3, 4, sun, sun chroma, BL, A1, A2, A3, B1, B2, C2, D2) individual esthetics with the brush infiltration technique, cut-back, layering and staining techniques LT blocks in one Bleach shade and seven A D shades (BL, A1, A2, A3, B1, B2, C2, D2) for the staining technique good optical properties combined with high strength suitable for crowns and up to multi-unit bridge restorations multi-unit framework structures and full-contour restorations as well as combinations of monolithic, partially and fully veneered restorations disc thicknesses: 10 mm, 12 mm, 14 mm, 16 mm, 18 mm, 20 mm, 25 mm; block sizes C17, B45 IPS e.max ZirCAD MO (Medium Opacity) MO discs in group shades ( 0, 1, 2, 3, 4 ) MO blocks in group shades ( 0, 1, 2 ) suitable for the layering, press-on and CAD-on techniques enhanced opacity to mask discoloured preparations and metal structures disc thicknesses: 10 mm, 14 mm, 18 mm, 20 mm, 25 mm; block sizes C13, C15, C15L, B40, B40L, B55, B65L-17 and B85L-22 for CEREC/inLab (Dentsply Sirona) 5

6 IPS e.max ZirCAD MT Colouring Liquids Shading for IPS e.max ZirCAD MT BL by way of brush infiltration before the sintering process Colouring liquids for shade infiltration in 16 A D tooth shades Five Effect liquids for the individual shade infiltration in shades blue, violet, grey, orange, brown IPS e.max ZirCAD LT Colouring Liquids Shading for IPS e.max ZirCAD LT full-contour restorations and frameworks by way of brush infiltration before the sintering process Colouring liquids for shade infiltration in 16 A D tooth shades Five Effect liquids for the individual shade infiltration in shades blue, violet, grey, orange, brown IPS e.max ZirCAD Colouring Liquid Indicator Marking colours to shade IPS e.max ZirCAD LT / MT Colouring Liquids. With brush infiltration, the infiltrated areas are made visible by means of IPS e.max ZirCAD Colouring Liquid Indicator. Available in three colours red, blue, yellow IPS e.max ZirCAD Colouring Liquid Diluter Liquid to dilute the IPS e.max ZirCAD MT or IPS e.max ZirCAD LT Colouring Liquids Detailed information on the available discs, block sizes and shades can be found in the CAD/CAM Block Overview at CAD/CAM Block Overview Block-Übersicht 6
7 Technical data Composition Material / Product IPS e.max ZirCAD MT Multi IPS e.max ZirCAD MT IPS e.max ZirCAD LT IPS e.max ZirCAD MO Zirconium oxide ( ZrO 2 ) % % % % Yttrium oxide ( Y 2O 3 ) > 6.5 % 8.0 % > 6.5 % 8.0 % > 4.5 % 6.0 % > 4.5 % 6.0 % Hafnium oxide ( HfO 2 ) 5.0 % 5.0 % 5.0 % 5.0 % Aluminium oxide ( Al 2O 3 ) 1.0 % 1.0 % 1.0 % 1.0 % Product Information IPS e.max ZirCAD Technical Data other oxides 1.0 % 1.0 % 1.0 % 1.0 % Properties Specification Typical mean value Specification Typical mean value Specification Typical mean value Specification Typical mean value CTE ( C) [10-6 /K] 10.4 ± ± ± ± 0.5 Flexural strength [MPa] Chemical solubility [μg/cm 2 ] < 100 < 100 < 100 < 100 Type / Class ( ISO 6872:2015 ) Type II / Class 4 Type II / Class 4 Type II / Class 5 Type II / Class 5 7
8 Uses and safety information IPS e.max ZirCAD discs and blocks Indications Translucency level Indications Full-contour crowns Full-contour 3-unit bridges Full-contour, 4- to multi-unit bridges with max. 2 pontics Crown frameworks 3- to multi-unit bridge frameworks with max. 2 pontics MT Multi Medium Translucency with shade gradation MT Medium Translucency * * LT Low Translucency MO Medium Opacity ** ** ** * IPS e.max ZirCAD MT and IPS e.max ZirCAD MT Multi are discs for the fabrication of restorations consisting of a maximum of three units. ** In Canada, bridge indications are limited to 6 units with a maximum of 2 connected pontics. Contraindications IPS e.max ZirCAD MT / MT Multi Veneering of MT Multi with IPS ex.max Ceram Bridge reconstructions consisting of more than 3 units Patients with severely reduced residual dentition Bruxism Any other use not listed in the indications Temporary seating IPS e.max ZirCAD LT / MO Bridge constructions with more than two connected bridge pontics Patients with severely reduced residual dentition Bruxism, for veneered IPS e.max ZirCAD LT / MO restorations Two or more connected extension units Any other use not listed in the indications Temporary insertion 8
9 Additional processing restrictions Failure to observe the following restrictions may compromise the results achieved with IPS e.max ZirCAD: Failure to observe the necessary minimum wall thicknesses and connector dimensions Milling the discs and blocks in a non-compatible CAD/CAM system Sintering in a non-compatible high-temperature furnace Side effects / warnings If patients are known to be allergic to any of the ingredients, IPS e.max ZirCAD restorations should not be used. The processing of IPS e.max ZirCAD discs and blocks produces dust which may irritate the skin and eyes and which may result in lung damage. Make sure that the suction equipment of your milling machine and at your workplace works flawlessly. Do not inhale grinding dust during finishing and wear a dust mask (particle class FFP2) as well as protective goggles. Observe the information in the Safety Data Sheet (SDS). Product Information IPS e.max ZirCAD Uses and Safety Information General notes on handling IPS e.max ZirCAD discs and blocks are delivered in their pre-sintered state. In this state, the material is easy to process, but does not yet have the known qualities, which it has as a finished restoration. Therefore, carefully handling is required. Please verify the delivery immediately upon receipt with regard to: Integrity of the packaging Integrity of the product (no disruptions, cracks or shade irregularities must be noticeable). The presence of the manufacturer s name, Ivoclar Vivadent, on the packaging as well as the presence of the CE marking. IPS e.max ZirCAD is best stored in the original packaging. in a dry place. When handling the IPS e.max ZirCAD discs and blocks, make sure that they... are not exposed to any blows or vibrations. are not touched with wet hands. only come into contact with liquids that have been approved for the product. Tap water, adhesives or pens etc., for example, are unsuitable. are not contaminated with foreign particles (e.g. glass-ceramic dusts, metal grinding dust). Safety information Carefully read these Instructions for Use before you remove the zirconium oxide discs or blocks from the packaging. They contain important information regarding processing, which are conductive to your safety and that of your patients. If not all the points in these Instructions for Use are observed, IPS e.max ZirCAD discs and blocks must not be used for the fabrication of dental restorations. 9
10 IPS e.max ZirCAD Colouring Liquids Indications IPS e.max ZirCAD Colouring Liquids are ready-to-use, aqueous metallic salt solutions to colour unsintered restorations made of IPS e.max ZirCAD MT BL and LT in the brush infiltration technique. Contraindications / usage restrictions Any other use not listed in the indications. General notes on handling Please verify the delivery immediately upon receipt with regard to: Integrity of the packaging Integrity of the product (clear liquid without cloudiness or sedimentation) The presence of the manufacturer s name, Ivoclar Vivadent, on the packaging as well as the presence of the CE marking. IPS e.max ZirCAD Colouring Liquids are best stored in the original packaging. at temperature between 2 C and 28 C (36 and 83 F) protected from direct sunlight When handling IPS e.max ZirCAD Colouring Liquids, the following points should be observed: The restoration must be free of dust and grinding residue. The Colouring Liquids must only come into contact with liquids that have been approved for the product. Tap water or liquids from other manufacturers, for example, are not suitable. The Colouring Liquids must not be contaminated. If there is cloudiness, the Colouring Liquids should no longer be used. Contamination promotes cloudiness (precipitation) or sedimentation of the Colouring Liquids. Do not decant and/or store the Colouring Liquids in metal containers. In general, contact with metal must be prevented. IPS e.max ZirCAD Colouring Liquids are applied with a clean, metal-free brush to the restoration. Warnings The usual increased care and hygiene required when handling chemicals must also be applied when handling the Colouring Liquids. Prevent direct skin contact, particularly in case of an allergy to one of the ingredients. After accidental skin contact, rinse with plenty of water. After eye contact, immediately rinse with plenty of water whilst holding the eyelid open and consult a physician. We recommend wearing gloves, protective goggles and suitable protective clothing. IPS e.max ZirCAD Colouring Liquids may cause stains on clothing and other surfaces. 10
11 IPS e.max ZirCAD Colouring Liquid Indicator IPS e.max ZirCAD Colouring Liquid Indicator are colour batches in red, blue and yellow to dye the IPS e.max ZirCAD Colouring Liquids. IPS e.max ZirCAD Colouring Liquids dyed with IPS e.max ZirCAD Colouring Liquid Indicator are used to verify the shading of zirconium oxide restorations in the brush infiltration technique before sintering. This makes it easier to achieve reproducible shade results. Indications IPS e.max ZirCAD Colouring Liquid Indicators are used for the temporary shading of IPS e.max ZirCAD Colouring Liquids. Contraindications / usage restrictions IPS e.max ZirCAD Colouring Liquid Indicators mixed with IPS e.max ZirCAD Colouring Liquids are not permanently colour stable. Therefore, IPS e.max ZirCAD Colouring Liquid Indicators should only be added immediately before application with the Colouring Liquids. They must not be used undiluted. Warnings Product Information IPS e.max ZirCAD Uses and Safety Information The usual increased care and hygiene required when handling chemicals must also be applied when handling the Colouring Liquids. Prevent direct skin contact, particularly in case of an allergy to one of the ingredients. After accidental skin contact, rinse with plenty of water. After eye contact, immediately rinse with plenty of water whilst holding the eyelid open and consult a physician. We recommend wearing gloves, protective goggles and suitable protective clothing. IPS e.max ZirCAD Colouring Liquids may cause stains on clothing and other surfaces. IPS e.max ZirCAD Colouring Liquid Diluter The IPS e.max ZirCAD Colouring Liquid Diluter is a liquid to dilute the IPS e.max ZirCAD MT / LT Colouring Liquids. This allows the creation of colouring liquids with a lower shading power which results in lighter hues. Indications IPS e.max ZirCAD MT Colouring Liquids IPS e.max ZirCAD LT Colouring Liquids Contraindications / usage restrictions Any other use not listed in the indications. 11
12 Material concept Translucency level Processing technique Staining technique Cut-back technique Layering technique Press-on technique CAD-on technique MT Multi Medium Translucency with shade gradation MT Medium Translucency LT Low Translucency MO Medium Opacity For further information about all-ceramics and IPS e.max, please refer to the Ivoclar Vivadent Report No. 16 and 17 and the IPS e.max ZirCAD Scientific Documentation. 12

13 Laboratory Practice Practical Procedure Overview of the Clinical Working Steps, Fabrication Process Intraoral scan Brush infiltration technique Full-contour restorations IPS e.max ZirCAD MT / LT Frameworks IPS e.max ZirCAD LT Working Steps Preparation, Determination of tooth shade and preparation shade Data recording Model fabrication Design (CAD) Fabrication (CAM) Separation Impression Full-contour restorations No infiltration Frameworks Practical Procedure Overview of the Clinical Working Steps, Fabrication Process Sintering Staining technique Veneering technique Full-contour restorations IPS e.max ZirCAD MT / MT Multi Partial veneer Cut-back IPS e.max ZirCAD MT / LT Full veneer Layering technique IPS e.max ZirCAD LT / MO Full veneer Press-on technique IPS e.max ZirCAD MO Full veneer CAD-on technique IPS e.max ZirCAD MO 13

14 Practical Procedure Shade determination tooth shade, preparation shade Block selection using the IPS e.max Shade Navigation App Optimum shade and shape integration in the oral cavity of the patient is the prerequisite for a true-to-nature all-ceramic restoration. Shade differences between the restoration and the natural residual dentition in particular, disturb the esthetic appearance. To achieve optimum shade integration, the following guidelines and notes must be observed. The overall esthetic appearance of an all-ceramic restoration is influenced by the following factors: Shade of the prepared tooth (natural tooth structure, die build-up, abutment, implant) Shade, translucency and layer thickness of the restoration (A1, A2, A3, HT, MT, LT, veneer, characterization) Shade of the cementation material. Factors influencing the overall shade effect Preparation shade Layer thickness Restoration Translucency Restoration Shade Restoration Shade Cementation material Desired tooth shade Upon the fabrication of high-quality esthetic restorations, these influencing factors must be taken into consideration. After all, only their interplay results in the overall shade effect. As the shade of the preparation and the layer thickness are usually difficult of control, and the shade of the cementation material only minimally affects the overall shade effect, the selection of the suitable translucency and shade of the IPS e.max discs and block is of critical important. The IPS e.max Shade Navigation App is used to determine the suitable blocks. The IPS e.max Shade Navigation App is the intelligent block/ingot/disc selection app for Android or ios smartphones and tablets. The app takes all the important influential factors into account and thus enables a very precise translucency and shade recommendation. 5 steps to find the suitable IPS e.max block: 1 Enter the tooth shade (Determined/desired tooth shade according to the A-D Shade Guide) Tips on shade determination: The tooth shade is determined on the non-prepared tooth or adjacent teeth after cleaning. Individual characteristics have to be considered when determining the tooth shade. In order to achieve as lifelike results as possible, shade determination should be carried out at daylight. Furthermore, the patient should not wear clothes with intensive colours and/or lipstick. For a flawless reproduction of the determined tooth shade, taking an additional digital photograph of the starting situation is recommended. 14 Another option for shade determination is provided by the Programat furnaces equipped with DSA function (Digital Shade Assistant). The integrated image processing software compares three preselected shade guide teeth with the tooth to be analyzed and automatically indicates the closest matching tooth shade. You can find additional information about this topic in the corresponding Programat Operating Instructions.
")
 Tips on determining the die shade: The die shade is determined with the IPS Natural Die Material")

15 2 3 Enter the indication (Veneer, inlay, etc.) Tips on selecting the indication: Not all possible indications are listed in the app. However, the following alternative indications can be used to define a suitable disc/block: Non-listed indications Alternative indications Bridge Crown Partial crown Onlay Occlusal veneer (table top) Onlay There are no alternative indications available for hybrid abutment and hybrid abutment crown. The material to be selected can be found in the corresponding Instructions for Use. Enter the die shade (Shade of the preparation defined with the IPS Natural Die Material shade guide) Tips on determining the die shade: The die shade is determined with the IPS Natural Die Material shade guide at the largest, most discoloured area of the tooth stump. If you are torn between two shades, always choose the darker one. The IPS Natural Die Material enables the fabrication of a model die similar to the preparation of the patient, on the basis of which the correct shade and brightness values of the all-ceramic restorations may be selected. Practical Procedure Shade Determination Tooth Shade, Preparation Shade Block Selection with the IPS e.max Shade Navigation App Example of the die shade effect ND 1 ND 2 ND 3 ND 4 ND 5 ND 6 ND 7 ND 8 ND 9 Restoration: Veneer (0.5 mm, IPS e.max CAD HT B1) Cementation material: Variolink Esthetic neutral Preparation shade: IPS Natural Die Material, ND 1 ND 9 15


16 4 Enter the layer thickness (Preparation depth and/or wall thickness of the restoration to be fabricated) Tips on determining the layer thickness: Determine the layer thickness either manually with calipers or digitally with of the CAD software. Crowns, veneers and copings are measured in the centre of the thinnest vestibular point. Inlays and onlays at the thinnest occlusal point. Manual determination of the layer thickness, in the centre of the thinnest, vestibular area Digital determination of the layer thickness, in the centre of the thinnest, vestibular area Example - Influence of layer thickness and translucency: Restoration: left: Veneer (0.5 mm, IPS e.max CAD HT B1); right: Crown (1.5 mm, IPS e.max CAD LT B1) Cementation material: Variolink Esthetic neutral Preparation shade: IPS Natural Die Material, ND 6 5 Enter the material (IPS e.max CAD, IPS e.max Press, IPS e.max ZirCAD) Tips on material selection: If a field is highlighted in grey in the material selection, the material is not suitable for the respective indication or layer thickness. = Result for the suitable block Tips on the result: The visual presentation of the result, permits the comparison of the restoration shade with the A D shade guide to recognize any necessary shade adjustments well in advance. More detailed information on the function and the procedure can be found under or directly in the app. 16

17 Preparation guidelines Before you begin with the actual construction, however, please ensure that the preparation is adequate for a ceramic restoration. Successful results can only be achieved with IPS e.max ZirCAD if the guidelines and minimum layer thicknesses are strictly observed. Basic preparation guidelines for all-ceramic restorations Do not prepare any angles and edges The ideal preparation is a shoulder preparation with rounded inner edges or a chamfer preparation. Anatomical tooth preparation with rounded edges The indicated dimensions reflect the minimum thickness for IPS e.max ZirCAD restoration. The radius of the edges of the prepared tooth, particularly in anterior teeth, must be at least as large as the radius of the smallest grinding instrument to ensure optimum grinding by the CAD/CAM unit. General preparation rules The anatomical shape of the tooth has to be evenly reduced according to the stipulated minimum wall thickness of the material used. For veneered restorations, the tooth structure must be reduced by another 1-2 mm in addition to the minimum wall thickness of the framework material used, depending on the intended veneering technique. 1.0 The ideal preparation is a shoulder preparation with rounded inner Shoulder preparation 1.5 edges or a chamfer preparation with a shoulder and/or chamfer width of 1 mm. For conventional and/or self-adhesive cementation, the preparation must demonstrate a retentive shape and sufficient preparation height. Preparation angles: 4 8 for conventional and semi-adhesive cementation, > 6 for adhesive cementation Chamfer preparation Practical Procedure Block Selection with the IPS e.max Shade Navigation App Preparation Guidelines Preparation guidelines for restorations made of IPS e.max ZirCAD MT / MT Multi Monolithic anterior crowns Incisal and/or occlusal reduction of the tooth structure by at least 0.8 mm Reduction in the labial or lingual area and in the cervical area by at least 0.8 mm Monolithic posterior crowns Occlusal reduction of the tooth structure by at least 1.0 mm Reduction in the vestibular or lingual area and in the cervical area by at least 1.0 mm When veneering IPS e.max ZirCAD MT crowns using the cut-back technique, the tooth structure has to be reduced by another 1.0 mm in the area of the intended veneer. 17
18 Monolithic crowns as bridge abutments in the anterior and posterior region Incisal and/or occlusal reduction of the tooth structure by at least 1.0 mm Reduction in the vestibular or lingual area and in the cervical area by at least 1.0 mm Preparation guidelines for monolithic restorations made of IPS e.max ZirCAD LT Monolithic anterior crowns Incisal and/or occlusal reduction of the tooth structure by at least 0.4 mm Reduction in the labial or lingual area and in the cervical area by at least 0.4 mm Monolithic posterior crowns Incisal and/or occlusal reduction of the tooth structure by at least 0.6 mm Reduction in the vestibular and/or lingual area and in the cervical area by at least 0.6 mm Monolithic bridge abutments in the anterior and posterior region Incisal and/or occlusal reduction of the tooth structure by at least 0.7 mm Reduction in the vestibular and/or lingual area and in the cervical area by at least 0.7 mm When veneering IPS e.max ZirCAD LT crowns using the cut-back technique, the tooth structure has to be reduced by another 1.0 mm in the area of the intended veneer. 18

19 Preparation guidelines for veneer frameworks made of IPS e.max ZirCAD LT and IPS e.max ZirCAD MO Anterior crown frameworks / cut-back crowns 1.0 Incisal and/or occlusal reduction of the tooth structure by at least mm Reduction in the labial and/or lingual area by at least 1.4 mm Reduction in the cervical area by at least 1 mm Practical Procedure Preparation Guidelines Bridge abutment frameworks for 3-unit bridges and 4- and multi-unit bridges in the anterior region Incisal and/or occlusal reduction of the tooth structure by at least 1.6 mm Reduction in the vestibular and/or lingual area by at least 1.6 mm Reduction in the cervical area by at least 1 mm Bridge abutment frameworks for 4- and multi-unit bridges in the posterior region Occlusal reduction of the tooth structure by at least 1.7 mm Reduction in the vestibular and/or lingual area by at least 1.7 mm Reduction in the cervical area by at least 1 mm Model and tooth preparation If a model with detachable segments is fabricated as the working base, the recommendations of the CAD/CAM system manufacturer have to observed regarding the use of the stone. Important for die preparation: Check the radius of the incisal/occlusal edge on the prepared dies. The radius of the edges of the prepared die, particularly with incisal edges, must be at least as large as the radius of the smallest grinding instrument to ensure optimum grinding by the CAD/CAM unit. If the incisal edge of the prepared die is thinner than the diameter of the cutter, the incisal edge has to be blocked out accordingly. Also observe the information provided by the manufacturer of the CAD/CAM system regarding the die geometry. 19

20 Design criteria High-quality materials as well as professional preparation and processing are the prerequisites for producing high-quality restorations, which fulfil the patient s requirements long-term. The design is an important key element of success for esthetic, durable and clinically successful all-ceramic restorations. Therefore, the following basic rules should be observed: Framework design Strive for an anatomical shape when designing frameworks. The design should support the veneering ceramic in the area of the cusps so that they can be built up with an even layer thickness of 1 2 mm. The Instructions for Use of the respective layering ceramic have to be observed. Minimum layer thicknesses and connector dimensions To achieve clinical success, the following minimum wall thicknesses and connector dimensions should not be underscored when processing IPS e.max ZirCAD discs/blocks: IPS e.max ZirCAD MT IPS e.max ZirCAD MT Multi Minimum layer thickness in mm Anterior region Connector dimensions in mm 2 Minimum layer thickness in mm Posterior region Connector dimensions in mm 2 Design type Crowns 3-unit bridges * supports the tooth shape and the gingiva shape ( incisal, occlusal and/or basal ) * Height: 4 mm, Width: 3 mm IPS e.max ZirCAD LT IPS e.max ZirCAD MO Minimum layer thickness in mm Anterior region Connector dimensions in mm 2 Minimum layer thickness in mm Posterior region Connector dimensions in mm 2 Design type Crowns unit bridges to multi-unit bridges with 2 pontics * supports the tooth shape and the gingiva shape ( incisal, occlusal and/or basal ) Cantilever bridges with one pontic * In Canada, bridge indications are limited to 6 units with a maximum of 2 connected pontics. 20
21 Framework design parameters for IPS e.max CAD Veneering Solutions (CAD-on technique) IPS e.max ZirCAD MO Minimum layer thickness in mm Connector dimensions in mm 2 Crowns 0.5 Practical Procedure Design Criteria 3-unit bridges to multi-unit bridges Failure to observe the stipulated framework design criteria and minimum thicknesses may result in clinical failures, such as cracks, delamination, and fracture of the restoration. Connector dimensions Aim for the largest possible dimensions when designing the connectors. The height of the connector is more important for the stability than the width. Doubling the width only results in double the stability, while doubling the height results in up to four times the stability. The greater the distance between the abutment teeth, the higher the mechanical stress on the construction and the exerted masticatory forces are going to be. Therefore, IPS e.max ZirCAD MT / MT Multi must not be used for bridge constructions with more than one pontic, while bridge constructions made of IPS e.max ZirCAD LT / MO must not have more than two pontics. For long-span bridge constructions (LT, MO), dimensions of 20 mm 2 are recommended for the connector between two bridge units, if there is enough space. Also, the height of the connector should be bigger than the width (e.g. height: 5 mm, width: 4 mm). 21
22 CAD/CAM process IPS e.max ZirCAD must be processed with an authorized CAD/CAM system. Additional information is available on the Internet from Positioning of IPS e.max ZirCAD MT Multi restorations within the disc (CAM software) To ensure that restorations made of IPS e.max ZirCAD MT Multi show a clearly visible enamel area, they must be positioned as highly as possible within the disc in the CAM software. As a reference: the restoration should be placed approximately 1 mm below the upper edge of the disc in the CAM software. Positioning of the IPS e.max ZirCAD MT Multi disc in the milling machine The discs have to be positioned in the milling machine in such a way that the imprinted side is oriented towards the incisal/ occlusal area of the restoration. The imprinted side thus corresponds with the incisal/occusal area. Positioning of 12 mm discs in the milling machine Discs with a thickness of 12 mm only feature one circumferential notch. They have to be positioned in the milling machine in such a way that the circumferential notch is pointing upwards. Using sintering support structures For bridge constructions made of IPS e.max ZirCAD LT/MO with more than five units, a sintering support structure must be designed at the object to be milled already at the CAM processing stage. Sintering support structures are divided into sintering drops, sintering frames and sintering tongues. The type of design for the sintering support structures depends on the sinter furnace used, the sintering base and the selected sintering program. If no adequate sintering support structure is attached to multi-unit bridges, there is a risk of distortion during the final sintering process and thus the risk that the completed restoration will not fit precisely. 22

23 Practical Procedure Processing Techniques General Processing Working steps after milling The correct choice of grinding instruments is imperative for finishing the restorations. This is true for both sintered and non-sintered objects. The use of unsuitable milling and grinding instruments may lead to local overheating of the material or to damage. The following aspects should be taken into consideration when separating the restorations: Non-sintered zirconium oxide restorations are susceptible to damage and fractures. This fact has to be kept in mind during the entire working procedure. Any post-processing should be carried out in the non-sintered state. In the non-sintered state, any contact with unsuitable liquids and liquids not approved for zirconium oxide (e.g. unpurified water and/or lubricant coolant) and/or contact media (e.g. occlusion spray) must be prevented. Use only light pressure for finishing. Do not, under any circumstances, post-separate bridge constructions with a separating disc. This may lead to predetermined breaking points in the area of the connectors and reduce the strength of the all-ceramic restoration. Make sure that the minimum wall thicknesses of the restorations are maintained during finishing. Practical Procedure Processing Techniques General Processing Wear protective gloves before separating the milled restorations. This is particularly recommended for restorations intended to be infiltrated with IPS e.max ZirCAD Colouring Liquids in a further processing step. Contaminated hands may leave a grease film or contaminations on the restorations, which may lead to an undesired shade result. Fine tungsten carbide burs or diamond grinding instruments are recommended for separating the restorations. The holding bars have to be notched on one side before the restoration is completely separated. Separating the restoration whilst wearing protective gloves Smooth out the attachment points of the holding bars with suitable grinding instruments. Rough tungsten carbide burs and/or grinding instruments are not suitable, as they may cause vibrations during finishing, which may result in chipping, among other things. Therefore, fine tungsten carbide burs and/or diamond grinding instruments are to be used. Do not use rubber polishers, as they condense the surface and lead to contaminations. Smoothing out the holding bar attachment points Clean the restoration thoroughly after finishing. To remove zirconium oxide dust, carefully clean it with a soft brush and then blast with oil-free compressed air. Adhering zirconium oxide dust may be sintered to the restoration and lead to fitting inaccuracies. The non-sintered restoration must not be cleaned in an ultrasonic bath or with the steam jet. The non-sintered restoration must not be blasted. 23


24 Brush infiltration of full-contour restorations IPS e.max ZirCAD MT Colouring Liquids are available for the infiltration of full-contour IPS e.max ZirCAD MT restorations and IPS e.max ZirCAD LT Colouring Liquids for IPS e.max ZirCAD LT restorations. Allocation of zirconium oxide and colouring liquids: Zirconium oxide Disc shades for Colouring liquid, shades infiltration IPS e.max ZirCAD MT BL IPS e.max ZirCAD MT Colouring Liquid, 16 A-D and 5 Effect shades IPS e.max ZirCAD LT See table (Pages 52-53) IPS e.max ZirCAD LT Colouring Liquid, 16 A-D and 5 Effect shades To visualize the colouring liquids, the indicator liquid IPS e.max ZirCAD Colouring Liquid Indicator is available. General notes on brush infiltration The restoration must be free of dust and grinding residue. Restorations fabricated by means of wet processing have to be completely dried before infiltration. The colouring liquids must not be contaminated. The colouring liquids have to be sealed when not in use. If there is cloudiness or precipitation (e.g. sediments), the colouring liquids should no longer be used. Cloudiness or precipitation of the colouring liquids is promoted by contamination. Do not decant and/or store the colouring liquids in metal containers. Apply IPS e.max ZirCAD Colouring Liquids with a clean, metal-free brush on the restoration. Do not use IPS e.max ZirCAD Colouring Liquid Indicator in an unmixed state. IPS e.max ZirCAD Colouring Liquid Indicator colour is not stable for longer periods of time. Store mixed solutions in a sealed container and use them within 4 hours. After longer storage, the reproducibility of the tooth shade in the sintered state is no longer ensured. Infiltrated restorations must be completely dried before sintering. 24


25 Mixing of IPS e.max ZirCAD Colouring Liquids and IPS e.max ZirCAD Colouring Liquid Indicator In order to visualize the colouring liquids during the application on the restoration, the colouring liquids are dyed with the IPS e.max ZirCAD Colouring Liquid Indicator (red, blue, yellow). For the dyeing of IPS e.max ZirCAD Colouring Liquids, it is recommended to follow the shade concept of the veneering ceramics. The red indicator liquid is recommended for the infiltration of the dentin area, the blue one for the incisal area. The IPS e.max ZirCAD Colouring Liquid Indicator yellow can be used for individual characterizations. Individual colours can be achieved by mixing the indicator colours. For example, blue and yellow result in a deep green. IPS e.max ZirCAD Colouring Liquid Indicator The IPS e.max ZirCAD Colouring Liquid jars are suitable for mixing the colouring liquids. Practical Procedure Brush Infiltration of Full-Contour Restorations It is advisable to wear protective gloves during the infiltration process. They help prevent skin irritation caused by the colouring liquids and the formation of a grease film on the restoration, which may compromise the infiltration of the colouring liquids. The IPS e.max ZirCAD MT Colouring Liquids and IPS e.max ZirCAD LT Colouring Liquids must not be mixed or combined. They may only be used on the intended zirconium oxide. A higher concentration of IPS e.max ZirCAD Colouring Liquid Indicator dilutes the IPS e.max ZirCAD Colouring Liquids further and reduces their shading effect. Please observe the following notes for brush infiltration: For the shading of the restorations according to A-D shades, there are shade allocation tables (on Pages 50, 52 and 53). The area designations used, e.g. inside, occlusal etc., are schematically represented in the following images. Three different brushes (IPS e.max ZirCAD Colouring Liquid Brush) are available for the liquid infiltration. They come in sizes 1, 3 and 5. IPS e.max ZirCAD Colouring Liquid Brushes in sizes 1, 3 and 5 (from left to right) The mixing ratio of the IPS e.max ZirCAD Colouring Liquid and IPS e.max ZirCAD Colouring Liquid Indicator is as follows: Mixing ratio: 25 drops of IPS e.max ZirCAD Colouring Liquid with 1 drop of IPS e.max ZirCAD Colouring Liquid Indicator IPS e.max ZirCAD Colouring Liquid IPS e.max ZirCAD Colouring Liquid Indicator 25


26 Brush infiltration is suitable for the individual shading of restorations made of IPS e.max ZirCAD MT and IPS e.max ZirCAD LT using the corresponding colouring liquids. The infiltration of full-contour restorations made of IPS e.max ZirCAD MT is only possible with MT BL. The infiltration of IPS e.max ZirCAD LT can be used for frameworks and full-contour restorations. For optimum shade match with the A-D shade guide, the infiltration of IPS e.max ZirCAD LT 0 and LT BL is recommended. To enhance the efficiency, optional infiltration of preshaded IPS e.max ZirCAD LT 1 and LT 2 is possible. Restorations made of IPS e.max ZirCAD MT and LT cannot be shaded by means of dip-infiltration, as the colouring liquids were designed for brush infiltration. This is the case for both monolithic restorations and frameworks. A distinction is made between basic and advanced brush infiltration. BASIC brush infiltration is used for the shading of the restorations in A-D shades according to the shade guide. The IPS e.max ZirCAD Colouring Liquids in A-D shades are used for this purpose. ADVANCED brush infiltration is individualized shading. IPS e.max ZirCAD Colouring Liquids in shades blue, violet, grey, orange and brown are used in addition to the BASIC application. Milled and finished crowns Crowns infiltrated according to the Basic diagram. Crowns infiltrated according to the Advanced diagram. The following infiltration diagram applies to both the IPS e.max ZirCAD MT Colouring Liquids and the IPS e.max ZirCAD LT Colouring Liquids. 26
 once (1x) with an even liquid quantity over the entire restoration using brush No. 5.")

 on the dentin and cervical area using brush No. 5.")

27 BASIC liquid infiltration (A-D shades) BASIC infiltration 1. Infiltrate the colouring liquid (A-D shades) once (1x) with an even liquid quantity over the entire restoration using brush No. 5. If a lighter incisal area is desired, infiltration may begin approximately 1 mm below the incisal edge. Posterior teeth are infiltrated in the same way as anterior teeth. Practical Procedure Brush Infiltration of Full-Contour Restorations Even infiltration over the labial surface Crown after the first infiltration step 2. Apply the colouring liquid with an even liquid quantity once (1x) on the dentin and cervical area using brush No. 5. In the incisal area of the anterior teeth, mamelons may be indicated by irregular gradation. The incisal edge and the cusp tips are not shaded in the second infiltration step. Crown after the second infiltration step 3. Infiltrate the colouring liquid once (1x) with an even liquid quantity in the cervical area of the restoration using brush No. 5. Crown after the third infiltration step For lighter tooth shades, waiving the third infiltration step is recommended, as the restorations may turn out to be too intensively shaded. 27


28 4. Finally, the inner surfaces of the crowns are infiltrated with a liquid application using brush No. 5. The inner incisal edges and the occlusal areas of the restorations are not shaded. Infiltration in the cervical area Infiltration of the inner dentin area ADVANCED liquid infiltration ADVANCED liquid infiltration is used for the individual characterization of monolithic crowns in the infiltration technique. This infiltration technique can be applied after BASIC infiltration. IPS e.max ZirCAD Colouring Liquids in shades blue, violet, grey, orange and brown are available for this purpose. Blue, violet and grey are mainly used for the individualization of the incisal or occlusal areas. Orange and brown can be used for the characterization of fissures, cervical and interdental areas. Orange can also be applied to outline mamelon structures in anterior teeth. Before ADVANCED infiltration, the restorations must be predried for 10 minutes at 70 C/158 F. ADVANCED infiltration is performed after BASIC infiltration The Effect shades must be applied very subtly. A trial firing is recommended before the first application of the Effect shades. Sample crowns or specifically fabricated shade tabs made of zirconium oxide are suitable for this purpose. Shade tabs infiltrated with brown, orange, violet, grey and blue (from left to right). 28


29 The IPS e.max ZirCAD Colouring Liquids can be diluted with the IPS e.max ZirCAD Colouring Liquid Diluter to diminish their shade effect. This is particularly recommended for the Effect shades. Left: violet applied undiluted; right: violet applied diluted For ADVANCED infiltration, the IPS e.max ZirCAD Colouring Liquid Brushes in sizes 1 and 3 are recommended. Practical Procedure Brush Infiltration of Full-Contour Restorations 1. Incisal effects may be achieved by the one-time application of shades blue, violet or grey using brush No. 1. Application of violet or grey in the incisal area 2. Additional shade effects may be achieved by applying other Effect shades. It is recommended to dye them with different IPS e.max ZirCAD Colouring Liquid Indicator colours. Additional shade effects with blue, grey and orange in the incisal area, as well as in the dentin and cervical area. The individual infiltration of posterior restorations is performed in the same way as anterior restorations. Individually infiltrated molar crown according to the ADVANCED infiltration diagram If ADVANCED infiltration is too intensive, the shade effect of the BASIC infiltration may be diminished. 29


30 Liquid infiltration of IPS e.max ZirCAD LT frameworks Frameworks are infiltrated using the BASIC infiltration technique. As an option, the frameworks can be individualized using the ADVANCED infiltration technique. Infiltration of a framework Sintered IPS e.max ZirCAD LT framework Notes on cleaning the IPS e.max ZirCAD Colouring Liquid Brushes After every infiltration or before every shade change, the infiltration brushes should be cleaned to prevent the shade result from being affected by shade residue of the previous infiltration. Clean the brushes under running water or in a glass of water. Subsequently, blot the brushes with an absorbent cloth. Cleaning and blotting the brushes Drying of the infiltrated restorations IPS e.max ZirCAD restorations infiltrated with IPS e.max ZirCAD Colouring Liquids have to be dried before sintering. Either a infrared lamp or a drying cabinet can be used for drying. The drying time depends on the temperature and the size of the object. Low temperatures and large objects delay the drying process. Drying at temperatures above 140 C/284 F may results in defects. The following table contains the recommended drying times. Drying of the infiltrated restorations under an infrared lamp Temperature 70 C/158 F Temperature up to 140 C/284 F Single tooth restorations 15 min 5 10 min Restorations with 2 to 4 units 40 min 25 min Bridges with 5 or more units 50 min 25 min 30


31 Sintering Sintering is one of the most important processes during the fabrication of IPS e.max ZirCAD restorations. During this process, the porous white body is turned into a densely sintered restoration by the effect of high temperatures. Only this fabrication step creates the final properties, such as the high strength and translucency. To achieve optimum mechanical and optical properties, it is absolutely mandatory that the defined sintering temperatures and times are observed at all times. Too low or too high sintering temperatures and/or too short or too long sintering times negatively affect the above properties. The sintering programs of the Programat S1/S sinter furnace from Ivoclar Vivadent are ideally coordinated with the optical and mechanical properties of IPS e.max ZirCAD restorations and lead to the best possible results. Practical Procedure Sintering Notes to be observed for sintering: Restorations infiltrated with colouring liquid must be completely dry to prevent damage to the furnace and/ or the object. In principle, sintering beads are not recommended for the Programat S1/S sinter furnace from Ivoclar Vivadent. The restorations must not come into contact with each other during sintering. The correct program selection must be observed. Always keep the sintering accessories clean and free of dust so that no contamination of the sintered restorations occurs. Make sure that the appropriate sintering support structure is selected for the respective furnace system. Sintering in the Programat S1/S sinter furnace The following points must be observed for sintering in the Programat S1/S1 1600: The sinter tray can be fully loaded with restorations Simultaneous sintering of crown and bridge frameworks as well as restorations with a sintering support structure is possible. For sintering without distortions, the restorations must be evenly supported. Bridge constructions should not be exclusively supported by the final abutment crowns. Preferably provide support to the pontics. The abutment crowns do not necessarily have to come into contact with the sinter tray. Ideally, bridge constructions should be positioned in concentric circles on the sinter tray. Note: Do not place any restorations over the groove in the sinter tray! Place the loaded sinter tray in the intended position in the centre of the Programat S1/S using the sinter fork. 31
32 correct o.k. incorrect Single-tooth anterior restorations Place the restorations on their labial surface. Place the restorations on their oral surface. Do not place the restorations on the crown margins. Single-tooth posterior restorations Place the restorations on their occlusal surface. Do not place the restorations on the crown margins. Three-unit anterior restorations Place the restorations on their labial surface and provide support to the pontic. If the restoration "tilts", select an alternative position. Positioning on the incisal edges. The pontic must also rest on the sinter tray. Do not support the restorations exclusively at the marginal edges. Three-unit posterior restorations Place the restorations on the buccal or oral surfaces depending on the curvature. Abutment crowns do not have to come into contact with the sinter tray. The pontic must be supported. Do not support the restorations exclusively at the crown margins. The pontic must be supported on the basal side. If the pontic does not support the restoration, the restoration must not be positioned on the occlusal surface. Anterior restorations with 4 units and more Place the restorations on their incisal surfaces. Make sure the pontics are supported. Depending on the curvature, the framework can be placed on its labial surfaces. All the pontics must come into contact with the sinter tray. Abutment crowns do not have to come into contact with the sinter tray. Do not support the restorations exclusively at the marginal edges on the sinter tray. Posterior restorations with 4 units and more Depending on the curvature, the framework can be placed on its buccal surfaces. All the pontics must come into contact with the sinter tray. Abutment crowns do not have to be supported on the sinter tray. Do not support the restorations exclusively at the crown margins. The pontics must be supported on the basal side. If the pontics do not support the restoration, the restoration must not be positioned on the occlusal surface. Restoration with sintering support structure 32 Place the restoration upright on the sinter tray with the sintering support structures resting on the tray. The restoration can also be placed on the sintering support structure and/or the incisal or occlusal surfaces of the pontics. Align the sintering support structure with the centre of the sinter tray. Do not support the restoration at the crown margins. Points of contact of the restoration with the sinter tray.

33 Processing after sintering After sintering, the restorations can be finished using suitable instruments. If diamond grinding instruments are used for finishing the restoration, water cooling is required to prevent local overheating. Observe the recommendations for grinding instruments suitable for zirconium oxide from Ivoclar Vivadent. Please observe the Ivoclar Vivadent flow chart "Recommended grinding tools for IPS e.max zirconium oxide". Practical Procedure Processing after Sintering The following recommendations apply for the further processing of densely sintered, cooled restorations. Finishing of sintered IPS e.max ZirCAD restorations should be kept to a minimum. The restoration should only be mechanically processed if it is absolutely necessary. Place IPS e.max ZirCAD restorations on the model, check fit and make slight adjustments, if necessary. Check marginal areas and finish, if necessary. Use only light pressure and low speed to adjust the restoration. Prevent sharp edges when finishing frameworks. Bridge connectors must not be post-separated with a separating disc. The material-specific minimum wall thicknesses and connector dimensions must not be underscored during processing. Use only immaculate grinding instruments. Check the restoration for defects and cracks before and after finishing. Remove zirconium oxide dust sintered to the restoration with suitable grinding instruments. As an alternative, zirconium oxide dust sintered to the restoration may be removed by blasting with a jet medium with a grain size of µm at a maximum pressure of 1.5 bar. Clean frameworks under running water or with the steam jet and dry before veneering. Polishing the occlusal surfaces of monolithic restorations is very important. Good polishing protects the antagonist from undesired abrasion. Make sure that the occlusal surfaces are carefully polished after functional adjustment by grinding. Commercially available polishers and polishing agents for oxide ceramics are recommended for polishing. Polish contact surfaces to the antagonist to a high gloss and subsequently clean them with the steam jet. Polishing of functional contact surfaces 33

34 Staining technique With the staining technique, restorations made of IPS e.max ZirCAD MT Multi, MT and LT may be individually characterized after sintering with very little effort by means of staining and glazing. The correct combination of disc or block shade and the stains to achieve the desired tooth shade can be easily determined with the help of the corresponding shade allocation table. The combination tables for the IPS Ivocolor stains can be found on Pages 58 and 59. As an option, labial or vestibular surfaces may be polished with rubber burs before glazing to achieve enhanced translucency and shade intensity. Fabricate dies using IPS Natural Die Material before staining the restorations. The light-curing IPS Natural Die Material simulates the shade of the preparation. Fabricate a die according to the shade information supplied by the dentist (shade selection), which serves as the optimum basis for a true-to-nature shade reproduction of the given oral situation. Die made of IPS Natural Die Material. Short Instructions Kurzanleitung IPS Natural Die Material Refer to the IPS Natural Die Material Short Instructions for information regarding die fabrication. coordinated with abgestimmt mit IPS e.max Shade Navigation App 34


 can be used.")
35 1 Stain and Characterization firing with IPS Ivocolor Below, the steps for staining and characterization with IPS Ivocolor are explained. For further information, refer to the IPS Ivocolor Instructions for Use. IPS Ivocolor Stains and Glazes Instructions for Use Practical Procedure Staining Technique Before the Stain and Characterization firing, the restoration must be free of dirt and grease. Clean the objects with a steam cleaner to remove any contaminations and grease residue. Any contamination after cleaning must be prevented. Wet the restoration surface with a little stains liquid to enhance the wettability. Mix the pastes or powders with the IPS Ivocolor Mixing Liquid allround or longlife to the desired consistency. To imitate the incisal area and translucency in the incisal or occlusal third, incisal stains (e.g. IPS Ivocolor Shade Incisal) can be used. The cusps and fissures of posterior teeth may be individually characterized with IPS Ivocolor Essence stains, such as mahogany, hazel or sunset. Conduct the Stain and Characterization firing using the stipulated firing parameters (Page 59). More intensive shades are achieved by repeated staining and firing, rather than by applying thicker layers. A more intensive application of stains results in inhomogeneous shading. 35

36 Glaze firing Glaze firing is conducted with a powder or paste glaze (IPS Ivocolor Glaze Powder/Paste FLUO). The fluorescent particles of these glazing materials result in a true-to-nature appearance of the final restoration. Observe the IPS Ivocolor Instructions for Use when using these glazing materials. Apply the glazing material in an evenly covering layer on the restoration. Too weak or missing proximal contacts may be applied with IPS Ivocolor Glaze. If the glazing material accidentally reaches the inner aspects of the restoration, remove it with a dry short-hair brush before firing. Conduct the Glaze firing with the stipulated firing parameters (Page 59) using the firing accessories of the respective furnace. Once the firing cycle is completed, remove the restoration from the furnace and allow it to cool to room temperature still on the firing tray in a place protected from draft. Do not touch the restoration with metal tongs. Glazing with IPS Ivocolor Glaze Paste FLUO Conduct the Glaze firing with IPS Ivocolor using the stipulated firing parameters (Page 59). If the gloss is unsatisfactory after the first Glaze firing, additional Glaze firing cycles may be conducted using the same firing parameters. The preparation shade and the wall thicknesses of the restoration decisively influence the final tooth shade. This is particularly true for dark preparation shades and low wall thicknesses. 36
 Layering technique (IPS e.max ZirCAD LT/MO) Press-on technique (IPS e.max ZirCAD MO) CAD-on technique (IPS e.")

 In the cut-back technique, mainly the incisal or occlusal areas of monolithic anterior and posterior teeth are reduced.")

37 Veneering technique Veneering technique Partial veneer / cut-back Full veneer Layering technique (IPS e.max ZirCAD MT/LT) Layering technique (IPS e.max ZirCAD LT/MO) Press-on technique (IPS e.max ZirCAD MO) CAD-on technique (IPS e.max ZirCAD MO) Practical Procedure Veneering Technique Veneering in the Layering Technique Veneering in the layering technique The layered ceramic build-up using IPS e.max Ceram can be carried out on IPS e.max ZirCAD MT, IPS e.max ZirCAD LT and IPS e.max ZirCAD MO. Partial veneer and cut-back veneer (IPS e.max ZirCAD LT and IPS e.max ZirCAD MT) In the cut-back technique, mainly the incisal or occlusal areas of monolithic anterior and posterior teeth are reduced. The reduced shape is then built up with veneering ceramics in the layering technique. With this technique, the esthetic appearance of the restorations can be improved with little effort in a few working steps. Restoration with cut-back Application of the veneering ceramic for the Wash firing. After that, the Wash firing is conducted. Individual characterization of the Wash (optional) with an additional firing cycle. 37

 Restorations made of IPS e.max ZirCAD LT and IPS e.")


38 Restoration with Wash firing Veneering with IPS e.max Ceram layering materials Completely layered restoration before the 1 st Dentin firing Completed restoration, stained and glazed. Shade allocation tables for the combination of framework shade, veneering ceramic and the desired tooth shade can be found on Page 55. Full veneer in the layering technique (IPS e.max ZirCAD MO and IPS e.max ZirCAD LT) Restorations made of IPS e.max ZirCAD LT and IPS e.max ZirCAD MO are suitable for a full veneer in the layering technique. IPS e.max ZirCAD MO is very well suited for masking discoloured preparations or abutments. IPS e.max ZirCAD LT is predestined for the fabrication of restorations, for which combinations of full-contour, partially veneered and/or fully veneered restoration units are required. To ensure even thickness of the veneer, the zirconium oxide framework has to be given a cusp-supporting design. Unshaded and preshaded material versions are available for the veneering of IPS e.max ZirCAD LT and MO. Application and firing of the IPS e.max Ceram ZirLiner is recommended before veneering unshaded IPS e.max ZirCAD MO 0. It provides the framework with a tooth shade. IPS e.max ZirLine is available in four shades. Please refer to the IPS e.max Ceram Instructions for Use for further information. An allocation table of the desired tooth shade and the IPS e.max Ceram veneering ceramic can be found on Page
. Subsequent ZirLiner firing.")


 is sprinkled on the restoration using a dry brush.")
39 Framework structures with reduced anatomical shade (anterior tooth, posterior bridge) Application of IPS e.max ZirLiner on the anterior framework (optional with MO 0). Subsequent ZirLiner firing. Practical Procedure Veneering in the Layering Technique There are two options for the application of the Wash: 1. Wash applied in the sprinkle technique Wash applied in the sprinkle technique (optional). If space is limited or to enhance the in-depth chroma, the sprinkle technique can be applied. For that purpose, IPS Ivocolor Shade, Essence and Glaze are mixed with the respective IPS Ivocolor Liquids to the desired consistency and applied in a covering layer on the entire framework. This is carried out after the ZirLiner has been fired. After that, the corresponding IPS e.max Ceram material (e.g. Dentin) is sprinkled on the restoration using a dry brush. Carefully remove excess with blown air or tap it off. After that, the Wash firing is conducted. Wash surface after firing 39


40 2. Wash applied with an instrument If there is an ideal amount of space available, conduct the Wash firing with the required IPS e.max Ceram Deep Dentin, Dentin, Transpa Incisal and/or Impulse material. Use the IPS Build-Up Liquids allround or soft to mix the materials. Apply the Wash in a thin, covering coat on the entire framework. Wash surface after firing Layering the restoration Completely fired restoration Completed restoration after Stain and Glaze firing. The IPS e.max Ceram Power Dentin and Power Incisal materials are recommended for veneering IPS e.max ZirCAD LT restorations. They were developed specifically for the veneering of translucent zirconium oxide materials and enable sufficient brightness of the restoration to be achieved. Please refer to the IPS e.max Ceram Instructions for Use for detailed information regarding the technique. IPSe.max Ceram Instructions for Use all ceramic all you need 40


41 Veneering in the press technique Press technique (IPS e.max ZirCAD MO) Practical Procedure Veneering in the Press Technique Apply IPS e.max ZirLiner and fire Modelling a full-contour wax-up Sprueing and investing the restoration Pressing and subsequent divesting of the restoration Finished and completed restoration. Please refer to the IPS e.max ZirPress Instructions for Use for detailed information regarding the technique. 41

42 Veneering in the CAD-on technique Veneering of IPS e.max ZirCAD MO In the IPS e.max CAD-on technique, a zirconium oxide framework is fused with a milled IPS e.max CAD veneering structure and crystallized. Please refer to the IPS e.max CAD Veneering Solution Instructions for Use for detailed information regarding the technique. IPSe.max CAD Veneering Solutions Instructions for Use all ceramic all you need IPS e.max CAD Veneering Solution restoration in its non-crystallized state IPS e.max CAD Veneering Solution restoration, crystallized and completed. 42
43 General Information ZirCAD Frequently Asked Question How do I recognize on which side the translucent layer for the incisal area is located in an IPS e.max ZirCAD MT Multi disc? The translucent layer is on the imprinted side of the disc. How does a restoration have to be positioned within an IPS e.max ZirCAD MT Multi disc so that it shows the desired shade gradation? The restoration has to be placed as high in the upper area of the disc as possible. Ideally, approximately one millimetre below the upper edge of the disc. General Information Frequently Asked Questions Can IPS e.max ZirCAD MT Multi restorations be infiltrated with IPS e.max ZirCAD Colouring Liquids? Infiltration of IPS e.max ZirCAD MT Multi for individual characterization is possible. It has to be carried out with the IPS e.max ZirCAD MT Colouring Liquid. Can IPS e.max ZirCAD MT Multi restorations be veneered? Veneering with layering ceramics has not been approved for IPS e.max ZirCAD MT Multi. Can IPS e.max ZirCAD MT restorations be infiltrated with IPS e.max ZirCAD LT Colouring Liquids? The IPS e.max ZirCAD MT/LT Colouring Liquids can only be used on zirconium oxide of the same translucency level. If restorations are shaded with colouring liquid of the other translucency level, the desired tooth shade is not achieved. Colouring liquids with different translucency levels must not be mixed. Can restorations of different translucency levels be sintered in one furnace program? With program No. 3 of the Programat S (software V5.0), restorations of all translucency levels can be sintered together. Can moist frameworks be sintered? Restorations must be fully dried before they are sintered. The drying time depends on the temperature and the size of the restoration. For drying the objects, a temperature of 140 C / 284 F must not be exceeded. If moist frameworks are sintered, there is a risk that tears and cracks are formed in the restoration. Can IPS e.max ZirCAD restorations be sandblasted with Al 2 O 3 prior to veneering? The restorations may only be blasted with Al 2 O 3 ( µm) at max.1.5 bar to remove milling dust sintered to the restoration. Intensive blasting with high pressure may lead to surface damage and interfere with the bond between framework and layering ceramic. The surface must be cleaned to enable a good bond. Therefore, the restoration should be cleaned under running water or with the steam jet before veneering. After cleaning, the surface should not be contaminated with foreign substances (e.g. skin lipids, saliva). 43
44 Does the surface of monolithic restorations have to be polished before being inserted in the patient's mouth? If occlusal contacts are adjusted by grinding in the patient's mouth, polishing is imperative. Failure to observe this instruction may cause damage to the antagonist. Can IPS e.max ZirCAD restorations be conventionally cemented? IPS e.max ZirCAD restorations can be cemented adhesively, self-adhesively, or conventionally. For conventional cementation, however, an appropriately retentive preparation design must be observed. If this is not possible, adhesive or self-adhesive cementation should be preferred, e.g. with Multilink Automix or SpeedCEM Plus. Vivaglass CEM is available for conventional cementation. It is not advisable to use traditional phosphate cements, as they would negatively influence the light transmission of the all-ceramic and therefore compromise the esthetic appearance of the all-ceramic restorations. 44
45 Cementation and Aftercare Cementation options Esthetic cementation options are decisive for the harmonious shade effect of an all-ceramic restoration. Depending on the indication, IPS e.max restorations can be seated using either adhesive, self-adhesive or conventional cementation. For the adhesive cementation of IPS e.max ZirCAD restorations, Multilink Automix is the ideal composite. For the self-adhesive cementation of IPS e.max ZirCAD restorations, SpeedCEM Plus is available. We recommend using Vivaglass CEM glass ionomer cement for the conventional cementation of IPS e.max ZirCAD. General Information Cementation and Aftercare Short definition of the different cementation methods: Adhesive cementation With adhesive cementation, the bond is also created by static friction, but primarily by the chemical and/or micromechanical bond between the cementation material and the restoration, as well as between the cementation material and the preparation. Given the chemical and/or micromechanical bond, retentive preparation is not required. Depending on the cementation material, specific adhesive systems are used on prepared teeth in order to achieve the micro-mechanical bond to dentin or enamel. Adhesive cementation results in enhanced "(overall) strength" of the seated all-ceramic restoration. Self-adhesive cementation The cementation material features self-adhesive properties on the tooth, which is why no additional special conditioning of the tooth surface is necessary. Hence, the adhesion of the restoration is partially achieved by a micromechanical and/ or chemical bond. In order to achieve sufficient bonding strength values, retentive preparation (preparation angle 4 8, preparation height at least 4 mm) is recommended. Self-adhesive cementation does not result in enhanced "(overall) strength" of the seated all-ceramic restoration. Conventional cementation With conventional cementation, the bond is almost entirely created by static friction between the cementation material and the restoration, as well as between the cementation material and the preparation. In order to obtain the necessary mechanical friction, a retentive preparation showing a preparation angle of approximately 4 8 is required. Conventional cementation does not result in enhanced "(overall) strength of the seated all-ceramic restoration. Preparing for cementation Conditioning of the restoration and preparation depends on the cementation method used, as well as the cementation material. The following paragraphs describe the basic working steps to prepare for cementation. Conditioning of the restoration Conditioning of the ceramic surface in preparation for cementation is decisive for a sound bond between the cementation material and the all-ceramic restoration. Observe the following procedure for IPS e.max ZirCAD restorations: Clean the surface of the IPS e.max ZirCAD restoration with Al 2 O 3 at max. 1 bar pressure before cementation. Thoroughly clean the IPS e.max ZirCAD restoration with water and blow dry. Saliva can easily be removed from the restoration by means of Ivoclean. For adhesive cementation, condition the bonding surface using Monobond Plus. IPS e.max ZirCAD MT Multi/MT/LT/MO Indication Crowns and bridges with/without pressed-on margin Cementation method adhesive self-adhesive/conventional Blasting Cleaning after try-in Cleaning with Al 2 O 3 at a maximum pressure of 1 bar (15psi). Ivoclean Conditioning with Monobond Plus for 60 s Cementation system Multilink Automix SpeedCEM, Vivaglass CEM PL 45
46 Conditioning of the preparation Before it is conditioned, the restoration is tried-in and the occlusion and articulation are checked. If adjustments of the restoration are required, the restoration must be polished extraorally in these areas before final seating. Any saliva can easily be removed from the restoration by means of Ivoclean. Conditioning of the restoration and preparation depends on the cementation material used and is carried out according to the respective Instructions for Use. If adjustment by grinding in the oral cavity of the patient is necessary, the ground-in surfaces have to smoothed and polished. Please observe "Recommended grinding instruments for ceramics in the dental practice"! More detailed information are part of the Cementation Navigation System ( CNS Care Notes Same as natural teeth, high-quality IPS e.max ZirCAD restorations require regular professional care. This is not only beneficial to the health of the gingiva and teeth, but also to the overall esthetic appearance. The pumice-free Proxyt pink polishing paste is used to care for the surfaces without causing any wear. The low RDA* value = 7 (*Relative Dentin Abrasion) is a reliable confirmation that a low-abrasion cleaning paste is used. Scientific investigations and long-term clinical experience have proved the gentle effect compared to other pastes. 46
47 Sintering programs Sintering programs Programat S1 1600, Software V 5.0 Program Name Description Duration Programat 1 IPS e.max ZirCAD MT Multi crown/bridge 2 IPS e.max ZirCAD MT crown/ bridge 3 IPS e.max ZirCAD MT Multi/ MT/LT/MO standard Program for the quick sintering of IPS e.max ZirCAD MT Multi Program for the quick sintering of IPS e.max ZirCAD MT Standard program for the conventional sintering of IPS e.max ZirCAD MT Multi/MT/LT/MO restorations and dried, infiltrated IPS e.max ZirCAD MT and LT restorations. 4 IPS e.max ZirCAD LT crown Program for the quick sintering of IPS e.max ZirCAD LT crowns 5 IPS e.max ZirCAD LT bridge (up to 14 units) Program for the quick sintering of IPS e.max ZirCAD LT bridges with up to 14 units 6 IPS e.max ZirCAD MO crown Program for the quick sintering of IPS e.max ZirCAD MO crown frameworks 7 IPS e.max ZirCAD MO bridge (up to 4 units) 8 IPS e.max ZirCAD MO bridge (up to 14 units) 9 IPS e.max ZirCAD MO standard Program for the quick sintering of IPS e.max ZirCAD MO bridge frameworks with up to 4 units Program for the quick sintering of IPS e.max ZirCAD MO bridge frameworks with up to 14 units Standard program for the sintering of IPS e.max ZirCAD MO frameworks 4h 25 min 2h 30 min 9 h 50 min 2 h 55 min 4 h 30 min 75 min 90 min 2 h 45 min 7 h 20 min 10 Zenostar MT crown/bridge Program for the quick sintering of Zenostar MT 2 h 30 min 11 Zenostar MT/T standard Standard program for the sintering of Zenostar MT/T 9 h 50 min Dosto Tray General Information Sintering Programs 12 Zenostar T crown Program for the quick sintering of Zenostar T crowns 2 h 55 min 13 Zenostar T bridge (up to 14 units) Program for the quick sintering of Zenostar T bridges with up to 14 units 14 Zenostar MO crown Program for the quick sintering of Zenostar MO crown frameworks 15 Zenostar MO bridge (up to 4 units) 16 Zenostar MO bridge (up to 14 units) Program for the quick sintering of Zenostar MO bridge frameworks with up to 4 units Program for the quick sintering of Zenostar MO bridge frameworks with up to 14 units 17 Zenostar MO standard Standard program for the sintering of Zenostar MO frameworks 18 Zenotec Zr Bridge crown Program for the quick sintering of Zenotec Zr Bridge crown frameworks 19 Zenotec Zr Bridge bridge (up to 4 units) 20 Zenotec Zr Bridge bridge (up to 14 units) Program for the quick sintering of Zenotec Zr Bridge bridge frameworks with up to 4 units Program for the quick sintering of Zenotec Zr Bridge bridge frameworks with up to 14 units 21 Zenotec Zr Bridge standard Standard program for the sintering of Zenotec Zr Bridge frameworks 22 Regeneration firing Program for the regeneration of IPS e.max ZirCAD frameworks after excessive working Individual programs 4 h 30 min 75 min 90 min 2 h 45 min 7 h 20 min 75 min 90 min 2 h 45 min 9 h 50 min 60 min 47
48 Sintering programs Programat S1, Software V 3.0 Sintering programs Programat S1 1600, Software V 4.0 Allocation for IPS e.max ZirCAD MT Multi/MT/LT/MO Program Name Duration IPS e.max ZirCAD MO Crown 1 IPS e.max ZirCAD Crown 75 min IPS e.max ZirCAD MO Bridge (4 units) 2 IPS e.max ZirCAD Bridge (4 units) 90 min IPS e.max ZirCAD MO Bridge (14 units) 3 IPS e.max ZirCAD Bridge (14 units) 2 h 45 min IPS e.max ZirCAD MO Standard 4 IPS e.max ZirCAD Sintramat 7 h 20 min IPS e.max ZirCAD LT Crown 5 Zenostar T Crown 2 h 55 min IPS e.max ZirCAD LT Bridge (14 units) 6 Zenostar T Bridge (14 units) 4 h 30 min IPS e.max ZirCAD MT Multi/MT/LT/MO Standard 7 Zenostar T Standard 9 h 50 min IPS e.max ZirCAD MO Crown 8 Zenostar MO Crown 75 min IPS e.max ZirCAD MO Bridge (4 units) 9 Zenostar MO Bridge (4 units) 90 min IPS e.max ZirCAD MO Bridge (14 units) 10 Zenostar MO Bridge (14 units) 2 h 45 min IPS e.max ZirCAD MO Standard 11 Zenostar MO Standard 7 h 20 min 12 Zenotec Zr Bridge Crown 75 min 13 Zenotec Zr Bridge (4 units) 90 min 14 Zenotec Zr Bridge (14 units) 2 h 45 min 15 Zenotec Zr Bridge Standard 9 h 50 min 16 FCZ Crown 2 h 55 min 17 FCZ Bridge 4 h 30 min 18 ZrO 2 Speed 4 h 20 min 19 ZrO 2 conventional 7 h 40 min 20 ZrO 2 F 3 h 30 min 21 Regeneration Firing 60 min Programs are not suitable for IPS e.max ZirCAD MT Multi/MT/LT/MO. Pre-dried restorations infiltrated with IPS e.max ZirCAD MT/LT Colouring Liquids must be sintered using the long-term program No. 7. Standard program for furnaces from other manufacturers (IPS e.max ZirCAD MT Multi/MT/LT/MO) Temperature 1 [ C] Temperature 2 [ C] Heating rate [ C/h] Holding time [h] Heating stage Holding stage Heating stage Holding stage Cooling stage Cooling stage Switch-Off If sinter furnaces from other manufacturers are used, it must be made sure that the final temperature of the sinter furnace corresponds with the target temperature. Temperature deviations may lead to discrepancies regarding shade and translucency. 48
49 Sintering programs Zenotec sinter furnaces For the sintering process in the Zenotec high-temperature furnaces, the following points should be observed: If a standard program is used, it is recommended to sinter the restorations on a sintering support base plate under a high-purity Al 2 O 3 cover. All standard sintering programs are matched to this equipment. Fast sintering programs may only be conducted with a special sintering support base plate without cover. The fast sintering programs are only approved for IPS e.max ZirCAD LT and MO single-tooth restorations. Check sintering equipment regularly to make sure that they are clean and work properly. General Information Sintering Programs Sintering programs for the Zenotec Fire P1 sinter furnace Standard programs for IPS e.max ZirCAD MT Multi / MT/ LT / MO (1450 C/2642 F) Temperature 1 [ C] Temperature 2 [ C] Heating rate [ C/h] Holding time [h] Heating phase Holding phase Heating phase Holding phase Cooling phase Cooling phase switch-off Fast sintering program for IPS e.max ZirCAD LT / MO (only for single-tooth restorations) Temperature 1 [ C] Temperature 2 [ C] Heating rate [ C/h] Holding time [h] Heating phase Holding phase Cooling phase switch-off Sintering programs for the Zenotec Fire Cube sinter furnace Standard programs for IPS e.max ZirCAD MT Multi / MT / LT / MO (1500 C/2732 F) Temperature 1 [ C] Temperature 2 [ C] Heating rate [ C/h] Holding time [h] Heating phase Holding phase Heating phase Holding phase Cooling phase Cooling phase switch-off Fast sintering program Zenotec Fire Cube (only for single-tooth restorations) Temperature 1 [ C] Temperature 2 [ C] Heating rate [ C/h] Holding time [h] Heating phase Holding phase Cooling phase switch-off 49
50 Combination tables IPS e.max ZirCAD MT Multi Staining technique (monolithic restorations) Tooth shade IPS e.max ZirCAD MT Multi Staining technique with IPS Ivocolor BL1 MT Multi BL Shade Dentin 0 BL2 MT Multi BL Shade Dentin 0 BL3 MT Multi BL Shade Dentin 2 BL4 MT Multi BL Shade Dentin 2 A1 MT Multi A1 Shade Dentin 1 A2 MT Multi A2 Shade Dentin 2 A3 MT Multi A3 Shade Dentin 2 A3.5 MT Multi A3 Shade Dentin 2 B1 MT Multi B1 Shade Dentin 4 B2 MT Multi B2 Shade Dentin 4 B3 MT Multi B2 Shade Dentin 5 C1 MT Multi B1 Shade Dentin 6 C2 MT Multi C2 Shade Dentin 6 C3 MT Multi C2 Shade Dentin 6 D2 MT Multi D2 Shade Dentin 7 D3 MT Multi D2 Shade Dentin 7 Shade Incisal 1/2/3 50
51 IPS e.max ZirCAD MT BL Infiltration technique and/or staining technique (monolithic restorations) Tooth shade IPS e.max ZirCAD MT BASIC infiltration with IPS e.max ZirCAD MT Colouring Liquids 1x complete (leave incisal area somewhat uncovered for lighter shades) 1x dentin infiltration (inside and outside) 1x cervical* ADVANCED infiltration with IPS e.max ZirCAD MT Colouring Liquids BL1 MT BL Shade Dentin 0 Staining technique with IPS Ivocolor General Information Combination Tables BL2 MT BL Shade Dentin 0 BL3 MT BL Shade Dentin 2 BL4 MT BL Shade Dentin 2 A1 MT BL A1 Shade Dentin 1 A2 MT BL A2 Shade Dentin 2 A3 MT BL A3 Shade Dentin 2 A3.5 MT BL A3.5 Shade Dentin 2 A4 MT BL A4 Shade Dentin 3 B1 MT BL B1 B2 MT BL B2 Shade Dentin 4 Shade Dentin 4 Shade Incisal 1/2/3 B3 MT BL B3 B4 MT BL B4 Individual infiltration with Shade Dentin 5 blue, violet, grey, orange, brown Shade Dentin 5 C1 MT BL C1 Shade Dentin 6 C2 MT BL C2 Shade Dentin 6 C3 MT BL C3 Shade Dentin 6 C4 MT BL C4 Shade Dentin 6 D2 MT BL D2 Shade Dentin 7 D3 MT BL D3 Shade Dentin 7 D4 MT BL D4 Shade Dentin 6 *For lighter tooth shades, it is recommended not to infiltrate the cervical area of the restoration, as it may turn out too intensively shaded. 51
52 IPS e.max ZirCAD MT preshaded Staining technique (monolithic restorations) Tooth shade IPS e.max ZirCAD MT Staining technique with IPS Ivocolor BL1 MT BL Shade Dentin 0 BL2 MT BL Shade Dentin 0 BL3 MT BL Shade Dentin 2 BL4 MT BL Shade Dentin 2 A1 MT A1 Shade Dentin 1 A2 MT A2 Shade Dentin 2 A3 MT A3 Shade Dentin 2 A3.5 MT A3 Shade Dentin 2 A4 MT A3 Shade Dentin 3 B1 MT B1 Shade Dentin 4 B2 MT B2 Shade Dentin 4 B3 MT A3 Shade Dentin 5 B4 MT A3 Shade Dentin 5 C1 MT B1 Shade Dentin 6 C2 MT C2 Shade Dentin 6 C3 MT C2 Shade Dentin 6 C4 MT C2 Shade Dentin 6 D2 MT D2 Shade Dentin 7 D3 MT D2 Shade Dentin 7 D4 MT C2 Shade Dentin 6 Shade Incisal 1/2/3 52
53 IPS e.max ZirCAD LT 0/LT BL Infiltration technique and/or staining technique (monolithic restorations) Tooth shade IPS e.max ZirCAD LT BASIC infiltration with IPS e.max ZirCAD LT Colouring Liquids 1x complete (leave incisal area somewhat uncovered for lighter shades) 1x dentin infiltration (inside and outside) 1x cervical* ADVANCED infiltration with IPS e.max ZirCAD LT Colouring Liquids BL1 LT 0/LT BL Shade Dentin 0 Staining technique with IPS Ivocolor General Information Combination Tables BL2 LT 0/LT BL Shade Dentin 0 BL3 LT 0/LT BL Shade Dentin 2 BL4 LT 0/LT BL Shade Dentin 2 A1 LT 0/LT BL A1 Shade Dentin 1 A2 LT 0/LT BL A2 Shade Dentin 2 A3 LT 0/LT BL A3 Shade Dentin 2 A3.5 LT 0/LT BL A3.5 Shade Dentin 2 A4 LT 0/LT BL A4 Shade Dentin 3 B1 LT 0/LT BL B1 B2 LT 0/LT BL B2 B3 LT 0/LT BL B3 B4 LT 0/LT BL B4 Shade Dentin 4 Shade Dentin 4 Individual infiltration with blue, violet, grey, orange, brown Shade Dentin 5 Shade Dentin 5 Shade Incisal 1/2/3 C1 LT 0/LT BL C1 Shade Dentin 6 C2 LT 0/LT BL C2 Shade Dentin 6 C3 LT 0/LT BL C3 Shade Dentin 6 C4 LT 0/LT BL C4 Shade Dentin 6 D2 LT 0/LT BL D2 Shade Dentin 7 D3 LT 0/LT BL D3 Shade Dentin 7 D4 LT 0/LT BL D4 Shade Dentin 6 *For lighter tooth shades, it is recommended not to infiltrate the cervical area of the restoration, as it may turn out too intensively shaded. 53
54 IPS e.max ZirCAD LT 1 and LT 2 Infiltration technique and staining technique (monolithic restorations) Tooth shade IPS e.max ZirCAD LT BASIC infiltration with IPS e.max ZirCAD LT Colouring Liquids 1x dentin infiltration of the crown A1 LT 1 A1 A2 LT 1 A2 2x outside A3 LT 2 A3 2x outside A3.5 LT 2 A3.5 2x outside A4 LT 2 A4 2x outside B1 LT 1 B1 B2 LT 1 B2 2x outside B3 LT 2 B3 B4 LT 2 B4 2x outside C1 LT 1 C1 2x outside C2 LT 1 C2 2x outside C3 LT 1 C3 2x outside D3 LT 2 D3 2x outside 1 x cervical infiltration ADVANCED infiltration with IPS e.max ZirCAD LT Colouring Liquids Individual infiltration with blue, violet, grey, orange, brown Staining technique with IPS Ivocolor Shade Dentin 1 Shade Dentin 2 Shade Dentin 2 Shade Dentin 2 Shade Dentin 3 Shade Dentin 4 Shade Dentin 4 Shade Dentin 5 Shade Dentin 5 Shade Dentin 6 Shade Dentin 6 Shade Dentin 6 Shade Dentin 7 Shade Incisal 1/2/3 54
55 IPS e.max ZirCAD LT Staining technique (monolithic restorations) Tooth shade IPS e.max ZirCAD LT Staining technique with IPS Ivocolor BL1 LT 0 Shade Dentin 0 BL2 LT 0 Shade Dentin 0 BL3 LT 0 Shade Dentin 2 BL4 LT 1 Shade Dentin 2 LT A1 Shade Dentin 0 A1 LT 1 Shade Dentin 3 LT sun LT A2 Shade Dentin 1 A2 LT 1 Shade Dentin 2 LT sun LT A3 Shade Dentin 2 A3 LT 2 Shade Dentin 3 LT sun LT A3 A3.5 LT 4 LT sun chroma Shade Dentin 2 LT A3 A4 LT 4 LT sun chroma Shade Dentin 6 LT B1 Shade Dentin 4 B1 LT 1 Shade Dentin 6 LT B2 B2 LT 1 Shade Dentin 4 Shade Incisal 1/2/3 LT sun LT B2 Shade Dentin 4 B3 LT 3 Shade Dentin 7 LT sun LT B2 Shade Dentin 4 B4 LT 3 Shade Dentin 5 LT sun LT D2 Shade Dentin 6 C1 LT 1 Shade Dentin 8 LT C2 Shade Dentin 6 C2 LT 2 Shade Dentin 8 LT C2 Shade Dentin 6 C3 LT 2 Shade Dentin 8 LT C2 Shade Dentin 6 C4 LT 4 Shade Dentin 8 LT D2 Shade Dentin 7 D2 LT 2 Shade Dentin 8 LT sun LT D2 Shade Dentin 7 D3 LT 2 Shade Dentin 7 LT sun LT D2 Shade Dentin 6 D4 LT 2 Shade Dentin 8 General Information Combination Tables Darker shades require several stain firing cycles. 55
56 IPS e.max ZirCAD LT/MO Layering technique Tooth shade BL1 BL2 BL3 BL4 A1 A2 A3 A3.5 A4 B1 B2 B3 B4 C1 C2 IPS e.max ZirCAD disc IPS e.max Ceram Dentin/ Power Dentin IPS e.max Ceram Transpa Incisal/ Power Incisal MO 0 D BL1 I BL LT 0 PD BL1 PI BL LT BL PD BL1 PI BL MO 0 D BL2 I BL LT 0 PD BL2 PI BL LT BL PD BL2 PI BL MO 0 D BL3 I BL LT 0 PD BL3 PI BL LT BL PD BL3 PI BL MO 0 D BL4 I BL LT 0 PD BL4 PI BL LT BL PD BL4 PI BL MO 1 D A1 TI 1 LT 1 PD A1 PI 1 LT B1 PD A1 PI 1 MO 1 D A2 TI 1 LT 1 PD A2 PI 1 LT B1 PD A2 PI 1 MO 2 D A3 TI 2 LT 2 PD A3 PI 2 LT A2 PD A3 PI 2 MO 2 D A3.5 TI 2 LT 2 PD A3.5 PI 2 LT A2 PD A3.5 PI 2 MO 4 D A4 TI 3 LT 4 PD A4 PI 3 LT C2 PD A4 PI 3 MO 1 D B1 TI 1 LT 1 PD B1 PI 1 LT B1 PD B1 PI 1 MO 1 D B2 TI 1 LT 1 PD B2 PI 1 LT B1 PD B2 PI 1 MO 3 D B3 TI 1 LT 3 PD B3 PI 1 LT B2 PD B3 PI 1 MO 3 D B4 TI 2 LT 3 PD B4 PI 2 LT B2 PD B4 PI 2 MO 1 D C1 TI 1 LT 1 PD C1 PI 1 LT C2 PD C1 PI 1 MO 4 D C2 TI 3 LT 4 PD C2 PI 3 LT C2 PD C2 PI 3 56
57 C3 C4 D2 D3 D4 MO 4 D C3 TI 3 LT 4 PD C3 PI 3 LT C2 PD C3 PI 3 MO 4 D C4 TI 3 LT 4 PD C4 PI 3 LT C2 PD C4 PI 3 MO 2 D D2 TI 3 LT 2 PD D2 PI 1 LT C2 PD D2 PI 1 MO 4 D D3 TI 3 LT 4 PD D3 PI 2 LT C2 PD D3 PI 2 MO 4 D D4 TI 3 LT 4 PD D4 PI 3 LT C2 PD D4 PI 3 General Information Combination Tables 57
58 IPS e.max ZirCAD MO Press-on technique Tooth shade IPS e.max ZirCAD disc IPS e.max ZirLiner IPS e.max ZirPress BL1 MO 0 ZL clear BL1 BL2 MO 0 ZL clear BL2 BL3 MO 0 ZL clear BL3 BL4 MO 0 ZL clear BL4 A1 MO 1 ZL clear A1 A2 MO 1 ZL clear A2 A3 MO 2 ZL clear A3 A3.5 MO 2 ZL clear A3.5 A4 MO 4 ZL clear A4 B1 MO 1 ZL clear B1 B2 MO 1 ZL clear B2 B3 MO 3 ZL clear B3 B4 MO 3 ZL clear B4 C1 MO 1 ZL clear C1 C2 MO 4 ZL clear C2 C3 MO 4 ZL clear C3 C4 MO 4 ZL clear C4 D2 MO 2 ZL clear D2 D3 MO 4 ZL clear D3 D4 MO 4 ZL clear D4 58
59 Shade combination table for the staining of veneered IPS e.max ZirCAD with IPS Ivocolor IPS e.max ZirCAD LT and MO restorations veneered with IPS e.max Ceram IPS e.max ZirCAD MO restorations pressed-over with IPS e.max ZirPress A D tooth shade BL1 BL2 BL3 BL4 A1 A2 A3 A3.5 A4 B1 B2 B3 B4 C1 C2 C3 C4 D2 D3 D4 General Information Combination Tables Shade 0 Shade 1 Shade 2 Shade 3 Shade 4 Shade 5 Shade 6 Shade 7 Shade 8 IPS Ivocolor Shade 59
60 Firing parameters Firing of restorations made of IPS e.max ZirCAD MT Multi/MT/LT and MO To achieve optimum firing results for the restorations, the following points have to be observed: In order to ensure an even thickness of the veneer, the zirconium oxide framework must be designed in such a way that it supports the cusps. Depending on the clinical situation, the results are different wall thicknesses and dimensions of the restorations Since zirconium is a poor heat conductor compared to other materials, a low temperature increase rate is required. This ensures even heat distribution in the bonding area between the framework and the veneer, as well as the outer surfaces of the restoration even with different wall thicknesses. In this way, an optimum bond, as well as even sintering of the layering materials are achieved. During cooling of the restorations after firing, stress occurs as a result of the different cooling speeds both outside and within the material. With long-term cooling for the final firing cycle, this stress can be reduced and the risk of delamination minimized, particularly in ZrO 2 -supported restorations. Several units (e.g. multi-unit bridges with bulky pontics) in the furnace impede even and thorough heating of the objects to be fired. Even temperature distribution in the firing chamber depends on the type of furnace, as well as the size of the firing chamber. The parameters stipulated in the Instructions for Use are coordinated with Ivoclar Vivadent furnaces (tolerance range +/- 10 C/18 F). If a non-ivoclar Vivadent furnace is used, temperature adjustments may be necessary. At the beginning of the firing procedure, open the furnace and wait for the acoustic signal. Subsequently, place the firing tray with the objects in the centre of the firing table and start the program. Notes on cooling after completion of the firing program In order to ensure "smooth" cooling of the restoration after firing, please observe the following notes: Wait for the acoustic signal or optical indication of the furnace at the end of the firing cycle before the firing tray with the fired objects is removed. Do not touch the hot objects with metal tongs. Allow the objects to cool to room temperature in a place protected from draft. Do not blast or quench the objects. Firing parameters for IPS e.max ZirCAD in combination with IPS e.max Ceram and IPS Ivocolor in the layering, cut-back and press technique Stand-by temperature B [ C/ F] ZirLiner firing 1) 403/757 Wash firing (foundation) 403/757 1 st Dentin/Incisal firing 403/757 2 nd Dentin/Incisal firing 403/757 Stain firing with IPS Ivocolor Glaze firing with IPS Ivocolor 403/ /757 Add-On with Glaze firing 403/757 Add-On after Glaze firing 403/757 Closing time * S [min] IRT/ 04:00 IRT/ 04:00 IRT/ 04:00 IRT/ 04:00 IRT/ 06:00 IRT/ 06:00 IRT/ 06:00 IRT/ 06:00 Heating rate t [ C/ F/min] Firing temperature T 1 [ C/ F] Holding time H 1 [min] Heating rate t [ C/ F/min] Firing temperature T 2 [ C/ F] Holding time H 2 [min] Vacuum [ C/ F] Vacuum [ C/ F] Long-term cooling ** L [ C/ F] 40/72 960/ :00 450/ / /752 90/ / :00 20/36 730/ :00 650/ /752 90/ / :00 20/36 730/ :00 650/ /752 90/ / :00 20/36 730/ :00 650/ / / / / / /1344 Cooling rate tl [ C/ F/min] / / :00 450/ / / / / :00 450/ / / / / :00 450/ / / /90 700/ :00 450/ / /842 0 * IRT standard mode 1) before wax-up and pressing with IPS e.max ZirPress ** Long-term cooling for the last firing cycle 60

61 Depending on the furnace type, the firing temperature may be adjusted by ± 5 C, max. ± 10 C. For multi-unit ZrO 2 bridges with solid pontics, the heating rate must be reduced to 45 C/min for the Glaze firing with IPS Ivocolor. General Information Firing Parameters To achieve an optimum firing result for multi-unit bridges (4 14 units), the holding time H 2 should be increased to 3 min. Firing parameters for IPS e.max ZirCAD in combination with IPS Ivocolor in the staining technique Stand-by temperature B [ C/ F] Closing time* S [min] Heating rate t [ C/ F/min] Firing temperature T 1 [ C/ F] Holding time H 1 [min] Vacuum [ C/ F] Vacuum [ C/ F] Long-term cooling L [ C/ F] Stain and Glaze firing 403/757 IRT/ 06:00 45/81 15/27 710/ :00 450/ / /842 * IRT standard mode Monolithic IPS e.max ZirCAD single crowns are fired with a heating rate of 45 C/min. - Monolithic IPS e.max ZirCAD bridges with solid pontics or restorations with a gingiva mask are fired with a heating rate of 15 C/min and cooled at lower speed. Depending on the volume of the restoration, the cooling time should be at least minutes. These firing parameters are guidance values. They are valid for the Programat furnaces from Ivoclar Vivadent. If furnaces from other manufacturers are used, the firing parameters have to adjusted accordingly, as the case may be. Deviations may occur: Depending on the furnace generation In case of regional differences in the power supply or if several electrical devices are operated on the same circuit. 61
BLOCK RANGE CAD. IPS e.max
 BLOCK RANGE 682185 / en / 2018-01-24 www.ivoclarvivadent.com Ivoclar Vivadent AG Bendererstr. 2 9494 Schaan Liechtenstein Tel.: +423 235 35 35 Fax: +423 235 33 60 FOR A COMPREHENSIVE RANGE OF INDICATIONS
BLOCK RANGE CAD. IPS e.max
 BLOCK RANGE 682185 / en / 2015-11-16 www.ivoclarvivadent.com Ivoclar Vivadent AG Bendererstr. 2 9494 Schaan Liechtenstein Tel.: +423 235 35 35 Fax: +423 235 33 60 FOR A COMPREHENSIVE RANGE OF INDICATIONS
A lasting connection: Esthetic implantborne single-tooth restorations. Part 1
 Clinical A lasting connection: Esthetic implantborne single-tooth restorations. Part 1 Oliver Morhofer, 1 Bernd Kobus 1 Introduction Restoring complex patient cases in such a way that the tooth shades
Empress * CAD IPS. Confidence. Reliability. Esthetics. IPS Empress CAD for the CAD/CAM Technology Information for Dentists
 Empress CAD for the CAD/CAM Technology Information for Dentists Confidence Reliability Esthetics Empress * CAD * The ultimate esthetic restorative system Empress System A time-tested system. with new possibilities
CAD/CAM NEEDS. IPS e.max CAD THE LEADING CAD/CAM LITHIUM DISILICATE ceramic. all ceramic all you need
 The clinically Proven Solution For ALL YOUR CAD/CAM NEEDS THE LEADING CAD/CAM LITHIUM DISILICATE ceramic all ceramic all you need For all your CAD/CAM needs is an innovative lithium disilicate glass-ceramic
Prior to use, carefully read the instructions for use.
 Prior to use, carefully read the instructions for use. GC Initial LiSi Press LITHIUM DISILICATE GLASS CERAMICS For use only by a dental professional in the recommended indications. INDICATIONS FOR USE
Empress *CAD IPS. Confidence. Reliability. Aesthetics. The world s leading all-ceramic
 Empress CAD for the CAD/CAM Technology Information for Dentists Confidence Reliability Aesthetics IPS Empress *CAD * The world s leading all-ceramic Empress System A time-tested system. with new possibilities
TECHNICAL GUIDE. For use with CEREC
 TECHNICAL GUIDE For use with CEREC THE FUTURE AND SOLUTION OF INNOVATIVE ZIRCONIA FEATURES TRANSLUCENCY SIMILAR TO NATURAL TOOTH ENAMEL BY SPEED SINTERING The collaboration of Kuraray Noritake Dental s
I N F O R M A T I O N F O R D E N T I S T S. IPS e.max one system for every indication
 I N F O R M A T I O N F O R D E N T I S T S IPS e.max one system for every indication all ceramic all you all need you IPS e.max one system for every indication Dental patients of today are looking for
Lithium Disilicate. Zirconia
 e.max CAD e.max Press e.max ZirCAD CadCAM Milled Crystalized Lithium Disilicate Pressed Lithium Disilicate CadCAM Milled Sintered Yttrium Zirconia 360 Lithium Disilicate Zirconia 400 1,000 Esthetic anterior
DISCOVER MORE. Materials Choose the ideal veneering material for your digitally produced frameworks and restorations:
 DISCOVER MORE Scanners/CAD Discover the latest scanning technology and modern design combined with intelligent software applications: From the current Shape scanner generation, the correct device can be
Press Impulse. In pursuit of nature. all ceramic all you need
 Press Impulse In pursuit of nature all ceramic all you need Press Impulse Ingots with an added Impulse IPS e.max Press: The expanded ingot concept... The IPS e.max Press lithium disilicate (LS 2 ) ingots
Leading material offering and application range. Straumann CARES CADCAM
 Leading material offering and application range Straumann CARES CADCAM content Leading material offering 2 Applications at a glance 5 Features & benefits ceramics 6 Features & benefits metals 8 Features
IPS Empress System Information for the. Laboratory. Confidence. Reliability. Esthetics. Empress IPS. System. The ultimate esthetic restorative system
 IPS Empress System Information for the Laboratory Confidence Reliability Esthetics IPS Empress The ultimate esthetic restorative system System A time-tested system offers new possibilities For nearly 20
THE CLINICALLY PROVEN SOLUTION FOR ALL YOUR CAD/CAM NEEDS. IPS e.max CAD THE LEADING CAD/CAM LITHIUM DISILICATE CERAMIC. all ceramic all you need
 THE CLINICALLY PROVEN SOLUTION FOR ALL YOUR CAD/CAM NEEDS IPS e.max CAD THE LEADING CAD/CAM LITHIUM DISILICATE CERAMIC all ceramic all you need IPS e.max CAD For all your CAD/CAM needs IPS e.max CAD is
Empress *CAD. Confidence. Reliability. Esthetics. IPS Empress CAD for the CAD/CAM Technology Information for Dentists
 Empress CAD for the CAD/CAM Technology Information for Dentists Confidence Reliability Esthetics Empress *CAD * The ultimate esthetic restorative system Empress System A time-tested system. with new possibilities
Directions For Use. Zirconia. Minimum occlusal wall thickness: 0.5 mm, including a 0.1 mm reserve for occlusal adjustment
 Zirconia ht Minimum occlusal wall thickness: 0.5 mm, including a 0.1 mm reserve for occlusal adjustment Conservative circular preparation, minimum wall thickness 0.4 mm Marginal region, minimum wall thickness
UTML Ultra Translucent Multi-Layered STML Super Translucent Multi-Layered ML Multi-Layered HTHigh-Translucent TECHNICAL GUIDE
 Ultra Translucent Multi-Layered STML Super Translucent Multi-Layered ML Multi-Layered HTHigh-Translucent TECHNICAL GUIDE High Esthetic Potential for Zirconia Dental Restorations * New series which features
all ceramic all you need
 INFORMATION FOR THE DENTIST all ceramic all you need All you need for all-ceramics PRESS and CAD/CAM techniques Designed with simplicity and versatility in mind, IPS e.max comprises highly aesthetic and
SHAPE YOUR DENTAL FUTURE LABORATORY
 SHAPE YOUR DENTAL FUTURE LABORATORY Modern minimalism dispenses with everything superfluous and focuses on timeless design. Innovative ideas, state-ofthe-art technology and straightforward, pared-down
Dentist THE POPULAR AND RELIABLE ALL-CERAMIC SYSTEM
 Dentist THE POPULAR AND RELIABLE ALL-CERAMIC SYSTEM ramic e c l l a d u nee o y l l a More all-ceramic. More choice. More IPS e.max. Every case has different goals and requirements. IPS e.max helps you
NEW IPS Ivocolor. Universal stains and glazes
 NEW IPS Ivocolor Universal stains and glazes One staining material for all IPS ceramics * IPS Style individualize IPS e.m flexible IPS Empress esthetic customize stains ceramics IPS InLine IPS e.max stains
The product must be only used by specifically trained personnel and under the relevant application by proven techniques.
 Instruction manual Intended use: DD Bio ZX² monolith zero Liquids are indicated for coloring of pre-sintered Dental Direkt Zirconia milling blanks for the manufacture of dental restorations. Application:
Competence in. All-Ceramics
 Competence in All-Ceramics The success story begins All-ceramics have firmly established themselves as the most popular restorative materials in dentistry. Up until the 80s, gold was the material of choice
GUIDELINES FOR PROCESSING CELTRA DUO
 GUIDELINES FOR PROCESSING CELTRA DUO CONTENTS Minimum wall thickness 4 CAD / CAM processing 5 Finishing / polishing 5 Staining and glazing 5 Firing recommendations 8 Cementing 9 Ordering information 10
Tizian Blank. Tizian Zirconia Reinforced Composite
 Tizian Blank Tizian Zirconia Reinforced Composite Inspired by Nature This innovative combination of materials offers both the advantages of high-performance acrylics and zirconium dioxide: The CAD/CAM
IPS InLine System. Instructions for Use
 IPS InLine System Instructions for Use IPS InLine One One-Layer Metal-Ceramic IPS InLine Conventional Metal-Ceramic IPS InLine PoM Press-on-Metal Ceramic Optimize your working procedures and simultaneously
ZirPress. all ceramic all you need
 ZirPress all ceramic all you need I N S T R U C T I O N S F O R U S E Table of Contents 3 IPS e.max System one system for every indication PRODUCT INFORMATION ZirPress 4 Product Information Material Uses
Everything for chairside CAD/CAM restorations
 Everything for chairside CAD/CAM restorations DESENSITIZING EFFECT Deutsch Groundbreaking innovations. Proven solutions. Natural esthetics. CEREC dentists have been relying on Ivoclar Vivadent products
Screw-retained implant-supported restoration in the edentulous maxilla
 Screw-retained implant-supported restoration in the edentulous maxilla A working document for the production of a milled zirconium dioxide framework Authors: Dr Octavian Fagaras & Milos Miladinov, Romania
TECHNICAL GUIDE KATANA ZIRCONIA MULTI-LAYERED SERIES
 TECHNICAL GUIDE KATANA ZIRCONIA MULTI-LAYERED SERIES HIGH ESTHETIC WITH KATANA ZIRCONIA* New series which features translucency similar to natural tooth enamel is now available. Introducing the new series
Empress System IPS. Empress CAD IPS. Instructions for Use LABSIDE
 IPS Empress System IPS Empress CAD Instructions for Use LABSIDE Table of Contents Product Information IPS Empress CAD Product Information 4 Material Uses Composition Block concept Product overview and
CAD I N S T R U C T I O N S F O R U S E C H A I R S I D E
 CAD all ceramic all you need I N S T R U C T I O N S F O R U S E C H A I R S I D E Table of Contents 3 IPS e.max System one system for every indication PRODUCT INFORMATION CAD 4 Product Information Material
IPS Ivocolor Universal stains and glazes
 IPS Ivocolor Universal stains and glazes One staining material for all IPS ceramics * IPS Style individualize IPS e.m flexible IPS Empress esthetic customize stains ceramics IPS InLine IPS e.max glaze
BEGO PMMA Multicolor Processing information for CAD/CAM-produced restorations
 BEGO PMMA Multicolor Processing information for CAD/CAM-produced restorations Partners in Progress CAD/CAM-PRODUCED RESTORATIONS FROM BEGO PMMA Multicolor High-performance PMMA with color gradient BEGO
Everything for chairside CAD/CAM restorations
 Everything for chairside CAD/CAM restorations English Groundbreaking innovations. Proven solutions. Natural esthetics. CEREC dentists have been relying on Ivoclar Vivadent products for many years. There
GUIDELINES FOR PROCESSING CELTRA DUO
 GUIDELINES FOR PROCESSING CELTRA DUO 2 CONTENTS Minimum wall thickness 4 CAD / CAM processing 5 Finishing / polishing 5 Staining and glazing 5 Firing recommendations 8 Cementing 9 Ordering information
Dental technician. CAD The original lithium disilicate CAD/CAM glass-ceramic. All ceramic, all you need.
 Dental technician CAD The original lithium disilicate CAD/CAM glass-ceramic All ceramic, all you need. Excellent quality and esthetics CAD is the world s top-selling CAD/CAM glass-ceramic. The material
CERASMART for PlanMill
 CERASMART for PlanMill 2 introducing CERASMART for PlanMill the first FORCE ABSORBING FLEXIBLE NANO CERAMIC CERASMART is a revolutionary block. It combines exceptional strength and unparalleled aesthetics.
Dentium Workflow Solution for Labs
 lab system 2 Dentium Workflow Solution for Labs Contents Dentium Lab Products Publishing information Dec. 2016, Vol. 1 Publisher Head office 501 Gyeonggi R&DB Center, 105 Gwanggyo-ro, Yeongtong-gu, Suwon-si,
Implant-supported crowns Working Instructions
 VITA ENAMIC Implant-supported crowns Working Instructions VITA shade determination VITA shade communication VITA shade reproduction VITA shade control Date of issue: 11.18 VITA perfect match. VITA ENAMIC
Viteo. Base THE TITANIUM BASE FROM THE MATERIALS SPECIALISTS THE BASE FOR SUCCESS
 Viteo Base THE TITANIUM BASE FROM THE MATERIALS SPECIALISTS THE BASE FOR SUCCESS THE BASE FOR SUCCESS THE TITANIUM BONDING BASE FROM THE MATERIALS SPECIALISTS Viteo Base is a titanium bonding base for
Zirox Guidelines. Supplement to the ZIROX Instructions for Use (dated 07/05)
") Zirox Guidelines Supplement to the ZIROX Instructions for Use (dated 07/05) - 03 Technical Hotline Germany +9 60 07 / 9 76-222 Working with ZrO 2 and Zirox Indications and contraindications ZIROX veneering
Zirox Guidelines Supplement to the ZIROX Instructions for Use (dated 07/05) - 03 Technical Hotline Germany +9 60 07 / 9 76-222 Working with ZrO 2 and Zirox Indications and contraindications ZIROX veneering
SpeedCEM Plus. The self-adhesive resin cement A BIG PLUS FOR ZIRCONIA. Ideal for. ZirCAD
 SpeedCEM Plus The self-adhesive resin cement A BIG PLUS FOR ZIRCONIA Ideal for ZirCAD SpeedCEM Plus SpeedCEM Plus is a self-adhesive, self-curing resin cement with optional light-curing. This cement offers
GUIDELINES FOR PROCESSING CELTRA DUO
 GUIDELINES FOR PROCESSING CELTRA DUO 2 CONTENTS Minimum wall thickness 4 CAD / CAM processing 5 Finishing / polishing 5 Staining and glazing 5 Glaze-firing 7 Firing recommendations 8 Cementing 9 Ordering
VITABLOCS Mark II for KaVo Everest Working Instructions. Always on the safe side
 VITABLOCS Mark II for KaVo Everest Working Instructions Always on the safe side Vertrieb: KaVo Dental GmbH Bismarckring 39 D-88400 Biberach Tel. +49 7351 56-0 Fax +49 7351 56-1488 Hersteller: VITA Zahnfabrik
new Variolink Esthetic The esthetic luting composite Amazingly simple esthetics!
 new Variolink Esthetic The esthetic luting composite Amazingly simple esthetics! Variolink Esthetic EXCEPTIONAL ESTHETICS Variolink Esthetic is an esthetic light- and dual-curing luting composite for the
all ceramic all you need
 all ceramic all you need All you need for all-ceramics PRESS and CAD/CAM techniques Designed with simplicity and versatility in mind, IPS e.max comprises highly aesthetic and high-strength materials for
all ceramic all you need Abutment Solutions Instructions for Use
 all ceramic all you need Abutment Solutions Instructions for Use Table of Contents 3 IPS e.max System Practical Procedure Product Information 4 IPS e.max Press 5 IPS e.max Press Abutment Solutions Description
Variolink Esthetic The esthetic luting composite SIMPLE ESTHETICS! Recommended for. CAD/Press. Recommended for. Tetric CAD
 Variolink Esthetic The esthetic luting composite AMAZINGLY SIMPLE ESTHETICS! Recommended for CAD/Press Recommended for Tetric CAD Variolink Esthetic Variolink Esthetic is an esthetic light- and dual-curing
Press. all ceramic all you need
 Press all ceramic all you need I N S T R U C T I O N S F O R U S E Table of Contents 3 IPS e.max System one system for every indication PRODUCT INFORMATION Press 4 Product Information Material Uses Composition
Wirobond C+ Processing information for CAD/CAM-produced restorations. Partners in Progress
 Wirobond C+ Processing information for CAD/CAM-produced restorations Partners in Progress CAD/CAM-PRODUCED RESTORATIONS MADE OF Wirobond C+ Wirobond C+ As the Wirobond C+ alloy (manufactured by BEGO Bremer
Ceramic Based Aesthetic CAD/CAM Restorative
 Ceramic Based Aesthetic CAD/CAM Restorative Create Natural Aesthetics with High-Strength Materials SHOFU Block HC and Disk HC are the latest generation of hybrid-ceramic restorative materials for use with
VITAVM 9 VENEERING MATERIAL. Working Instructions
 VENEERING MATERIAL VITAVM 9 Working Instructions For all-ceramic substructure porcelains in the CTE range of approx. 10,5 such as VITA In-Ceram YZ CUBES For individualizing VITABLOCS Mark II for CEREC
Everything for chairside CAD/CAM restorations
 Everything for chairside CAD/CAM restorations English Vol. 01/2018 Das universelle Adhäsiv DESENSITIZING EFFECT Deutsch Groundbreaking innovations. Proven solutions. Natural esthetics. Planmeca FIT dentists
Instructions for use Dental Direkt Color Solutions: DD Basic Shade, DD Art Elements, DD Pro Shade Z & DD Pro Shade C
 _ As we are continually developing our products, we reserve the right to change them at any time. The latest digital version of these instructions for use can be found on our homepage at www.dentaldirekt.de
Clinical Guideline. for full contour zirconia restorations produced chairside with CEREC Zirconia (milling process).
.") Clinical Guideline for full contour zirconia restorations produced chairside with CEREC Zirconia (milling process). University of Zurich / University of Michigan CEREC.com/zirconia Clinical workflow step
Clinical Guideline for full contour zirconia restorations produced chairside with CEREC Zirconia (milling process). University of Zurich / University of Michigan CEREC.com/zirconia Clinical workflow step
Spring / Summer CLINICAL. SPECIAL OFFERS / 1 st MARCH - 31 st AUGUST
 Spring / Summer SPECIAL OFFERS / 1 st MARCH - 31 st AUGUST 2018 CLINICAL www.ivoclarvivadent.co.uk Tetric EvoFlow Tetric EvoFlow is the top-selling flowable radiopaque composite in Europe. The product
IPS. Empress Esthetic. NEWS from the IPS Empress Original System
 IPS Empress Esthetic NEWS from the IPS Empress Original System A tried-and-tested system with NEW aesthetic properties The IPS Empress pressed ceramic system, which has been clinically proven for more
NEW. SpeedCEM. Plus. The self-adhesive resin cement A BIG PLUS FOR ZIRCONIA
 NEW SpeedCEM The self-adhesive resin cement A BIG PLUS FOR ZIRCONIA SpeedCEM is a self-adhesive, selfcuring resin cement with optional lightcuring. This cement offers an ideal combination of performance
Developed to make a difference
 Developed to make a difference Any block can make a restoration Celtra Duo (ZLS) provides the freedom to work your way Finally, a CEREC block that gives you total control. You choose the processing pathway.
Warnings: Precautions:
 CAD/CAM and Instructions for Use Cercon base, Cercon base light, Cercon base medium, Cercon base colored (short: Cercon base) and Cercon ht, Cercon ht light, Cercon ht medium Cercon base PMMA, Cercon base
Straumann n!ce Turn time spent milling into time spent smiling. Quick Guide
 Straumann n!ce Turn time spent milling into time spent smiling. Quick Guide n!ce processing polish only 1 2 3 MILL POLISH SEAT Prepare the tooth, digitize and design the desired restoration as usual. 1
CERASMART. The new leader in hybrid ceramic blocks
 The new leader in hybrid ceramic blocks Introducing, a new force absorbing hybrid ceramic block 20 µm Contains high density of ultra fine homogeneously-dispersed fillers in a highly cross-linked resin
Anterior Esthetic Techniques & Materials
 Anterior Esthetic Techniques & Materials Lee Ann Brady DMD www.pinterest.com Lee Ann Brady www.leeannbrady.com www.restorativenation.com Planning Information Tooth Position Arrangement Contour Color Material
Celtra, Cercon, Celtra Ceram, Universal Stain and Glaze. All-ceramic solutions for every need. Brochure for the dental laboratory
 Celtra, Cercon, Celtra Ceram, Universal Stain and Glaze All-ceramic solutions for every need Brochure for the dental laboratory Content Celtra Ceram High esthetic veneering 4 Celtra Press Monolithic stained
TOOTH PREPARATION. (Boucher's Clinical Dental Terminology, 4th ed, p239)
") Budapest, 2017 TOOTH PREPARATION The selected form given to a natural tooth when it is reduced by instrumentation to receive a prosthesis (e.g. artificial crown or a retainer for a fixed or removable prosthesis)
Budapest, 2017 TOOTH PREPARATION The selected form given to a natural tooth when it is reduced by instrumentation to receive a prosthesis (e.g. artificial crown or a retainer for a fixed or removable prosthesis)
NobelProcera Product Overview
 NobelProcera Product Overview TM EXPERIENCE THE NEW WORLD OF CAD/CAM DENTISTRY Most versatile product and material portfolio Latest production technology for Precision Milled Restorations PMR Cutting-edge
NEW. IPS Style The first patented metal-ceramic containing oxyapatite MAKE IT YOUR STYLE
 NEW IPS Style The first patented metal-ceramic containing oxyapatite MAKE IT STYLE YOUR! STYLE. A brief look at metal-ceramics Metal-ceramics systems are used 365 days of the year. They are a constant
Calibra. Cements. The Simple Choice for Easy Cleanup
 Calibra Cements The Simple Choice for Easy Cleanup www.calibracement.com The Calibra family of definitive cements was designed to make it easier than ever to achieve consistent, successful results in your
Practicing Minimally Invasive Dentistry with Durability and Esthetic in Mind
 Clinical Applications of CAD/CAM and All Ceramic Restorations in 01 Practicing Minimally Invasive Dentistry In light of Current Technologies Practicing Minimally Invasive Dentistry with Durability and
Product Information. Translucent Zirconium Dioxide For monolithic restorations. Giving a hand to oral health.
 Product Information Translucent Zirconium Dioxide For monolithic restorations. Giving a hand to oral health. Zr tr cara Zirconium Dioxide the ideal material for aesthetic restoration. On account of its
F R A M E W O R K D E S I G N F O R M E T A L - C E R A M I C R E S T O R A T I O N S. Manual
 F R A M E W O R K D E S I G N F O R M E T A L - C E R A M I C R E S T O R A T I O N S Manual The fabrication of aesthetic and functional metal-supported ceramic restorations requires both comprehensive
Lava Lava Network Open Interface CAD Design: 3M ESPE AG 3M ESPE
 Lava Lava Network Open Interface Instructions for Use CAD Design: Lava Frame Lava DVS Lava Wax 3M ESPE AG Dental Products D-82229 Seefeld - Germany 3M ESPE Dental Products St. Paul, MN 55144-1000 U.S.A.
Posterior Adhesive Dentistry
 Posterior Adhesive Dentistry Stephen D. Poss DDS Michigan Dental The following pages contain a summary of information designed to assist you with the armamentarium, preparation, and cementation of anterior
TOOTH - Crown - Lithium disilicate - Retentive preparation - Super- and equigingival - Visible margin - Variolink Esthetic - ExciTE F DSC
 Used Products TOOTH - Crown - Lithium disilicate - Retentive preparation - Super- and equigingival - Visible margin - Variolink Esthetic - ExciTE F DSC Variolink Esthetic The esthetic, light- and dual-curing
COLOURS ON CERAMIC PRODUCTS FOR DENTAL USE
 COLOURS ON CERAMIC PRODUCTS FOR DENTAL USE BTEETH : COLOUR LINE FOR DENTAL CERAMICS ZIRCONIA The technological evolution of dental laboratories will be increasingly based on the use of innovative materials
GUM COLORS INSTRUCTIONS FOR USE
 GUM COLORS INSTRUCTIONS FOR USE The natural appearance of gingival parts is very important, especially when producing high-quality telescopic and implant supported supra constructions. The CERAMAGE GUM
New as of: CEREC SpeedGlaze. Operating Instructions (valid for USA) English
 English") New as of: 03.2018 CEREC SpeedGlaze Operating Instructions (valid for USA) English Table of contents Operating Instructions CEREC SpeedGlaze Table of contents 1 Product description... 3 1.1 Contact information...
New as of: 03.2018 CEREC SpeedGlaze Operating Instructions (valid for USA) English Table of contents Operating Instructions CEREC SpeedGlaze Table of contents 1 Product description... 3 1.1 Contact information...
أ.م. هدى عباس عبد اهلل CROWN AND BRIDGE جامعة تكريت كلية. Lec. (2) طب االسنان
 طب االسنان") Lec. (2) CROWN AND BRIDGE أ.م. هدى عباس عبد اهلل Patient selection and examination A thorough diagnosis must first be made of the patient's dental condition, considering both hard and soft tissues. this
Lec. (2) CROWN AND BRIDGE أ.م. هدى عباس عبد اهلل Patient selection and examination A thorough diagnosis must first be made of the patient's dental condition, considering both hard and soft tissues. this
TECHNICAL GUIDE KATANA ZIRCONIA MULTI-LAYER SERIE
 TECHNICAL GUIDE KATANA ZIRCONIA MULTI-LAYER SERIE HIGH ESTHETIC WITH KATANA ZIRCONIA New series which features translucency similar to natural tooth enamel is now available. Introducing the new series
COMPUTER AIDED OVERPRESS - A SIMPLE PROCESS
 COMPUTER AIDED OVERPRESS - A SIMPLE PROCESS HORST KOINIG The simplicity of Computer Aided Overpress (CAO) does not necessarily mean that the daily routine in dental laboratories is just as simple. Looking
Vectris INSTRUCTIONS FOR USE
 Vectris INSTRUCTIONS FOR USE 2 TABLE OF CONTENTS Product Information Material 6 Product system 7 Applications 8 Questions & answers 9 Composition and storage 10 Working times 11 Description of assortments
Powerful, Affordable 3D Printers for Professionals
 Wright products, Wright quality, at the right price Valid September - November 2017 Powerful, Affordable 3D Printers for Professionals Form 2 Complete Package The most advanced desktop 3D printer ever
Gingiva Solution SR Phonares II, IvoBase, SR Nexco
 Gingiva Solution SR Phonares II, IvoBase, SR Nexco Preface 5 Framework design 6 Framework preparation 8 Finishing of the denture base 10 Gingival modification 12 Mobile mucosa 14 Immobile mucosa 16 Lip
Multilink Automix The adhesive cementation system
 Multilink Automix The adhesive cementation system A strong bond, proven performance. Clinically proven with Multilink Aut Strong hold A wide variety of restorative materials are available today. Due to
TOOTH - Crown - Lithium disilicate - Non-retentive preparation - Variolink Esthetic - Adhese Universal
 Used Products TOOTH - Crown - Lithium disilicate - Non-retentive preparation - Variolink Esthetic - Adhese Universal Variolink Esthetic The esthetic, light- and dual-curing adhesive luting system Proxyt
Restoration of upper central incisors
 Restoration of upper central incisors Author: Paul Gerrard CPD: 1 hour Educational aims and objectives The aim is to show the reader with step by step illustrations a different technique for providing
Real fast. Real tough. Real easy. Psst it s the one on the left. Lava Ultimate. CAD/CAM Restorative
 Lava Ultimate CAD/CAM Restorative 10-Year Limited Warranty* Real fast. Real tough. Real easy. Psst it s the one on the left. Real performance. Powered by 3M ESPE Lava Ultimate CAD/CAM Restorative! What
BRILLIANT AESTHETICS + RELIABLE TECHNOLOGY
 BRILLIANT AESTHETICS + RELIABLE TECHNOLOGY THE VENEERING CERAMIC FOR ZIRCONIA FRAMEWORKS There can be no progress without innovation. Ever since zirconia was introduced as a framework material, the aesthetic
Lava All-Zirconia. What about chipping? Not an issue for us. All-Zirconia Monolithic Restoration
 Lava All-Zirconia All-Zirconia Monolithic Restoration What about chipping? Not an issue for us. Your affordable solution to PFM Lava All-Zirconia Lava All-Zirconia an outstanding material Lava Precision
SHOFU BLOCK & DISK CAD/CAM CERAMIC-BASED RESTORATIVE. Visit or call mm x 12mm x 16mm. 98mm x 14mm. 12mm x 14mm x 18mm
 SHOFU BLOCK & DISK CAD/CAM CERAMIC-BASED RESTORATIVE 1mm x 12mm x 16mm 12mm x 14mm x 18mm 98mm x 14mm Visit www.shofu.com or call 8.827.4638 Created through a rigorous manufacturing process, Shofu Blocks
This PDF is available for free download from a site hosted by Medknow Publications
 CMYK115 Review Article 12-06 CEREC - The power of technology I. Kaur, K. Datta Department of Prosthodontics, Pb Govt. Dental College and Hospital, Amritsar, Punjab, India For correspondence Inderpreet
Predictable Real World Aesthetics. The Key to Success with Natural Restorations
 The Insiders Guide to Quality Dentistry Predictable Real World Aesthetics The Key to Success with Natural Restorations ISUS CAD/CAM Implant Supra-Structures: Accuracy, durability and precision Conscious
CLINICAL GUIDELINE. FOR FULL CONTOUR ZIRCONIA RESTORATIONS PRODUCED CHAIRSIDE WITH CEREC ZIRCONIA (MILLING PROCESS). CEREC.
. CEREC.") CEREC.COM/ZIRCONIA CLINICAL GUIDELINE. FOR FULL CONTOUR ZIRCONIA RESTORATIONS PRODUCED CHAIRSIDE WITH CEREC ZIRCONIA (MILLING PROCESS). SIRONA / UNIVERSITY OF ZURICH / UNIVERSITY OF MICHIGAN MAY 2016 CLINICAL
CEREC.COM/ZIRCONIA CLINICAL GUIDELINE. FOR FULL CONTOUR ZIRCONIA RESTORATIONS PRODUCED CHAIRSIDE WITH CEREC ZIRCONIA (MILLING PROCESS). SIRONA / UNIVERSITY OF ZURICH / UNIVERSITY OF MICHIGAN MAY 2016 CLINICAL
My Lava Ultimate. Chairside Crown. Lava Ultimate CAD/CAM Restorative for CEREC. Precision Solutions
 Precision Solutions Lava Ultimate CAD/CAM Restorative for CEREC Picture shows a software simulation that may differ from reality. The high performance of Lava Ultimate has been verified by internationally
STL. inside. ineos Blue: Precision, Speed and Control. THE SCANNER WITH Bluecam TECHNOLOGY
 CAD/CAM SYSTEMS INSTRUMENTS HYGIENE SYSTEMS TREATMENT CENTERS IMAGING SYSTEMS THE SCANNER WITH Bluecam TECHNOLOGY ineos Blue: Precision, Speed and Control. STL inside T h e D e n t a l C o m p a n y ineos
Multilink Automix The adhesive cementation system
 Multilink Automix The adhesive cementation system A strong bond, proven performance. Recommended for Multilink Aut Strong hold A wide variety of restorative materials are available today. Due to their
the new dna of high strength glass ceramics
 the new dna of high strength glass ceramics 1 the new dna of high strength glass ceramics Together with the Fraunhofer Institute and VITA, we have developed a new class of materials for high-strength glassceramics