Surgical Technique. Intramedullary locked Nailing With Screws for Humerus Fractures Solid/Cannulated. Humeral Interlocking Nail.
|
|
|
- Roland Gibson
- 5 years ago
- Views:
Transcription


1 Screws for Humerus Fractures Surgical Technique Humeral Interlocking Nail Approved by Humerus Nail Kit Code
2
3 Contents Introduction Implant design Indications Pre-operative planning Patient positioning Preparing the nail and instruments Solid nail technique Introduction of the nail Distal and proximal blocking Cannulated nail technique Introduction of the nail Distal and proximal blocking Post-operative care Set of Instruments Implant Extraction
4


5 This guide is designed to demonstrate the techniques that can be applied to the utilization of the ARZZT locked intramedullary nail for the humerus, and it is recommended for use by orthopedic traumatologists in the treatment of humerus fractures. The recommendations for their use do not presume to interfere with the surgeon s experience, nor the particular needs of each patient, and follow the biomechanical principles of internal splints with treatment of diaphyseal and proximal fractures of the humerus. 5
6
7 Introduction Conservative treatment does not always lead to favorable results, and is linked to long periods of immobilization, as well as trophic and functional problems in the upper part of the affected extremity. The fracture line can extend from the metaphyseal area to the superior and inferior diaphyseal thirds (diaphyseal lesions or fractures). The management of these lesions caused by highenergy trauma, which are increasingly more frequent, has led to the development of implants like the ARZZT intramedullary nailing system for the humerus, which can be used to treat various types of fractures. 7
.")

8 Implant Design The ARZZT solid and cannulated intramedullary nails for the humerus have the particular feature of being able to block the proximal part in three ways and on three planes, allowing for excellent fixation and stability with respect to both fracture lines and tuberosities (including diaphysis). The ARZZT intramedullary nails for the humerus are available in solid and cannulated versions, are made from a titanium 6AI4V alloy, and can be used at the discretion of the orthopedic surgeon, who must evaluation the risk, benefits, and convenience. The solid nail can be drilled manually or not, creating a diameter 1 mm greater than that of the nail. It is available in the following measurements: Diameter Ø 7 mm / longitude of 180 to 320 mm Diameter Ø 8 mm / longitude of 180 to 320 mm The cannulated nail is best used with drilling, and is available in the following measurements: Diameter 6.7 mm / longitude of 140 to 340 mm Diameter Ø 7 mm / longitude of 180 to 320 mm Diameter Ø 8 mm / longitude of 180 to 320 mm Diameter of cannulated orifice: 3.00 mm 8

9 Implant Design Diameter of the guide rod: 2.0 mm; longitude of 800 mm Both nails are available in increments of 20 mm between each of their lengths. Titanium locking screws: diameter of 3.85 mm, measurements of 20 to 50 mm with increments of 5 mm between measurements, made from titanium 6AI4V 9
10 Indications Ins Hilden Arzzt Nail Systems, consisting of intramedullary solid and cannulated nails, end cap and locking screws, are intended for fixation of fractures of different types: of the shaft, open and closed shaft fractures; and malunion and non-unions of the Femur, Tibia, and Humerus. Pre-operative Planning The diameter and longitude of the nail can be established by way of X-rays of if possible the healthy extremity, which are to be used as templates, taking into account the magnification, which varies between 10 and 15%. Some surgeons make use of the image intensifier, superimposing the nail onto the affected extremity to establish the diameter and obtain a safe distance from the joint, as well as the insertion point of the nail. The longitude of the nail can be determined prior to the surgery by measuring the healthy humerus from the point of the humeral head to the upper part of the olecranon fossa, and subtracting three or four centimeters from the figure obtained. For very narrow bones, it is recommended to place the nail with a smaller diameter at the surgeon s discretion and, depending on the comminution and stability of the fracture, it is recommended to use a nail with a larger diameter with the aim of achieving greater fastening and stability. 10

11 Patient Positioning It is recommended to place the patient on the fracture table in a beach chair position, laying laterally or dorsally prone with the aim of facilitating both the reduction of the fracture and the surgical approach chosen by the surgeon. Beach chair position: The patient is placed seated with 30 to 60 degrees of flexion, the lower extremities are placed flexed over a bump, which allows for them to be supported, with the aim of diminishing venous stasis. 11
 2.")
12 Preparing the nail and Instruments The nail must be assembled and calibrated before it is used inside the humerus in order to allow for the free passage of the screws and create exact symmetry with the instrumental frame. 1.Place the nail in the insertion handle, ensuring that the grooves line up, and attach it to the nail connector. (Picture) 2.Fasten the nail in the insertion sleeve with the nail connector, and tighten the handle firmly, using the L-handled hexagon key (Allen), introducing it into the handle s orifices. 12


13 Preparing the nail and Instruments 3.Position the humeral arm. 4.Secure the module by tightening the fastening screw with the L-handled hexagon key (Allen) 13


 line up")

14 5. Place the T-handled feeler gauge and insert the spacer to be used into the grooves of the feeler gauge. 6. Calibrate the distal arm, fastening it with the fastening screw and tightening it firmly with the L-handled hexagon key (Allen), ensuring that the external sheaths for tissue protection of the internal sheaths (drill bit guides) line up perfectly with the distal orifices of the nail. 7. Ensure once more the firmness of the fastening screws. Remove the spacer and the T-handled feeler gauge. 14

15 Antegrade Solid Nail Technique Make an incision of the skin from the anterolateral border of the acromion in the distal direction, toward the insertion of the deltoid muscles. Incise the subcutaneous tissue, and separate the muscular fibers of the deltoids. Locate the supraspinatus tendon and divide it in line with its fibers. Using blunt dissection, retract both borders with sutures on the tendon, and expose a portion of the cartilage of the humeral head medially to the greater tuberosity. Access to the point of entry is via the supraspinatus tendon. 15


16 Antegrade Solid Nail Technique Introduce the primer punch via the opening made in the supraspinatus tendon, right on the lateral border of the humeral articular cartilage, verifying the correct position of the image intensifier on two planes and following the curvature of the primer punch, which will be rectified upon entering the medullar canal. The orifice or entry portal should be 10 mm in diameter. Remove the primer punch. Posteriorly, use the 7 and 8 mm reamer to widen the canal diameter, depending on the diameter chosen by the orthopedic surgeon. 16
17 Introduction of the Antegrade Nail The point of access for the ARZZT humeral nail is found on the prolongation of the axis of the central humeral diaphysis, in the transition area between the bone and the cartilage. In the correct position with respect to the humeral head, the insertion point is found immediately beneath the tip of the acromion. Once the nail is attached to the fastener handle, it must be introduced by exerting firm manual pressure with rotational movements until the tip of the nail reaches the fracture area. Perform reduction maneuvers, using the image intensifier to control the passage of the nail through the fracture line, and inserting it into the medullar canal of the distal humeral diaphysis of the fracture. To drive the nail, you may hit it with the nail impactor (hammer). The tip of the nail should be at a distance of 15 mm from the cranial limit of the olecranon fossa, with the guidance of the fastener handle directed toward the lateral surface of the arm. Verify the alignment of the fastener handle in order to perform the blocking in a completely lateral fashion. Position the humeral module in order to locate the distal orifices, along with the distal arm. Place the external sheath (for tissue protection) and use it to make a mark where you will make the incision to introduce the feeler gauge. Make a 5 mm perforation with the scalpel. Introduce a Kelly clamp and dissect the length and width of the incision. Introduce the external sheath (for tissue protection) and the sheath punch (dissector) until you reach the anterior cortex. Remove the sheath punch. Introduce the 4.5 mm drill bit. Use the bit to perforate the anterior cortex of the humerus. Remove and clean the residue with the T-handled bit. Introduce the feeler gauge, fastening it with the spacer. 17

18 Distal and Proximal Blocking Place the exterior sheaths (for tissue protection) and interior sheaths (drill bit guides) in the orifices where the distal locking of the nail is to be performed. Mark its location on the skin. Makes two incisions of 5 mm each. Using a Kelly clamp, dissect the length and width of the wound. Introduce the external sheath (for tissue protection) with the sheath punch until the lateral cortex is located. Remove the sheath punch, position the internal sheath (3.5 mm drill bit guide), and perforate the humerus in both cortexes. Remove the bit and the internal sheath (3.5 mm drill bit guide). Determine the longitude of the locking screw by using the depth gauge. Introduce the 3.5 mm screw. Perform the same maneuver for the most proximal of the distal orifices. 18


19 Distal and Proximal Blocking Remove the feeler gauge and the humeral arm. Proceed to locate and perforate the proximal orifices, which are found at three different locations on three planes. The orthopedic surgeon will choose which are required and whether the characteristics of the fracture allow for the three orifices and three screws to be used without impediment. Perform the same maneuvers for the location, perforation, and blocking to be used for the distal orifices. Using the proximal arm for support, introduce the blocking screws of the required longitude. Verify the reduction and the longitude of the screws. If there is no problem, remove the fastener handle from the nail, and introduce the sealing cap. Repair the rotator cuff, suture the subcutaneous cellular tissue with vicryl #2-0 and the skin with nylon #3-0, with this depending on the preferences of the orthopedic surgeon. Cover the wound with a dressing and apply a shoulder immobilizer or sling. The surgery is complete. 19


20 Drilled Cannulated Nail Technique Make an incision of the skin from the anterolateral border of the acromion in the distal direction toward the insertion of the deltoid muscles. Incise the subcutaneous tissue, and separate the muscular fibers of the deltoids. Locate the supraspinatus tendon and divide it in line with its fibers. Using blunt dissection, retract both borders with sutures on the tendon, expose a portion of the cartilage of the humeral head medially to the greater tuberosity. Access to the point of entry is via the supraspinatus tendon. Introduce the awl via the opening made in the supraspinatus tendon right on the lateral border of the humeral articular cartilage, verifying the correct positioning with the image intensifier on two planes, following the curvature of the primer punch, which will be rectified upon entering the medullar canal. The orifice or portal must be 10 mm in diameter. Remove the primer punch. Posteriorly, introduce the guide wire to initiate the medullar drilling. 20
 through the access orifice or portal.")
21 Drilled Cannulated Nail Technique Guide rod (2.0 mm in diameter / 800 mm in longitude) The drilling technique begins with the insertion of the guide wire (2.0 mm in diameter / 800 mm in longitude) through the access orifice or portal. With the help of the image intensifier, perform fracture reduction maneuvers in order to pass the distal end of the guide rod through the fracture site. 21


22 Drilled Cannulated Nail Technique Using the image intensifier, confirm the passage of the guide wire through the fracture site. Introduce the guide wire up to 10 mm above the cranial limit of the olecranon fossa. Begin the drilling of the medullar canal with the reamer of the smallest diameter, progressing in increments from the 0.5 mm medullar reamer. The final diameter is obtained once the reamer makes contact with the humeral cortex, and must be 1 to 1.5 mm greater than the diameter of the nail to be used. 22

.")
23 Introduction of the Antegrade Nail With the humeral nail already mounted and fastened to the insertion handle, introduce the nail via the guide wire, exerting firm manual pressure with rotational movements until the tip of the nail reaches the fracture site. Perform maneuvers to reduce the fracture, using the image intensifier to control the passage of the nail through the fracture line, and inserting it into the medullar canal of the distal humeral diaphysis of the fracture. To drive the nail, you may hit it with the nail impactor (hammer). The tip of the nail should be at a distance of 15 mm from the cranial limit of the olecranon fossa, with the guide of the insertion handle directed toward the later surface of the arm. Confirm the correct insertion of the humeral nail, as well as the alignment (reduction) of the fracture. Remove the guide rod. Verify the alignment of the fastener handle in order to perform the blocking in a completely lateral fashion. Position the proximal arm in order to locate the distal orifices, along with the distal arm. Position the external sheath (for tissue protection) and use it to mark where you will make the incision to introduce the feeler gauge. Make a 5 mm perforation with the scalpel. Introduce a Kelly clamp and dissect the length and width of the incision. Introduce the external sheath (for tissue protection) and the sheath punch (dissector) until you reach the anterior cortex. Remove the sheath punch. Introduce the internal sheath (4.5 mm drill bit guide). Use the bit to perforate the anterior cortex of the humerus. Remove and clean the residue with the T-handled bit. Introduce the feeler gauge, fastening it with the spacer. 23

24 Distal and Proximal Blocking Place the exterior sheaths (for tissue protection) and interior sheaths (drill bit guides) in the orifices where the distal locking of the nail is to be performed. Mark its location on the skin. Makes two incisions of 5 mm each. Using a Kelly clamp, dissect the length and width of the wound. Introduce the external sheath (for tissue protection) with the sheath punch until the lateral cortex is located. Remove the sheath punch, place the internal sheath (3.5 mm drill bit guide), and perforate the humerus in both cortexes. Remove the bit and the internal sheath (3.5 mm drill bit guide). Determine the longitude of the locking screw by using the depth gauge. Introduce the 3.5 mm screw. Perform the same maneuver for the most proximal of the distal orifices. 24


25 Distal and Proximal Blocking Remove the feeler gauge and the proximal module. Proceed to locate and perforate the proximal orifices, which are found at three different locations on three planes. The orthopedic surgeon will choose which are required and whether the characteristics of the fracture allow for the three orifices and three screws to be used without impediment. 25

26 Distal and Proximal Blocking Perform the same maneuvers for the location, perforation, and blocking to be used for the distal orifices. Using the proximal arm for support, introduce the locking screws of the required longitude. Verify the reduction and the longitude of the screws. If there is no problem, remove the fastener handle from the nail, and introduce the sealing cap. Repair the rotator cuff, suture the subcutaneous cellular tissue with vicryl #2-0 and the skin with nylon #3-0, with this depending on the preferences of the orthopedic surgeon. Cover the wound with a dressing and apply a shoulder immobilizer or sling. The surgery is complete. 26
27 Post-Operative Care Given that the stability provided for fractures fixed by the ARZZT intramedullary nail for the humerus, there is no need for external stabilization with splints. The use of physical therapy to reduce edema, as well as the optimal time to resume movement and remove stiches, is left to the judgment of the orthopedic surgeon. 27
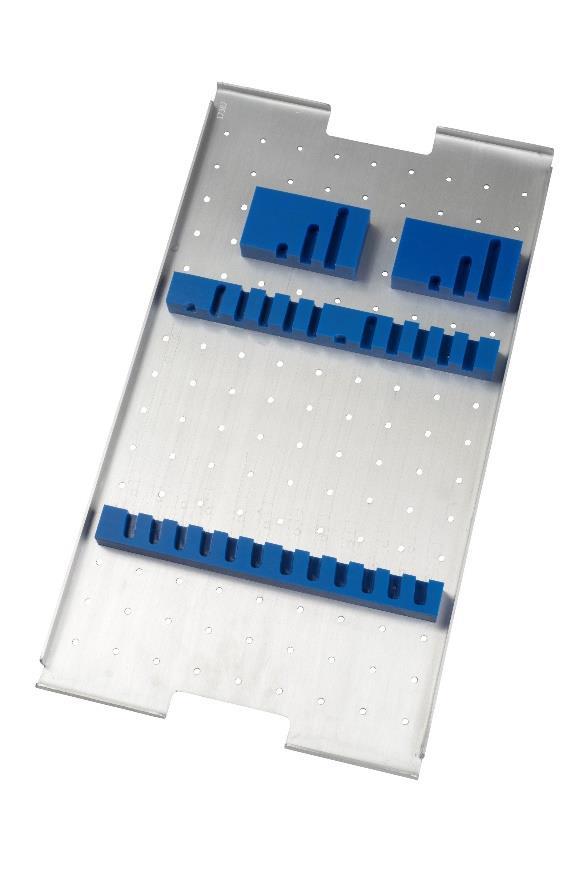

28 Set of Instruments 28

29 Implant Extraction Patient positioning The simple extraction of the nail requires placing the patient in a beach chair position. Without requiring a special surgical table, this position allows one to obtain the adequate exposure to facilitate the removal of the nail via the previous incisions. Surgical technique 1. Remove the proximal locking screws using the previous incisions. 2. Before proceeding with the extraction of the distal locking screws, one must make sure to fasten the proximal portion of the nail with the insertion handle and the nail connector, thus avoiding the rotation of the nail, which makes its removal more difficult. 3. It is recommended to use the prior surgical incision with an incision of 3 cm, enough to facilitate the extraction of the implant. One must perform a layered dissection of the subcutaneous cellular tissue, the deltoid muscles, the supraspinatus tendon (in a direction parallel to its fibers), until one feels the point of the nail (proximal portion). 4. Carefully remove the fibrous tissue located at and around the closing screw, obtaining a direct view of the implant. In the event that one encounters bone tissue over the nail, use the guide punch until the implant is located. 5. Extract the end cap from the nail. 29


30 Implant Extraction 6. Setting up the instruments for extraction. Proceed to place the fastening handle on the proximal portion of the nail, fixing it with the connecting screw. 7. Remove the distal screws with the ARZZT screwdriver. 8. Proceed with the extraction of the nail using the impactor/extractor in a retrograde fashion. 9. Use saline solution to wash the medullar canal, and perform an adequate surgical debridement. 10. Proceed to close the wound in layers, and cover it with a sterile dressing. Depending on the surgical bleeding, you may drain the wound. 30
31

32 Contact 202 Timberloch PI Suite 200 The Woodlands. TX, Approved by Humerus Nail Kit Code
3. PATIENT POSITIONING & FRACTURE REDUCTION 3 8. DISTAL GUIDED LOCKING FOR PROXIMAL NAIL PROXIMAL LOCKING FOR LONG NAIL 13
 Contents IMPLANT FEATURES 2 1. INDICATIONS 3 2. PRE-OPERATIVE PLANNING 3 3. PATIENT POSITIONING & FRACTURE REDUCTION 3 4. INCISION 4 5. ENTRY POINT 4-6 6. PROXIMAL NAIL INSERTION 6-7 7. PROXIMAL LOCKING
System. Humeral Nail. Surgical Technique
 System Humeral Nail Surgical Technique Contents IMPLANT FEATURES 2 1. INDICATIONS 3 2. PRE-OPERATIVE PLANNING 3 3. PATIENT POSITIONING & FRACTURE REDUCTION 3 4. INCISION 4 5. ENTRY POINT 4-6 6. PROXIMAL
Double Engine Orthopedic Bone Nail System Universal Humeral Nail
 Double Engine Orthopedic Bone Nail System ----------- Universal Humeral Nail Surgical Technique Manual Note: The surgical procedures should be performed under the guidance of qualified skilled orthopedic
Orthopedic Bone Nail System - Distal Femoral Nail Surgical Technique Manual
 Orthopedic Bone Nail System - Distal Femoral Nail Surgical Technique Manual Note: The surgical procedures should be performed under the guidance of qualified skilled orthopedic surgeons, and this surgical
TITANIUM TIBIAL NAIL SySTEM
 TITANIUM TIBIAL NAIL SySTEM Solid and Cannulated Nails SURGICAL TEChNIqUE Table of contents Introduction Indications 2 Preoperative Implant Selection 6 Surgical Technique Instruments for Opening the Tibia
humerus InSafeLOCK Nail
 humerus InSafeLOCK Nail Introduction Content Humerus InSafeLOCK Nail is an innovative intramedullary nailing system, developed for humerus problems. Humerus fractures have 5-6 % incidence of all bone fractures.
The Titanium Tibial Nail System
 The Titanium Tibial Nail System Solid Tibial Nails (UTN) and Cannulated Tibial Nails (CTN) Surgical Technique This publication is not intended for distribution in the USA. Instruments and implants approved
Conventus CAGE PH Surgical Techniques
 Conventus CAGE PH Surgical Techniques Conventus Orthopaedics The Conventus CAGE PH (PH Cage) is a permanent implant comprised of an expandable scaffold, made from nitinol and titanium, which is deployed
Surgical technique. UHN/PHN Humeral Nailing System.
 Surgical technique UHN/PHN Humeral Nailing System. 358.590 Radiographic Ruler for UHN 292.260 Kirschner Wire 2.5 mm with trocar tip, length 280 mm, Stainless Steel 351.120 Awl with T-Handle, cannulated,
NeoGen Tibia Nail System
 NeoGen Tibia Nail System LESS IS MORE TE-2070-03 Surgical Technique BLE OF CONTENT Preface Surgical Technique Appendix Products Information Patient Preparation Entry Portal Fracture Reduction Canal Preparation
Table of contents. Introduction... 3 Indications... 3 Contraindications... 3 TRIGEN Humeral Nail Specifications... 6
 Surgical Technique Table of contents Introduction... 3 Indications... 3 Contraindications... 3 TRIGEN Humeral Nail Specifications... 6 Surgical Technique Patient positioning... 7 Establish the incision
UHN/PHN Humeral Nailing System.
 UHN/PHN Humeral Nailing System. Surgical Technique This publication is not intended for distribution in the USA. Instruments and implants approved by the AO Foundation. 358.590 Radiographic Ruler for
A Locking IM Rod that won't back out. Simple and straight to the point! SURGICAL TECHNIQUE
 A Locking IM Rod that won't back out. Simple and straight to the point! SURGICAL TECHNIQUE The SLIM (Simple Locking IntraMedullary) System is a new generation of pediatric orthopedic nails specifically
Aesculap Targon TX. Intramedullary Nail for Tibial Fractures...going to X-tremes. Aesculap Orthopaedics
 Aesculap Targon TX Intramedullary Nail for Tibial Fractures...going to X-tremes Aesculap Orthopaedics Surgical Technique Preoperative Planning KH483 X-ray template Targon TX (KH483200 : 375 mm-420 mm KH48320
AcUMEDr. FoREARM ROD SYSTEM
 AcUMEDr FoREARM ROD SYSTEM FoREARM ROD SYSTEM Since 1988 Acumed has been designing solutions to the demanding situations facing orthopedic surgeons, hospitals and their patients. Our strategy has been
LOCKING TEP LOCKING TITANIUM ELASTIC PIN INTRAMEDULLARY NAIL
 LOCKING TEP LOCKING TITANIUM ELASTIC PIN INTRAMEDULLARY NAIL ... Index -3 3-8 8 9 9 0 7 Introduction Features Indicatiıons Surgical Technique Femoral Surgical Technique Tibial Surgical Technique Ulna Radius
Sirus Antegrade Femoral Nail System Surgical Technique
 Sirus Antegrade Femoral Nail System Surgical Technique The Cannulated Titanium Nail with Anatomical Shape and Lateral Entry Point Disclaimer This document is intended exclusively for experts in the field,
Cannulated Angled Blade Plate 3.5 and 4.5, 90.
 Cannulated Angled Blade Plate 3.5 and 4.5, 90. Technique Guide This publication is not intended for distribution in the USA. Instruments and implants approved by the AO Foundation. Table of Contents Introduction
Humeral Nailing System
 UHN/PHN Humeral Nailing System Surgical Technique Image intensifier control This description alone does not provide sufficient background for direct use of DePuy Synthes products. Instruction by a surgeon
Humeral Nails With Multiple Locking Options for Simple and Complex Fractures. MultiLoc. Humeral Nails. Surgical Technique
 Humeral Nails With Multiple Locking Options for Simple and Complex Fractures MultiLoc Humeral Nails Surgical Technique Table of Contents Introduction MultiLoc Humeral Nails 2 Screw Configurations 4 AO
Titanium Solid Humeral Nail System
 For Antegrade or Retrograde Insertion With Spiral Blade, Conventional and Compression Locking Titanium Solid Humeral Nail System Surgical Technique Table of Contents INTRODUCTION Foreword.... 2 Indications....
Chapter 4: Forearm 4.3 Forearm shaft fractures, transverse (12-D/4)
") AO Manual of ESIN in children s fractures Chapter 4: Forearm 4.3 Forearm shaft fractures, transverse (12-D/4) Title AO Manual of ESIN in children Subtitle Elastic stable intramedullary nailing (ESIN) Author
AO Manual of ESIN in children s fractures Chapter 4: Forearm 4.3 Forearm shaft fractures, transverse (12-D/4) Title AO Manual of ESIN in children Subtitle Elastic stable intramedullary nailing (ESIN) Author
OPERATING MANUAL AND TECHNIQUE GUIDE FOR TITANIUM FEMORAL AND TIBIAL NAILING SYSTEMS
 OPERATING MANUAL AND TECHNIQUE GUIDE FOR TITANIUM FEMORAL AND TIBIAL NAILING SYSTEMS ORTHO-MEDICAL GMBH TITANIUM FEMORAL NAIL OPERATIVE TECHNIQUE Introduction: Why a new type of femoral nail? The latest
LCP Distal Humerus Plates
 The anatomic fixation system for the distal humerus with angular stability Surgical technique LCP Locking Compression Plate Contents Indications and contraindications 2 Implants 3 Instruments 5 Preparation
NeoGen Femoral Nail System
 NeoGen Femoral Nail System LESS IS MORE TE-2070-04 Surgical Technique BLE OF CONTENT Preface Standard Femoral Mode Recon Mode Post-Operative Management Appendix Products Information Indication Patient
GREENS SURGICALS. Redefining Excellence INSTRUMENT SYSTEM PREPARED BY: DR. VINAY KUMAR
 GREENS SURGICALS Redefining Excellence TIBIA AND FEMUR INSTRUMENT SYSTEM PREPARED BY: DR. VINAY KUMAR OPERATIVE TECHNIQUES INDEX SR.NO CONTENTS 1 LIST OF INSTRUMENT FOR TIBIA AND FEMUR. 2 RADIO GRAPH OF
P.R.C.T II FIXATION PLATE FOR ARTICULAR FRACTURE OF THE PROXIMAL HUMERUS SURGICAL TECHNIQUE
 P.R.C.T II FIXATION PLATE FOR ARTICULAR FRACTURE OF THE PROXIMAL HUMERUS SURGICAL TECHNIQUE INDICATIONS - Surgical technique...page 0 - Mini invasive approach...page 04 - Diaphyseal plates...page 05 -
Surgical Technique. Cannulated Angled Blade Plate 3.5 and 4.5, 90
 Surgical Technique Cannulated Angled Blade Plate 3.5 and 4.5, 90 Cannulated Angled Blade Plate 3.5 and 4.5, 90 Table of contents Indications/Contraindications 2 Implants 3 Surgical technique 5 Implant
Olecranon Osteotomy Nail. For simple fractures and osteotomies of the olecranon.
 Olecranon Osteotomy Nail. For simple fractures and osteotomies of the olecranon. Technique Guide Discontinued June 2016; AVAILABLE FOR IMPLANT REMOVAL PURPOSES ONLY DSEM/TRM/0517/0843 Table of Contents
Surgical Technique Guide PANTERA. Proximal Humerus Fracture Fixation Plate System
 Surgical Technique Guide PANTERA Proximal Humerus Fracture Fixation Plate System Installing the PANTERA is a 4-Step Process: The following technique is designed to optimize the surgical exercise. Step
TM HUMELOCK II. Cemented. Hemi / Trauma. Total / Primary SURGICAL TECHNIQUE
 TM HUMELOCK II Cemented Hemi / Trauma SURGICAL TECHNIQUE Total / Primary CONTENTS - Surgical technique Humerus : Degenerative...page 0 - Surgical technique Glenoid...page 0 - Surgical technique Humerus
Zimmer Natural Nail System
 Zimmer Natural Nail System Antegrade Femoral Nail Surgical Technique (Piriformis Fossa & Greater Trochanteric Approaches) Zimmer Natural Nail System Antegrade Femoral Surgical Technique 1 Zimmer Natural
Technique Guide. SureLock Distal Targeting Device. C-arm guided targeting for trochanteric fixation nail.
 Technique Guide SureLock Distal Targeting Device. C-arm guided targeting for trochanteric fixation nail. Table of Contents Introduction SureLock Distal Targeting Device 2 Surgical Technique Preoperative
Polarus 3 Solution Plates and Nails. Surgical Technique 4.3. Screws
 Polarus 3 Solution Plates and Nails Surgical Technique 4.3 mm Screws Acumed is a global leader of innovative orthopaedic and medical solutions. We are dedicated to developing products, service methods,
BICEPTOR Tenodesis System
 BICEPTOR Tenodesis System Sub-Pectoral Biceps Tenodesis A Shoulder Series Technique Guide As described by: Nikhil N. Verma, MD As described by: Nikhil N. Verma, MD Midwest Orthopedics at Rush Chicago,
TABLE OF CONTENTS. 2 (8144 Rev 2)
") 1 (8144 Rev 2) TABLE OF CONTENTS Introduction Conventus CAGE TM - Proximal Humerus...3 Indications and Contraindications...4 Surgical Summary...5 Patient Positioning & Approach...6 Surgical Technique Plate
1 (8144 Rev 2) TABLE OF CONTENTS Introduction Conventus CAGE TM - Proximal Humerus...3 Indications and Contraindications...4 Surgical Summary...5 Patient Positioning & Approach...6 Surgical Technique Plate
This surgical technique describes how to perform an anatomic total shoulder arthroplasty implanting a short stem.
 INTRODUCTION This surgical technique describes how to perform an anatomic total shoulder arthroplasty implanting a short stem. CAUTION Federal law (USA) restricts this device to sale distribution and use
Open reduction; plate fixation 1 Principles
 Executive Editor: Peter Trafton Authors: Martin Jaeger, Frankie Leung, Wilson Li Proximal humerus 11-A2 Open reduction, plate fixation Search search... Shortcuts All Preparations All Approaches All Reductions
AcUMEDr. Locking Proximal Humeral Plate. PoLARUSr PHPt
 AcUMEDr Locking Proximal Humeral Plate PoLARUSr PHPt PoLARUSr PHPt LOCKING PROXIMAL HUMERAL PLATE Since 1988 Acumed has been designing solutions to the demanding situations facing orthopedic surgeons,
Polarus 3 Solution Plates and Nails. Surgical Technique 3.5. Screws 4.3. Screws
 Polarus 3 Solution Plates and Nails Surgical Technique 3.5 mm 4.3 mm Screws Screws Acumed is a global leader of innovative orthopaedic and medical solutions. We are dedicated to developing products, service
Principles of intramedullary nailing. Management for ORP
 Principles of intramedullary nailing Eakachit Sikarinklul,MD Basic Principles of Fracture Management for ORP Bangkok Medical Center Bangkok, 22-24 July 2016 Learning outcomes At the end of this lecture
Surgical Technique. Forearm Fracture Solutions
 Surgical Technique Forearm Fracture Solutions Acumed is a global leader of innovative orthopaedic and medical solutions. We are dedicated to developing products, service methods, and approaches that improve
Titanium Cannulated Retrograde/ Antegrade Femoral Nail
 Expert Nailing System With Radiolucent Instrumentation Titanium Cannulated Retrograde/ Antegrade Femoral Nail Surgical Technique Table of Contents Introduction Titanium Cannulated Retrograde/Antegrade
3. Insert Tocar Sleeves Insert the NCB tissue protection sleeve assembly 1.6 to 10mm through a skin incision (Fig. 38).
.") NCB Proximal Humerus Plating System Surgical Technique 19 2. Temporary Plate Fixation The plate can be temporary fixed to the bone with 1.6mm K-wire through the proximal cannulated fixation screw of the
NCB Proximal Humerus Plating System Surgical Technique 19 2. Temporary Plate Fixation The plate can be temporary fixed to the bone with 1.6mm K-wire through the proximal cannulated fixation screw of the
Expert Humeral Nailing System. Expert Humeral Nail and Expert Proximal Humeral Nail.
 Expert Humeral Nailing System. Expert Humeral Nail and Expert Proximal Humeral Nail. Surgical Technique Expert Nailing System This publication is not intended for distribution in the USA. Instruments and
Femur Condylar Plate System Procedural Steps.
 Femur Condylar Plate System Procedural Steps www.carbo-fix.com 1 Table of Contents Introduction..3 Instrumentation Set... 8 Procedural Steps:...... 12 Ordering Information 19 2 Introduction The CarboFix
TRAUMATOLOGY. Trochanter
 TRAUMATOLOGY Trochanter 1 References Prof. Dr. András Sárváry Head of Department Fővárosi Önkormányzat Péterfy Sándor úti Kórház Rendelőintézet és Baleseti Központ Budapest The following surgical description
Titanium Distal Femoral Nail System
 For Retrograde Insertion Titanium Distal Femoral Nail System Surgical Technique Table of Contents Introduction Titanium Distal Femoral Nail System 2 AO Principles 4 Indications 5 Clinical Cases 6 Surgical
QUICK REFERENCE GUIDE. The Orthofix Femoral Nailing System. By Prof. Dr. D. Pennig
 QUICK REFERENCE GUIDE The Orthofix Femoral Nailing System By Prof. Dr. D. Pennig Whenever possible, femoral fractures should be stabilized within the first 24 hours following injury, provided the patient
NCB Proximal Humerus Plating System
 NCB Proximal Humerus Plating System Surgical Technique The right locking option for tough fractures Disclaimer This document is intended exclusively for experts in the field, i.e. physicians in particular,
Humerus Block. Discontinued December 2016 DSEM/TRM/0115/0296(1) Surgical Technique. This publication is not intended for distribution in the USA.
 Surgical Technique. This publication is not intended for distribution in the USA.") Humerus Block Surgical Technique Discontinued December 2016 DSEM/TRM/0115/0296(1) This publication is not intended for distribution in the USA. Instruments and implants approved by the AO Foundation. Contents
Humerus Block Surgical Technique Discontinued December 2016 DSEM/TRM/0115/0296(1) This publication is not intended for distribution in the USA. Instruments and implants approved by the AO Foundation. Contents
3.5 MM VA-LCP PROXIMAL TIBIA PLATE SYSTEM
 3.5 MM VA-LCP PROXIMAL TIBIA PLATE SYSTEM Part of the DePuy Synthes Variable Angle Periarticular Plating System SURGICAL TECHNIQUE TABLE OF CONTENTS INTRODUCTION 3.5 mm VA-LCP Proximal Tibial Plate 2 AO
TRK REVISION KNEE Surgical Technique
 1 TRK REVISION KNEE Surgical Technique 1. 2. 3. 4. 5. 6. 7. 8. 9. 10. INTERCONDYLAR RESECTION...... page FEMORAL STEM...... page NON CEMENTED FEMORAL STEM...... page TRIAL FEMORAL COMPONENTS...... page
operative technique Universal Application
 operative technique Universal Application Introduction Introduction Building upon the design rationale of the Xia Spinal System, the new Xia Spinal System represents the latest advancement in spinal implant
TM HUMELOCK II. Cementless. Hemi SURGICAL TECHNIQUE
 TM HUMELOCK II Cementless Hemi SURGICAL TECHNIQUE CONTENTS - Surgical technique...page 03 - Use of the OMS (Offset Modular System)...page 06 - Tuberosity synthesis...page 07 - Rehabilitation...page 07
Surgical Technique Guide
 Surgical Technique Guide Minimally Invasive, Intramedullary Device For Distal Radius Fragility Fractures The Sonoma WRx Wrist Fracture Repair Device is flexible, inserting easily through a small incision
M/DN Tibial and Humeral Intramedullary Fixation. Surgical Technique
 M/DN Tibial and Humeral Intramedullary Fixation Surgical Technique M/DN Tibial and Humeral Intramedullary Fixation Surgical Technique 1 Surgical Techniques for Fixation of Fractures with M/DN Tibial and
Surgical Technique.
 Surgical Technique www.biomet.co.uk INTRODUCTION design principals Recent advances in imaging technology have enabled orthopaedic surgeons to extend closed treatment of femoral fractures to include more
Technique Guide. 3.5 mm LCP Periarticular Proximal Humerus Plate. Part of the Synthes locking compression plate (LCP) system.
 system.") Technique Guide 3.5 mm LCP Periarticular Proximal Humerus Plate. Part of the Synthes locking compression plate (LCP) system. Table of Contents Introduction 3.5 mm LCP Proximal Humerus Plate 2 AO Principles
Technique Guide 3.5 mm LCP Periarticular Proximal Humerus Plate. Part of the Synthes locking compression plate (LCP) system. Table of Contents Introduction 3.5 mm LCP Proximal Humerus Plate 2 AO Principles
Humeral Universal. Product Rationale & Surgical Technique
 TM Humeral Universal Product Rationale & Surgical Technique Contents Design Summary 3 Implant Overview 4 Precautions 7 Antegrade Entry and Canal Preparation 8 Antegrade Nail Insertion 14 Antegrade Locking
The Bio-Modular Choice Shoulder System,
 Surgical Technique The Bio-Modular Choice Shoulder System, designed for both total and hemiarthroplasty of the shoulder, has enjoyed nearly two decades of clinical success. The variety of head types and
TORNIER BIO-RSA. Bony Increased Offset - Reversed Shoulder Arthroplasty SURGICAL TECHNIQUE
 TORNIER BIO-RSA Bony Increased Offset - Reversed Shoulder Arthroplasty SURGICAL TECHNIQUE 2 Table of Contents: Concept...4 Bony Increased Offset Reversed Shoulder Arthroplasty (BIO-RSA ) Concept...4 Surgical
Surgical Technique. Proximal Humerus Locking Plate
 Surgical Technique Proximal Humerus Locking Plate PERI-LOC Upper Extremity Locked Plating System 3.5mm & 4.5mm Proximal Humerus Locking PlatesCatalog Infor Table of Contents Introduction.........................................................2
ANATOMIC SHOULDER ARTHROPLASTY
 ANATOMIC SHOULDER ARTHROPLASTY INTRODUCTION This surgical technique describes how to perform an anatomic shoulder arthroplasty implanting a cemented pegged glenoid baseplate. CAUTION Federal law (USA)
Titanium Cannulated Adolescent Lateral Entry Femoral Nail. Expert Nailing System.
 Titanium Cannulated Adolescent Lateral Entry Femoral Nail. Expert Nailing System. Technique Guide EXPERT Nailing System Table of Contents Introduction Titanium Cannulated Adolescent Lateral Entry 2 Femoral
titanium cannulated adolescent lateral entry femoral nail
 titanium cannulated adolescent lateral entry femoral nail Expert Nailing System with Radiolucent Instrumentation SurgIcal technique Table of Contents Introduction Titanium Cannulated Adolescent Lateral
Polarus 3 Solution Plates and Nails
 Surgical Technique Polarus 3 Solution Plates and Nails Acumed is a global leader of innovative orthopaedic and medical solutions. We are dedicated to developing products, service methods, and approaches
Titanium Cannulated Lateral Entry Femoral Recon Nail
 Expert Nailing System Titanium Cannulated Lateral Entry Femoral Recon Nail Surgical Technique Table of Contents Introduction Titanium Cannulated Lateral Entry 2 Femoral Recon Nail Expert System AO Principles
Zimmer ITST Intertrochanteric/ Subtrochanteric Fixation System. Abbreviated Surgical Technique
 Zimmer ITST Intertrochanteric/ Subtrochanteric Fixation System Abbreviated Surgical Technique ITST System Abbreviated Surgical Technique Indications The ITST Intramedullary Nail is indicated for use in
Surgical Technique. Targeter Systems Overview
 Surgical Technique Targeter Systems Overview PERI-LOC Locked Plating System Targeter Systems Overview Table of contents Product overview... 2 Introduction... 2 Indications... 2 Design features and benefits...
Phoenix Tibial Nail System
 Surgical Technique Phoenix Tibial Nail System Featuring CoreLock Technology Each nail features CoreLock Technology, a preassembled, embedded locking mechanism for locking all proximal oblique screws, which
PROXIMAL HUMERAL NAILING SYSTEM OPERATIVE TECHNIQUE
 PROXIMAL HUMERAL NAILING SYSTEM OPERATIVE TECHNIQUE PROXIMAL HUMERAL NAILING SYSTEM Contributing Surgeons: Rupert Beikert, M.D. Senior Trauma Surgeon, Murnau Trauma Center Murnau, Germany Rosemary Buckle,
Percutaneous Humeral Fracture Repair Surgical Technique
 Percutaneous Humeral Fracture Repair Surgical Technique Percutaneous Pinning Percutaneous Humeral Fracture Repair Closed reduction followed by percutaneous fixation reduces risk from soft tissue dissection
PediNail Pediatric Femoral Nail
 PediNail Pediatric Femoral Nail Surgical Technique Table of Contents Indications...3 Patient Positioning...3 Approach...4 Reaming...5 Nail Placement...6 Proximal Interlocking...7 Distal Interlocking...8
MICRONAIL. Intramedullary Distal Radius System SURGICAL TECHNIQUE
 MICRONAIL II Intramedullary Distal Radius System SURGICAL TECHNIQUE Contents Introduction 3 4 Chapter 1 5 Chapter 2 6 Appendix A 18 Appendix B 19 Surgeon Design Team Introduction Product Information Surgical
Pre-Operative Planning. Positioning of the Patient
 Surgical Technique Pre-Operative Planning Decide upon the size and angle of the barrel plate to be used from measuring the x-rays. To maximise the sliding action when using shorter lag screws, the Short
TABLE OF CONTENTS SURGICAL TECHNIQUE 1 POST-OPERATIVE REHABILITATION 18. pages 1 RADIOLOGICAL ASSESSMENT 1 2 PATIENT POSITIONING 1
 TABLE OF CONTENTS SURGICAL TECHNIQUE 1 1 RADIOLOGICAL ASSESSMENT 1 2 PATIENT POSITIONING 1 3 DELTO-PECTORAL APPROACH 2 4 HUMERAL HEAD OSTEOTOMY 6 5 CHOICE OF HUMERAL INCLINATION AND RETROVERSION 7 pages
INTRAMEDULLARY. Medical Devices. Femur Intramedullary Nail
 FEMUR INTRAMEDULLARY Femur Intramedullary Nail Multi-functional Standard and Recon Antegrade and Retrograde Application Different Multi-Planner Locking Choices Medical Devices Introductions The new, multifunctional
Femoral Recon Nail System FRN
 Greater Trochanter Piriformis Fossa Approaches For Intramedullary Fixation of Femoral Shaft Fractures Femoral Recon Nail System FRN Surgical Technique Table of Contents AO Principles 2 Indications and
S U R G I C A L T E C H N I Q U E David A. McQueen, MD Return to Menu
 S U R G I C A L T E C H N I Q U E David A. McQueen, MD TOTAL KNEE INSTRUMENTS Wichita Fusion Nail Introduction...1 Preoperative Planning...2 Surgical Technique...3-8 Wichita Fusion Nail Surgical Technique
THE FIRST PERCUTANEOUS LOCKED FLEXIBLE INTRAMEDULARY NAIL SYSTEM FOR HAND FRACTURES
 THE FIRST PERCUTANEOUS LOCKED FLEXIBLE INTRAMEDULARY NAIL SYSTEM FOR HAND FRACTURES Intramedullary Nail & Slotted Awl Proximal Locking Device New Radio Opaque Soft Tissue Protection Cap Pre Operative Post
Expert R /AFN Retrograde /Antegrade Femoral Nail.
 Expert R /AFN Retrograde /Antegrade Femoral Nail. Technique Guide Expert Nailing System Table of Contents Introduction Features 2 AO/ASIF principles of internal fixation 7 Indications 9 Cases 10 Retrograde
TRAUMATOLOGY. Humerus
 TRAUMATOLOGY Humerus 1 References Dr. Zoltán DETRE Lead Surgeon Szent János Kórház, Budapest Prof. Dr. András SÁRVÁRY Head of Department, Director Főv. Önk. Péterfy Sándor úti Kórház Rendelőintézet és
PROXIMAL TIBIAL PLATE
 SURGICAL NÁSTROJE TECHNIQUE PRO ARTROSKOPII PROXIMAL INSTRUMENTS TIBIAL FOR PLATE ARTHROSCOPY Proximal Tibial Plate Description of medical device The Proximal Tibial Plate is used in epyphyseal and metaphyseal
NCB Distal Femur System. Surgical Technique
 NCB Distal Femur System Surgical Technique NCB Distal Femur System Surgical Technique 3 Surgical Technique NCB Distal Femur System Table of Contents Introduction 4 Indications 8 Preoperative Planning
A locking plate system that expands a surgeon s options in trauma surgery. Zimmer NCB Plating System
 A locking plate system that expands a surgeon s options in trauma surgery Zimmer NCB Plating System The Power of Choice The power of having true intraoperative options is at your fingertips. Using standard
THE HUMERUS 20 THE HUMERUS* CROSS SECTION CROSS SECTION SUPERIOR VIEW
 20 THE HUMERUS* CROSS SECTION CROSS SECTION SUPERIOR VIEW The marrow canal of the humerus is funnel-shaped. Its successful pinning is influenced by many factors. With a few exceptions, the entire humerus
Expert A2FN. Designed for small statured patients.
 Expert A2FN. Designed for small statured patients. Technique Guide Expert Nailing System This publication is not intended for distribution in the USA. Instruments and implants approved by the AO Foundation
MultiLoc Humeral Nailing System. Multiply your options.
 MultiLoc Humeral Nailing System. Multiply your options. Surgical Technique This publication is not intended for distribution in the USA. Instruments and implants approved by the AO Foundation. Table of
Surgical Technique. Including
 Including 1 for the TRIGEN Humeral Nail System using the TRIGEN SURESHOT Distal Targeting System Table of contents Introduction... 3 TRIGEN Humeral Nail indications... 4 TRIGEN SURESHOT indications...
OPERATIVE TECHNIQUE GALAXY FIXATION SHOULDER
 OPERATIVE TECHNIQUE GALAXY FIXATION SHOULDER cop2 OPERATIVE TECHNIQUE INTRODUCTION 1 FEATURES OF SHOULDER COMPONENTS 2 EQUIPMENT REQUIRED 5 PREOPERATIVE PLANNING 6 SURGICAL PROCEDURE 8 POST OPERATIVE MANAGEMENT
URSA HEMI-SHOULDER ARTHROPLASTY B I O T E K
 URSA HEMI-SHOULDER ARTHROPLASTY SURGICAL TECHNIQUE B I O T E K 2 Surgical Position Once general anesthesia has been satisfactorily induced, or a supraclavicular nerve block has been given, the patient
The Titanium Cannulated Tibial Nail with Proximal Bend. Expert nailing system.
 The Titanium Cannulated Tibial Nail with Proximal Bend. Expert nailing system. Technique Guide Expert Nailing System Table of Contents Introduction Titanium Cannulated Tibial Nail with 2 Proximal Bend
OPERATIVE TECHNIQUE SKS Total Knee Replacement
 OPERATIVE TECHNIQUE SKS Total Knee Replacement Femoral preparation A40577 1 2 5 1: Alignment rod A30049 + A30124 2: Centromedullary rod A40224 4: T-handle A40232 6: Femoral measuring device A40411 + A40414
The study of distal ¼ diaphyseal extra articular fractures of humerus treated with antegrade intramedullary interlocking nailing
 2018; 4(4): 46-50 ISSN: 2395-1958 IJOS 2018; 4(4): 46-50 2018 IJOS www.orthopaper.com Received: 01-08-2018 Accepted: 03-09-2018 Dr. Ankur Parikh Orthopaedics, Jehangir Hospital, Sassoon road, Pune, Dr.
Expert R/AFN. Retrograde/Antegrade Femoral Nail.
 Expert R/AFN. Retrograde/Antegrade Femoral Nail. Surgical Technique EXPERT Nailing System This publication is not intended for distribution in the USA. Instruments and implants approved by the AO Foundation
Femoral Recon Nail System FRN
 Greater Trochanter Piriformis Fossa Approaches For Intramedullary Fixation of Femoral Shaft Fractures Femoral Recon Nail System FRN Surgical Technique Image intensifier control This description alone does
Arthrodesis of the Ankle
 TM Arthrodesis of the Ankle Plantar View of the Foot 1. Make a lateral incision to expose the tibia-talus joint and the talo-calcaneal joint. Prepare the arthrodesis sites surgically with a rasp or an