Occ 5002, Summer Semester /24/2010
|
|
|
- Corey Ryan
- 5 years ago
- Views:
Transcription
 1.")


1 Trimming Casts: Occlusion 5002 (three types) 1. Removable casts with vestibule 2. Fixed cast with no vestibule 3. Bleaching cast with no palate What do we know? Pouring casts Trimming casts Duplicating a model with an alginate impression Our Goal What do we need to learn? Principles for casts Dimensions for stone Patient differences on cast design Cast needs for different situations GOAL: Quality Casts Two-Stage Pour Use for ALL Casts except bleaching Water and air rise during setting so Tray suspended right side up Quality Casts REVIEW REVIEW First Pour Impression lightly dried Stone vibrated into impression starting slowly from one corner Impression suspended, retention nodules for second stage added Set at least minutes Base added after initial set Vacuum mixing to avoid bubbles Is your vacuum hose clogged? Know what happens when you turn it on without the hose in place, then close the hole 1


2 Connect the hose and check again Close the hose for final check Vibration, Angle of impression, and amount of stone determine flow rate and lack of bubbles If the hose is stopped up, you should replace the gauze and check the opening. You only need one square of the unfolded 2X2 gauze The first increment should be the SMALLEST!! Always add stone at the same areas Do not allow the stone to fold over on itself: traps air Pour Stone 2 mm over depth of vestibule Stone Alginate Fill the teeth, then remove from the vibrator and complete filling the impression by hand. Jiggling motion to move the properly mixed stone Cover the alginate and wax, but avoid locking onto tray 2


3 TOO MUCH STONE!! Only need 2-3 mm depth Alginate edge Base edge REVIEW:TONGUE SPACE The tongue space can be filled with wet paper towels, PlayDoh, or alginate to form the base area to minimize trimming later Avoid mix that is too runny: weakens stone too thick: does not flow so have air bubbles Good tongue space block out Difficult to remove tongue stone without damage to teeth 3


4 Impossible to remove successfully! WET AND WIPE!!!! For additions Use flat plastic square or tile to minimize trimming Make base larger than initial pour Too much base means lots of trimming First pour captured details of vestibule; second pour has adequate stone to preserve vestibule with adequate land area The amount of vestibule needed is not all that is captured in the alginate impression, but only the thickness of the vestibule with a depth of 2-3 mm (for a flange of a prosthesis) 4


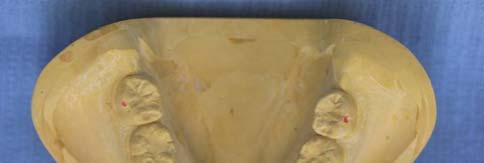
5 Good and bad points? Principles: Handle parallel to table top, assuming teeth are positioned in the tray correctly 1. How to clear spatula to stack stone 2. Clear tongue space 3. Support heels of mandibular Adequate thickness to create land area which preserves vestibule What is wrong with these pourings? Cast must be wet. Wipe stone into undercut areas on base Invert onto patty and shape base Set for additional minutes Quality Casts Second Pour Blend two pours together Do not lock stone onto tray Allow stone to set, but not so long that alginate hardens Quality Casts Second Pour Remove from alginate within one hour Remove stone that is locking the tray first, using wooden handle chisel/knife Remember which way the teeth point! Quality Casts Second Pour 5


6 Quality Casts Second Pour What are good points, bad points? Remove from alginate within one hour Remove stone that is locking the tray first Remember which way the teeth point! No Land Area Why no good land area? Problem? Building up the heels of the mandibular cast, while clearing the tongue space and avoiding locking the tray in the stone. If the first pour of stone is not wet, the second pour will not bond well 6


 Best to avoid rather than have")


7 So when trimming, the layers separate When dry, can superglue together if a good fit; however, when separate later, chance they may again debond Avoid separate of two pours by always having wet set stone for second mix, and good consistency of second mix (by hand) Best to avoid rather than have to correct; repour base Quality Casts Quality Casts Quality Casts Trimming The Cast Never trim dry on standard wheel trimmer Trim with proper contours Watch base thickness Clean off all nodules Fill in all critical voids Not What We Want Quality Casts Trimming The Cast Trim base parallel to occlusal plane Trim land areas as required for specific cast use Watch your fingers Watch the tooth surfaces 7


8 Inaccurate cast due to allowing slurry from grinding to bond to the cast Avoid by frequent rinsing during trimming May use soft brush to dislodge Quality Casts Trimming/Storage 4-6mm Trimming with burs best when dry Ti Trimming i with ithk knife or instrument tb best when wet 2-3mm Never ship or store damp Removable casts 4-6mm 2-3mm Fixed & Removable Casts Removable Cast Teeth focus Attached and unattached Tissue focus Vestibule width at 2-3mm Land area to strengthen cast at vestibule Hamular notches Retromolar pad Mounted to remove Fixed Casts Teeth focus Attached Gingiva No Vestibule Trimmed toterminal tooth Edges beveled Mounted so as not to be removed 8


9 Fixed casts do not need vestibule Removable casts and orthodontic casts need vestibule and all areas of soft tissue to see undercuts and boney protuberance Fixed casts only need the teeth and enough stone to mount in an articulator Removable cast guidelines preserve the proper thickness of the vestibule for the flange of a prosthesis Fixed casts have the teeth and the attached gingiva for occlusion and missing teeth issues Trimming Various Casts For Dentistry Step 1 is to trim the cast so the base is parallel to the Step 1 is to trim the cast so the base is parallel to the occlusal plane: anterior-posterior, and lateral 9


10 One side touches before the other Requires two views in two planes to correct 90º Step 1 is to trim the cast so the base is parallel to the occlusal plane: anterior-posterior, and lateral Trim the bottom of the base first 10


11 Hold position till underside is completely flat Keep slurry rinsed, and inspect in both planes frequently Half inch thickness is measured by feel to avoid grinding through palate or having cast fracture Patient anatomy will determine thickness of base Hold position till underside is completely flat Keep slurry rinsed, and inspect in both planes frequently 11


12 First get bulk reduced Then lower height down to 2 mm Then reduce sides to correct dimension and shape The closer the base pour and first horizontal trim to ideal, the less vertical trim needed to create the proper vestibule Pour Stone 2 mm over depth of vestibule Stone Alginate Cover the alginate and wax, but avoid locking onto tray Base added to be parallel to tray bottom Base added to be parallel to tray bottom Base trimmed flat parallel to occlusal plane, then trim sides First trim from side until land area left of about 2 mm 2 12


13 Second let dry and trim from Third trim from side until width of occlusal until depth of vestibule land area returns to about 2 mm left of about 2 mm 2 2 Imagine the 2 by 2 mm dimensions preserving anatomical landmarks for the appropriate cast design Imagine how much of the impression of the cheek that is in the stone must be removed to obtain a 2X2 vestibule Trim wet with water running to appropriate dimension 13


14 The better the second pour is positioned originally, the less trimming that is required for the cast If you don t trim the bottom of the base FIRST the sides won t be perpendicular to the base. If you don t trim the bottom of the base the sides won t be perpendicular to the base. The model trimmer must be set at 90 degrees for the angles to be appropriate Planning for the trimming step when initially pouring will eliminate much work later 14


15 You cannot lose sight of where you are trimming when working on the sides 15


16 2-3 mm thickness of land area is related to the depth and width Palm thumb grasp is essential for protection of your hands and the cast Set Aside Until The Casts Are Dry to Trim Dust collector and frequent air blasts avoid stone sticking to the cast Check out air gun for lab and dusty work Stone cutting wheel is aggressive, but dangerous May be best only for bleaching cast 16


17 4-6mm Review how the pour influences the trimming ease 2-3mm 4-6mm Problems? 17


18 What did they forget to do? Errors? 4-6mm 2-3mm 2-3mm 4-6mm 18


19 Defects and errors in the cast must be addressed What caused the positive bubbles, and how avoid (2)? What caused the negative bubbles, and how avoid (2)? Removal of nodules should be very selective, as each place altered is now an inaccurate portion of the cast Since removable casts are removed from the articulator to be processed and then reattached, some orientation means is needed Notches that have no undercuts are used, with vaseline in them as well as vaseline in the center of the cast Principle: Notches with no undercuts of significant dimension to be poured with mounting plaster and preserved during separation will allow repositioning of the cast back on the articulator after some event. Could be three or four notches Removable has now gone to three round for ease Classic was four sharp pyramids as are shown in handout 19


20 REVIEW REVIEW REVIEW REVIEW REVIEW Fixed casts have the minimum vestibule without damaging the teeth during trimming. 20


 No tissue distortion (adjacent to")


21 Fixed casts are not meant to be separated from the mounting, so notches are merely insurance in case they do separate This will be covered with mounting stone Use a pencil or permanent marker to identify the patient, the date of the casts, the articulator settings, etc.on the sides of the casts Name & Date Only write on the base if the casts are not to be mounted Name & Date Bleaching Tray Cast Pour with adequate thickness to separate, but no obvious base Stack only enough stone to remove the cast, not for a large base Wrap to preserve in plan to repour Tree to support Cast Development Minimum positive blebs (finger wipe) No voids on teeth (correct LC Blockout) No tissue distortion (adjacent to teeth) No vestibule (trim from base side) Horseshoe or thin center area / hole Central incisors vertical to flat base Dry (for porosity and adaptation when ready to fabricate tray) Options for Maxillary Cast for Bleaching Tray 1. New alginate impression 2. Duplicate existing cast 3. Double-pour properly-managed alginate impression 21


:128-131. 131.")


22 Double-Pour Alginate Impression Due to the extensive trimming of the cast for the tray, double-pouring the alginate impression generates a 2nd diagnostic cast for occlusal or esthetic treatment First pour must be kept in wet towel or humidor until stone has set (20-45 m) Rinse and repour (if no tears) results in cast of equal quality to an additional impression (Haywood VB, Powe A. Using Double-poured Alginate Impressions to Fabricate Bleaching Trays. Operative Dent 1998;23(3): ) Final trimming of cast will have no vestibule 2-10 mm beyond teeth flat base Trim base such that central incisor teeth are vertical This will avoid folds in the tray when fabricating Flat base with hole in center or horseshoe shape Avoid damaging teeth by trimming cast from base until vestibule is reached and hole is in palate 22


23 Any defect on the cast will not allow the tray to fit properly Avoid having tray cover any area that was trimmed (not in the impression) Incorrect trimming of the cast creates an artifical shape that will not be found in the mouth. Since the tray is formed by a vacuum-former, you cannot have voids in the teeth either Tray Tray Centrals not perpendicular and distal too thick Cast bubble No bubble in mouth 23


24 When blocking out negatives, the block-out material must be slighter greater than the defect. Cannot block out undercuts with wax, since tray is formed in vacuum former with heater Tray LC Blockout is a laboratory grade blue light cured composite. bubble Cast It was designed for spacers or reservoirs on bleaching trays. MCG does not use reservoirs, but the material is good for other cast issues Use to fill in defects so the tray will fit Do not use stone, as that is difficult to see and messy Slightly overfill Light cure for 20 seconds Wipe air-inhibited layer If you have bubbles, they must be filled with LC Blockout (not wax) to be slightly bigger than the missing area, but smooth LC Blockout can be used to block out undercuts with fixed retainers, pontics on FPDs, and severe undercuts on teeth 24


25 Natural defects, chips, nicks Use block-out out for voids or cast defects Also for undercuts that would lock tray onto cast Summary Have one maxillary cast of yourself trimmed for bleaching tray fabrication Store this cast until the end of the semester in the box provided by disensary You will fabricate a bleaching tray on this cast at the end of the course You will insert it on yourself to see how the tray feels in the mouth Alginate review for second group: Operator position reason Location for extra to wipe on occlusal surfaces Forces on tray to seat posterior; watching anterior Topical Anesthetic Spray in the clinic 25


26 Fit wax to palate, then vestibule Adhesive on green tray and on wax Same patient, but difference in techniques Ideally want bubble-free occlusal surface Most significant errors are not seating tray far enough Taking too long to load tray after 30 second mix and get seated completely Bend tray options and technique Heat, bend, water cool, try-in again Clinic & Lab today Alginate impressions Maxillary RPD FP B Mandibular RPD FP Axium Project sheet Pour and Trim RPD FP B Need RPD by July 1 to mount with FB Model trimmers also on second floor Next session for catchup, retakes and trimming 26
ARAB AMERICAN UNIVERSITY. Lab. Manual. Prosthetic Dentistry1; Removable Prosthodontics. 3 rd year
 ARAB AMERICAN UNIVERSITY Lab. Manual Prosthetic Dentistry1; Removable Prosthodontics 3 rd year Department of Fixed and removable prosthetic Dentistry Faculty of Dentistry 2012/2013 Course Instructor Dr.
Complete denture impressions
 Lec.5 Complete denture impressions د. غسان الطائي Dental Impression: a negative imprint of an oral structure used to produce a positive replica of the structure to be used as a permanent record or in the
Interim Denture Interim Complete Dental Prosthesis Clinical Steps
 Interim Denture Interim Complete Dental Prosthesis Clinical Steps Diagnostic Appointment Comprehensive Exam Extra oral Intra oral Address: Main complaint Esthetic concerns Other concerns Discuss (if present)
Complete Denture Clinic Complete Removable Dental Prosthesis Procedures
 Complete Denture Clinic Complete Removable Dental Prosthesis Procedures Diagnostic Appointment Comprehensive Exam Extra oral Intra oral Discuss current dentures Main complaint Esthetic concerns Prosthetic
MM01-Facebow And Bite Registration Procedure Checklist
 MM01-Facebow And Bite Registration Procedure Checklist Bite fork Registration OK Redo 1. Estimate the shape of the patient s arch 2. Place the bite tabs on the bite fork 3. Warm the compound in hot water
Lab Procedure Prior to Try-in
 Lab Procedure Prior to Try-in It is the procedure of attaching the maxillary and mandibular casts to the articulator in their recorded jaw relation. It is also called articulation. The maxillary cast is
Occlusal Splint Fabrication Technique
 Occlusal Splint Fabrication Technique Safety glasses should be worn for all lab procedures as well as gloves when handling acrylics. Items featured in this technique are found on the last page. 1 Mount
Face-Bow Instructions
 M Panadent Corporation 580 S. Rancho Avenue Colton, California 92324, USA Tel: (909) 783-1841 USA & Canada (800) 368-9777 The following procedure is followed when Panadent Bite-Tab compound discs are used
Surveying. 3rd year / College of Dentistry/University of Baghdad ( ) Page 1
 Page 1") د. فائزة Lec.3 Prosthodontics Surveying The ideal requirements for successful removable partial denture are: 1. Be easily inserted and removed by the patient. 2. Resist dislodging forces. 3. It should
د. فائزة Lec.3 Prosthodontics Surveying The ideal requirements for successful removable partial denture are: 1. Be easily inserted and removed by the patient. 2. Resist dislodging forces. 3. It should
Removable Prosthodontics. Complete Denture Procedures for a Team Approach in the Home
 Department of General Dentistry Division of Removable Prosthodontics Complete Denture Procedures for a Team Approach in the Home For Competency #9 1 Rev. April 2010 Ronni A. Schnell, D.M.D., M.A.G.D. and
STEP-BY-STEP-ANLEITUNG
 STEP-BY-STEP-ANLEITUNG VON TECHNIKERN FÜR TECHNIKER LABORATORY PROCEDURES, STEP BY STEP BY TECHNICIANS FOR TECHNICIANS Eclipse junior Laboratory Procedures, Step by Step* Splints Drilling Stents Temporaries
Removable Prosthodontics. Complete Denture Procedures for a Team Approach
 Department of General Dentistry Division of Removable Prosthodontics Complete Denture Procedures for a Team Approach For Competency #9 1 Rev. April 2010 Ronni A. Schnell, D.M.D., M.A.G.D. Complete Denture
Impression Manual.
 Impression Manual www.paladigitaldentures.com Contents Page 1 Requirements for Impressions Complete Denture Single Arch Maxillary Denture Single Arch Mandibular Denture Maxillary Impression Maxillary
Fixed Partial Denture
 University of Minnesota School of Dentistry Fixed Partial Denture Self-guided Instructional Material for Dental Students Authors Ranier M. Adarve, DMD, MS, MHPE Lisa Fedor James, DDS, Cert. Pros. Fixed
Removable Prosthodontics. Summative Evaluations
 Department of General Dentistry Division of Removable Prosthodontics Summative Evaluations For Competency #9 Rev. February 2010 Ronni A. Schnell, D.M.D., M.A.G.D. General Guidelines for the Removable Prosthodontics
RELINING AND REBASING
 RELINING AND REBASING Relining: The process used to resurface the tissue side of a denture with new material layer, thus producing an accurate adaptation to the denture foundation area. Rebasing: The laboratory
Relining and Rebasing of complete denture
 Relining and Rebasing of complete denture It is the procedures used to resurface the tissue-side of a denture with new material layer, thus producing an accurate adaptation to the denture foundation area.
SURVEYING OF REMOVABLE PARITAL DENTURES FEB, 11, 2015
 SURVEYING OF REMOVABLE PARITAL DENTURES FEB, 11, 2015 Dental Surveyor: It is a mechanical device used to determine the relative parallelism of the teeth surfaces and the undercuts areas in relation to
The width of the MCXL step bur is 1.4 mm wide and has a blunt end. As the bur approaches the inside of
 As I teach first year dental students how to prep a tooth for a full gold crown, get an impression, pour and mount models, wax-up, cast and polish, they are almost always amazed at all the required steps
AccuDent XD. A beautiful smile makes a great impression... Office Procedure Guide. ...but it takes a great impression to make a beautiful smile.
 AccuDent XD Alginate Impression System Office Procedure Guide A beautiful smile makes a great impression......but it takes a great impression to make a beautiful smile. EXPLORE. SHOP. LEARN. Accu-Dent
PH-04A: Clinical Photography Production Checklist With A Small Camera
 PH-04A: Clinical Photography Production Checklist With A Small Camera Operator Name Total 0-49, Passing 39 Your Score Patient Name Date of Series Instructions: Evaluate your Series of photographs first.
VIP Partner Laboratory (PL) Process Flow
 Process Flow") VIP Partner Laboratory (PL) Process Flow 1. VIP Software 2. CT Scan Appliance 3. CT Scan Clinician purchases VIP for PL fabricates CT Scan Appliance Patient submitted for scans treatment planning purposes
VIP Partner Laboratory (PL) Process Flow 1. VIP Software 2. CT Scan Appliance 3. CT Scan Clinician purchases VIP for PL fabricates CT Scan Appliance Patient submitted for scans treatment planning purposes
DEVELOPING ANALOGUE/SUBTITUTE FOR THE MANDIBULAR DENTURE BEARING AREA. Dr Muhammad Rizwan Memon FCPS Assistant Professor
 DEVELOPING ANALOGUE/SUBTITUTE FOR THE MANDIBULAR DENTURE BEARING AREA Dr Muhammad Rizwan Memon FCPS Assistant Professor Crest of Residual Ridge Buccal Shelf Shape of supporting structure Mylohyoid Ridge
Denture Troubleshooting Guide
 Denture Troubleshooting Guide Technical bulletin from National Dentex Comfort Sore spot in vestibule upper or lower denture Sore spot in upper post dam. (posterior limit of upper) Single sore spots on
Kois Dento-Facial Analyzer System Instructions
 These instructions apply to the following items: M Panadent Corporation 580 S. Rancho Avenue Colton, California 92324, USA Tel: (909) 783-1841 USA & Canada (800) 368-9777 Kois Dento-Facial Analyzer System
Using the Lucia Jig to take an accurate & reliable centric relation bite registration
 Trimming Instructions Trimming the silicone bite records is an important step to ensure an accurate fit on the model. Trimming eliminates all the interferences so there is no movement once the models are
AD2 MEASURES CONDYLE DISPLACEMENT (MCD) MANUAL
 MANUAL") AD2 MEASURES CONDYLE DISPLACEMENT (MCD) MANUAL Dr. Jorge Ayala Puente, DDS* Dr. Gonzalo Gutiérrez Álvarez, DDS* Dr. José Miguel Obach M., DDS Translation: Dr. Barbara Fernández Lübbert, DDS Edited: Dr.
AD2 MEASURES CONDYLE DISPLACEMENT (MCD) MANUAL Dr. Jorge Ayala Puente, DDS* Dr. Gonzalo Gutiérrez Álvarez, DDS* Dr. José Miguel Obach M., DDS Translation: Dr. Barbara Fernández Lübbert, DDS Edited: Dr.
Accu-Dent. impression system. Procedural guide. System 2 TM. For removable dentate impressions
 Accu-Dent impression system System 2 TM Procedural guide System 2 TM For removable dentate impressions The Complete System 2 TM Accu-Dent s System 2 is designed for partials, immediate dentures, orthodontics,
Reference to primary publication Properties of alginates in ZWP 4/2014 Xantalgin Crono - Introduction
 Reference to primary publication in ZWP 4/2014 Dr. Marcus Holzmeier, Wuerzburg Xantalgin Crono - Highly accurate alginate impressions. Introduction Even today when digital impression techniques are gaining
AVADENT-WAGNER EZ GUIDE PROTOCOL
 APPOINTMENT A. Final Impressions 1 APPOINTMENT 2 APPOINTMENT 3 D. Seat Wagner EZ Guide Try-In B. Papillameter Measurement E. Refine Anterior Teeth C. Tooth Mould Selection F. Interocclusal Record G. Deliver
TASKS. 2. Apply a disclosing agent to make the plaque visible.
 TASKS EQUIPMENT AND MATERIALS Personal protective equipment Assortment of nylon, soft-bristled toothbrushes Assortment of dental Floss, waxed and nonwaxed Disclosing solution Face mirror 3. Demonstrate
Invisible Retainer with Multi-Tooth Pontic Fabrication Technique (Single-Tooth Pontic Procedure also available)
") Invisible Retainer with Multi-Tooth Pontic Fabrication Technique (Single-Tooth Pontic Procedure also available) Safety glasses should be worn for all lab procedures as well as gloves when handling acrylics.
Invisible Retainer with Multi-Tooth Pontic Fabrication Technique (Single-Tooth Pontic Procedure also available) Safety glasses should be worn for all lab procedures as well as gloves when handling acrylics.
UDELL DENTAL LABORATORY Instructions for Use
 DALLA BONA Summary Cylindrical Dalla Bona Rigid precision attachment. Radicular telescopic stud. Adjustable frictional retention. Gold alloy male (Elitor) and female (OSV). Fixation: Male - soldered to
Cutting instruments. Instruments
 Instruments أﻧﺲ اﻟﻌﺒﯿﺪي. د The removal and shaping of tooth structure are essential aspects of restorative dentistry. Initially this was a difficult process accomplished entirely by the use of - Hand instruments.
UDELL DENTAL LABORATORY Instructions for Use PREAT Precision Attachments
 Indications Instructions The Locator Root Attachment is designed for use with overdentures or partial dentures, retained in whole or in part by endodontically treated roots in the mandibular or maxilla.
CLEAR, THIN, & STRONG
 CLEAR, THIN, & STRONG making bite splints successful through effective design Elizabeth D. Caughey, DDS Pankey Institute Visiting Faculty from Atlanta, GA Summer 2015 START WITH THE GOAL visualize a smooth,
LABORATORY PROCEDURES, STEP BY STEP
 LABORATORY PROCEDURES, STEP BY STEP BY TECHNICIANS FOR TECHNICIANS Eclipse Laboratory Procedures, Step by Step* Dentures with cast-metal frameworks Combination dentures Complete dentures Splints Drilling
Hex-Lock Abutment System. Restorative Manual
 System Restorative Manual 32 Restorative options with s s are manufactured from titanium alloy and used as the support foundation for single- or multiple-unit cement-retained, partially edentulous fixed
Principles of. By: Dr. Ahmad Rabah
 Principles of By: Dr. Ahmad Rabah 1. Utilize what's present: Whenever possible, select a design that fits the teeth and soft tissues, rather than choosing one that requires tissue alteration. When minimal
ORTHODONTIC BANDING AND CEMENTATION. Materials
 ORTHODONTIC BANDING AND CEMENTATION Materials Required Materials for fitting bands: 1. Selection of bands of different sizes for the teeth to which you are fitting bands 2. Tweezers to take the bands out
AVADENT-WAGNER EZ GUIDE PROTOCOL
 APPOINTMENT 1 APPOINTMENT 2 APPOINTMENT 3 A. Final Impressions D. Seat Try-In B. Papillameter Measurement E. Refine Anterior Teeth C. Tooth Mould Selection F. Interocclusal Record G. Deliver Final Dentures
A comparative evaluation of three different techniques for single step border molding
 ORIGINAL RESEARCH A comparative evaluation of three different techniques for single step border molding Kheur M 1, Jambhekar S 2, Sethi T 3, Kheur S 4 1Professor, 3 PG student, Dept. of Prosthodontics,
Secondary, master, (functional impression) taking methods Dr. Károlyházy Katalin Semmelweis Univ. Budapest, Department of Prosthodontics Head of the
 taking methods Dr. Károlyházy Katalin Semmelweis Univ. Budapest, Department of Prosthodontics Head of the") Secondary, master, (functional impression) taking methods Dr. Károlyházy Katalin Semmelweis Univ. Budapest, Department of Prosthodontics Head of the Dept.: Prof. Dr.Hermann Péter Med.Habil. 2017. Secondary
Secondary, master, (functional impression) taking methods Dr. Károlyházy Katalin Semmelweis Univ. Budapest, Department of Prosthodontics Head of the Dept.: Prof. Dr.Hermann Péter Med.Habil. 2017. Secondary
BOCL-01: Bonding Materials Checklist
 Task 19: Gather materials to bond partner using toothpaste as etchant Take a photo of gathered materials and submit with this completed checklist BOCL-01: Bonding Materials Checklist Date: Patient: Operator:
Unless otherwise noted, the content of this course material is licensed under a Creative Commons Attribution 3.0 License.
 Unless otherwise noted, the content of this course material is licensed under a Creative Commons Attribution 3.0 License. Copyright 2008, Jeffrey Shotwell The following information is intended to inform
Shadeguides Ceramic Veneers: Tooth Preparation for Enamel Preservation
 Ajay Juneja Shadeguides Ceramic Veneers: Tooth Preparation for Enamel Preservation 1 Feb 2016 The rationale of having minimal preparation and having ceramic veneers cemented to enamel in order for the
CLASS II AMALGAM RESTORATIONS. Amalgam restorations that restore one or both of the proximal surfaces of the tooth
 CLASS II AMALGAM RESTORATIONS Amalgam restorations that restore one or both of the proximal surfaces of the tooth Initial Tooth Preparation Occlusal outline form (occlusal step).the occlusal outline form
أ.م. هدى عباس عبد اهلل CROWN AND BRIDGE جامعة تكريت كلية. Lec. (2) طب االسنان
 طب االسنان") Lec. (2) CROWN AND BRIDGE أ.م. هدى عباس عبد اهلل Patient selection and examination A thorough diagnosis must first be made of the patient's dental condition, considering both hard and soft tissues. this
Lec. (2) CROWN AND BRIDGE أ.م. هدى عباس عبد اهلل Patient selection and examination A thorough diagnosis must first be made of the patient's dental condition, considering both hard and soft tissues. this
Invisible Retainer with Single-Tooth Pontic Fabrication Technique (Multi-Tooth Pontic Procedure also available)
") Invisible Retainer with Single-Tooth Pontic Fabrication Technique (Multi-Tooth Pontic Procedure also available) Safety glasses should be worn for all lab procedures as well as gloves when handling acrylics.
Invisible Retainer with Single-Tooth Pontic Fabrication Technique (Multi-Tooth Pontic Procedure also available) Safety glasses should be worn for all lab procedures as well as gloves when handling acrylics.
How to Design an Ideal Maxillary Plane of Occlusion For Fixed or Removeable Prosthetics
 How to Design an Ideal Maxillary Plane of Occlusion For Fixed or Removeable Prosthetics By James R. Neuber RDT Full Mouth Rehabilitation Ceramist There are several techniques to establish a new plane of
UNDERSTANDING DIGITAL DENTISTRY: CBCT AND INTRA-ORAL 30 SCANNING
 UNDERSTANDING DIGITAL DENTISTRY: CBCT AND INTRA-ORAL 30 SCANNING -=- & UNDERSTANDING DIGITAL DENTISTRY: CBCT AND INTRA-ORAL 30 SCANNING ----CBCTi-------iTERO------ NewTom VGi *Vertical Patient Positioning
Removable Partial Dentures
 Removable Partial Dentures Replacement of missing teeth Fixed partial denture Removable partial denture Complete removable Transitional denture Partial removable Implant retained prosthodontics No prosthetic
Listing of Standards By Task
 Orthodontics Listing of Standards By Task ORTHODONTICS 1. Disinfect the impression and/or model 2. Evaluate the prescription for completeness 3. Document changes to the prescription and/or design requirements
SS Implant System 2013 PROSTHETIC PROCEDURE
 SS Implant System 2013 PROSTHETIC PROCEDURE Contents TS Implant System Cement retained restoration 06 Cement-retained bridges with the Solid abutment system (non-modified abutment) 16 Cement-retained bridges
Introduction to Layering with Filtek Supreme Plus Universal Restorative. Filtek. Supreme Plus Universal Restorative
 Introduction to Layering with Filtek Supreme Plus Universal Restorative Filtek Supreme Plus Universal Restorative Introduction to Layering with Filtek Supreme Plus Universal Restorative TM. Multishade
Clinical Studies - Tooth Whitening
 Discus Dental Clinical Data and Safety Clinical Studies Tooth Whitening Evaluation of Tray Fabrication Design and Effects on Vital Tooth Bleaching Investigation: M. Bosma J. Bowman W. Dorfman K. Soll Hill
Lec. 3-4 Dr. Saif Alarab Clinical Technique for Class I Amalgam Restorations The outline form
 Lec. 3-4 Dr. Saif Alarab Clinical Technique for Class I Amalgam Restorations Class I refers to -Restorations on the occlusal surfaces of posterior teeth, - The occlusal two thirds of facial and lingual
Full Arch Rehabilitation All-on-4 Technique Restorative Steps Recipe for Success
 Full Arch Rehabilitation All-on-4 Technique Restorative Steps Recipe for Success Treatment Planning/Diagnosis 1. Setup meeting with Treatment Team to discuss case communication is key 2. Qualifying the
Construction of Removable Partial Denture
 Construction of Removable Partial Denture Peter Hermann Department of Prosthodontics Semmelweis University Treatment options for edentulous spaces Fixed prosthodontics (crowns/bridges) Removable prosthodontics
WHAT IS CLEAN BASE? Custom Base 4/9/2013
 The simultaneous delivery of multiple brackets onto the tooth surface via a polyvinylsiloxane or clear plastic tray. Accurate Bracket Placement Better Utilization of Staff Reduced Chairside Stress Less
CPR for Complex Dental Treatment; From Concept, to Prototype, to Restoration
 Reality or Resin; Free Hand Artistry with Anterior Bonding Dennis B. Hartlieb, DDS CPR for Complex Dental Treatment; From Concept, to Prototype, to Restoration Wish List: 1. Reversible (no prep/ minimal
Removable partial dentures
 Removable partial dentures Feb, 4, 2015 McCracken's Removable Partial Prosthodontics, Twelfth Edition Carr, Alan B 1 Prosthesis that replaces the missing teeth and associated supporting structures in a
A perfect fit for ultimate comfort. Soft and Extra Soft
 A perfect fit for ultimate comfort GC RELINE Soft and Extra Soft GC RELINE Soft & GC RELINE Extra Soft Ready-to-use, temporary soft silicone based reline materials. Vinyl polysiloxane materials in cartridges
Detailed Step-by Step Instruction for Chairside Splinting
 Dentapreg TM Splint - Procedures Basic Procedures in Short Splinting with Dentapreg TM strip always includes several basic procedures repeated in all particular clinical situations: (A) Clean the bonding
This patient just got his braces put on along with an expansion device in the roof of his mouth
 Czajka 1 Dr. Cline Date: 3/16/2015 Time at Office: 9:30 11:30 Number of Patients: 5 Patient 1 (images 1 3): This patient just got his braces put on along with an expansion device in the roof of his mouth
LEARN FROM A LEADER. Intensive, hands-on training that will prepare you to confidently fabricate the appliances you want.
 from professionals like, one of the country s most experienced Guide to Orthodontic s... A Comprehensive Resource from Theory to. Brian also has been involved in many patents in the dental field. 2011
Preci Clix Instructions for Ball Retained Overdenture Attachments
 www.preat.com 800-232-7732 Preci Clix Instructions for Ball Retained Overdenture Attachments Dentist Direct Placement Technique In one appointment, an existing removable partial denture may be converted
ZEST DANVILLE MATERIALS PERIOSCOPY
 ZEST DANVILLE MATERIALS PERIOSCOPY Attachment Processing Material is easy to use and predictable when processing attachments into full and partial overdentures,using either a chairside or laboratory procedure.
Denture Duplicator Flask
 Denture Duplicator Flask Package Contents REF 0398 One Flask REF 0395 One Flask, Jet Tooth Shade Powder: 2x45 g Net Wt., Jet Denture Repair Powder: 2x100 g Net Wt., Jet Liquid: 236 ml Net Vol., Silicone
DL 313 Removable Partial Dentures II
 DL 313 Removable Partial Dentures II Survey & Design Survey The procedure of studying the relative parallelism or lack of parallelism of the teeth and associated structures so as to select a path of placement
Extraction with Immediate Implant Placement and Ridge Preservation in the Posterior
 Extraction with Immediate Implant Placement and Ridge Preservation in the Posterior by Timothy F. Kosinski, DDS, MAGD The following case presentation illustrates the diagnosis, planning and treatment for
The University of Jordan Faculty of Dentistry Department of Conservative Dentistry and Prosthodontics 2014/2015
 The University of Jordan Faculty of Dentistry Department of Conservative Dentistry and Prosthodontics 014/01 Course Title: Conservative Dentistry 4 Crown & Bridge (practical) Course Code: 13040 Semester:
Table of Contents. Flexi-Overdenture Characteristics
 A s with Flexi-Post Flexi-Overdenture has the unique threaded split shank that creates maximum retention with minimum stress to the root. It is manufactured in stainless steel for the direct/non-coping
Height* FC width Prep depth RC width 4.0mm+ 4.3mm N/A 6.3mm
 STERN ERA IMPLANT ABUTMENT Summary Resilient precision overdenture attachment. Universal hinge with vertical movement. Titanium abutment, nylon male. Manufactured for most popular screw and cylinder implants.
TOOTH PREPARATION. (Boucher's Clinical Dental Terminology, 4th ed, p239)
") Budapest, 2017 TOOTH PREPARATION The selected form given to a natural tooth when it is reduced by instrumentation to receive a prosthesis (e.g. artificial crown or a retainer for a fixed or removable prosthesis)
Budapest, 2017 TOOTH PREPARATION The selected form given to a natural tooth when it is reduced by instrumentation to receive a prosthesis (e.g. artificial crown or a retainer for a fixed or removable prosthesis)
Good technique pays off. These words are not merely
 A review of 243 errors possible during the fabrication of a removable partial denture: Part I Robert W. Rudd, BS, DDS, MS, CDT, a and Kenneth D. Rudd, BS, DDS b Colorado Springs, Colo., and San Antonio,
Preci Clix Instructions for Ball Retained Overdenture Attachments
 www.preat.com 800-232-7732 Preci Clix Instructions for Ball Retained Overdenture Attachments Dentist Direct Placement Technique #1293 / 1297 In one appointment, an existing removable partial denture may
fusion treatment is powered by suresmile technology to provide 3D models and fully-customized wires based on your scans of the patient.
 fusion treatment is powered by suresmile technology to provide 3D models and fully-customized wires based on your scans of the patient. Capture two scans per patient: Initial 3D scan this scan may be
DURATEMP Temporary Crown & Bridge Material. Temrex Corporation October 2009
 DURATEMP Temporary Crown & Bridge Material Temrex Corporation October 2009 DURATEMP Temporary Crown & Bridge Material Overview Product Characteristics Physical Properties Case Report Instructions Ordering
ADJUSTABLE HERBST APPLIANCE - OASYS HINGE ACRYLIC
 P SYSTEMS The delivery visit should confirm the fit and comfort of the appliance, as well as the patients ability to insert and remove the appliance properly and without difficulty. It may be necessary
Lecture:6 dental material dr. Aseel Mohammed
 4. Zinc oxide eugenol impression material: It's described as a rigid, mucostatic, irreversible (set by chemical reaction) and hydrophobic impression material. We have 2 types of zinc oxide eugenol impression
Treatment Options for Restoring Edentulous Jaws using One- and Two-Piece Implants from Implant Direct Int l
 Treatment Options for Restoring Edentulous Jaws using One- and Two-Piece Implants from Implant Direct Int l Two-Piece ReActive Tri-Lobe Implants with Multi-Unit Abutments One-Piece ScrewIndirect Implants
Hands-on Posterior Tooth Preparation. Practical Skills Courses, SWL, 25/11/2016
 Hands-on Posterior Tooth Preparation Practical Skills Courses, SWL, 25/11/2016 Hands-On Didactic Teaching A Tooth-Friendly-Approach - Hands-on Tooth Preparation Course - Dental Simulation to include: Posterior
Lect. 14 Prosthodontics Dr. Osama
 Lect. 14 Prosthodontics Dr. Osama Principles of Removable Partial Denture Design Difference in Prosthesis Support and Influence on Design: For a tooth-supported prosthesis, the movement potential is less
Digital Impression Scanning
 Digital Impression Scanning Table of Contents Using ScanIt Orthodontics (Recommended Software) Software Settings... 1 Control Panel... 1 System Settings... 1 Export Format... 1 Filling Out Patient Information...
The Application of the HIP-Analyzer for the Evaluation of the Maxillary Occlusal Plane Topography
 The Application of the HIP-Analyzer for the Evaluation of the Maxillary Occlusal Plane Topography Sergey Shestopalov, PhD, DO, Konstantin Ronkin, DMD, MICCMO The orientation of the upper occlusal plane
Universal Plunger Loc Attachment
 Universal Plunger Loc Attachment www.preat.com 800-232-7732 Universal Plunger Loc Complete Universal 7.5mm length TI plunger attachment. Compatible with Lew Passive and Swiss Loc NG. 1.5mm plunger, 7.5mm
Contouring vs. Orthodontics. Contouring to Eliminate Fractures and Enhance Proportions
 Contouring vs. Orthodontics Photo 1 Maxillary central incisors are overlapped. Patient chose rapid tooth movement instead of contouring. Photo 2 Maxillary central incisors after six months of orthodontic
Prosthetic V. Removable dentures I.
 Prosthetic V. Removable dentures I. Removable dentures Partial Complete (full) lenka.roubalikova@tiscali.cz 2 Prosthetic dentistry replacement of Damaged teeth reconstruction of the crown (inlays, crowns)
Splint Appliance. Selection Guide. Great Lakes. See inside...
 Great Lakes Splint Appliance Selection Guide This guide includes helpful tips on how to choose the right splint for your patient and information on standard function and specifications for Great Lakes
Figure (2-6): Labial frenum and labial notch.
: Labial frenum and labial notch.") The anatomy of the edentulous ridge in the maxilla and mandible is very important for the design of a complete denture. The consistency of the mucosa and architecture of the underlying bone is different
The anatomy of the edentulous ridge in the maxilla and mandible is very important for the design of a complete denture. The consistency of the mucosa and architecture of the underlying bone is different
2. Gap closure and replacement of the missing tooth 35 with directly modelled bridge region 34-36
 GrandTEC Test Kit Dear User, This Test Kit has been put together to enable you to test GrandTEC on the model before using it in a clinical situation. GrandTEC is a resin-impregnated glass fibre strip.
Psychological Impact of Communication
 Psychological Impact of Communication Patient is a 47 year old female was unhappy with her smile and self conscience of her appearance. She is missing teeth, which was impinging during mastication. The
Essentials of. Dental Assisting. Edition 6. Debbie S. Robinson Doni L. Bird
 Essentials of Dental Assisting Edition 6 Debbie S. Robinson Doni L. Bird CHAPTER21 Restorative Procedures http://evolve.elsevier.com/robinson/essentials/ LEARNING OBJECTIVES KEY TERMS 1. Pronounce, define,
OT EQUATOR CASTABLE Single Attachment for Overdentures
 OT EQUATOR CASTABLE Single Attachment for Overdentures pick-up impression OT EQUATOR PROFILE CASTABLE MALE ATTACHMENT individual tray RETENTIVE CAPS OT EQUATOR HOUSING VIOLET CAP RIGID RETENTION (2.7Kg)
IMPRESSION PROCEDURES TRAINING MANUAL
 IMPRESSION PROCEDURES TRAINING MANUAL 01 01 A.B. DENTAL A.B. Dental is proud to present this impression taking procedure protocol. This manual explains, step by step, the procedure while using A.B. Dental
Connect your Scanner to SomnoMed Canada. SOMGauge Protrusive Bite Recording - Manual. Scanning Impressions - Lower and Upper
 IOS Instructions How to create and submit the best scans to SomnoMed Canada for the creation of a custom SomnoDent Sleep Apnea Appliance Its a simple process: STEP 1 Connect your Scanner to SomnoMed Canada
Protocol for 3Shape TRIOS
 Protocol for 3Shape TRIOS fusion treatment is powered by suresmile technology to provide 3D models and fully-customized wires based on your scan of the patient. Capture two scans per patient: Initial 3D
Selection and arrangement of teeth in rpd
 Selection and arrangement of teeth in rpd upon completion of the articulator mounting and a thorough assessment of the occlusal requirements, the practitioner should be able to perform the proper arrangement
Arrangement of the artificial teeth:
 Lecture Prosthodontic Dr. Osama Arrangement of the artificial teeth: It s the placement of the teeth on a denture with definite objective in mind or it s the setting of teeth on temporary bases. Rules