Balanced Surgical Technique
|
|
|
- John Bradley
- 6 years ago
- Views:
Transcription


1 2 Balanced Surgical Technique
2 Contemporary total knee arthroplasty demands high performance instrumentation that provides enhanced efficiency, precision, and flexibility. Through a program of continuous development DePuy now offers a single system of SIGMA High Performance instruments that supports most approaches to knee replacement surgery. This surgical technique provides instruction on the implantation of the SIGMA family of fixed bearing and rotating platform knees utilising the Balanced femoral preparation system. The SIGMA High Performance instrumentation has been designed to be used with 1.19 mm thick saw blades. There are several approach options available to the surgeon, the most common are; medial parapatellar, mini-midvastus and mini-subvastus.
3 Contents Surgical Summary 3 Incision and Exposure 5 Patella Resection 8 Tibial Jig Assembly 10 Lower Leg Alignment 11 Tibial Resection 14 Distal Femoral Resection 18 Extension Gap Assessment and Balancing 19 Femoral Sizing (Optional) 20 Femoral Rotation 21 Femoral Sizing 24 Femoral Finising Alternative 25 Measuring the Flexion Gap 26 Trial Components (For Fixed Bearing, see Appendix A) 27 Tibial Preparation - M.B.T. 30 Final Patella Preparation 32 Cementing Technique 33 Final Component Implantation 34 Closure 35 Appendix A: Fixed Bearing Modular Tibial Preparation 37 Appendix B: Fixed Bearing Standard Tibial Preparation 39 Appendix C: Tibial I.M. Jig Alignment 40 Appendix D: Spiked Uprod 43 Ordering Information 46


4 Surgical Summary Step 1 Incision and exposure Step 2 Patella resection Step 3 Lower leg alignment Step 9A Alternative Femoral preparation Step 7 Soft tissue balancing Step 8 Femoral rotation Step 11 Trial reduction Step 12 Trial preparation Step 13 Final patella preparaton 3


5 Step 4 Tibial resection Step 5 Femoral alignment Step 6 Distal femoral resection Step 9B Alternative Notch resection Step 9 Femoral preparation Step 10 Measuring flexion gap Step 14 Final component implantation 4
.")

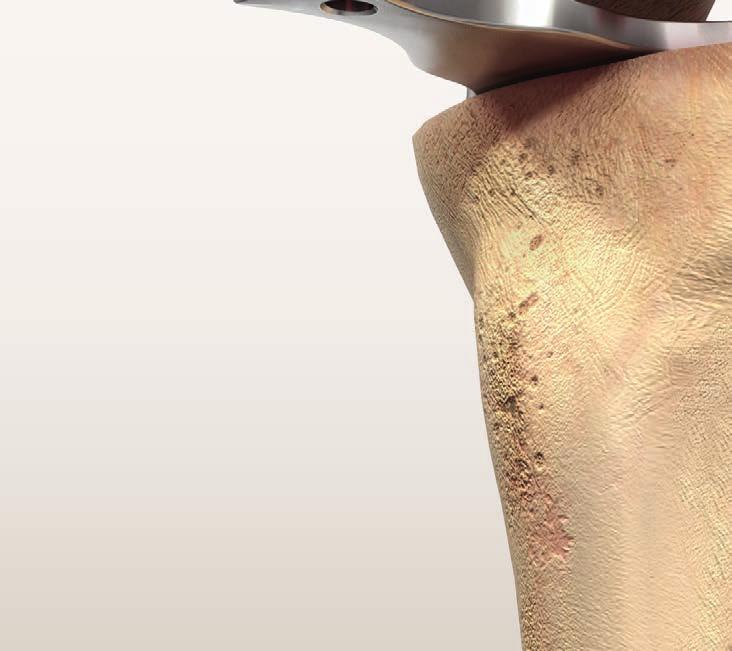
6 Incision and Exposure The SIGMA High Performance (HP) instrumentation has been designed for use with and without Ci computer assisted surgery, for both open and minimally invasive approaches to the knee. Make a straight midline skin incision starting from 2 to 4 cm above the patella, passing over the patella, and ending at the tibial tubercle (Figure 1). Figure 1 For surgeons choosing the medial parapatellar (Figure 2): With neutral alignment or with varus deformity, make a medial parapatellar incision through the retinaculum, the capsule and the synovium. The medial parapatellar incision starts proximal (4 cm) to the patella, incising the rectus femoris tendon longitudinally, and continues distally around the medial aspect of the patella and ligamentum patella stopping just medial to the tibial tubercle (Figure 2). Following this incision, either evert or luxate the patella laterally to expose the entire tibio-femoral joint. Figure 2 5
7 For surgeons choosing the mini mid-vastus option (Figure 3): The mid-vastus approach starts 3-4 cm in the middle of the vastus medialis obliquus (VMO), running distal and lateral to the muscle fibres towards the rectus femoris, splitting the VMO. Continue the incision distally around the medial aspect of the patella and ligamentum patella stopping just medial to the tibial tubercle (Figure 3). Following this incision, luxate the patella laterally to expose the entire tibio-femoral joint. For surgeons choosing the subvastus option (Figure 4): The subvastus approach starts by lifting the VMO with a 90 degree stomp hook. A 3-4 cm incision is made in the capsule underneath the VMO, running horizontal from medial to lateral towards the mid portion of the patella. The incision continues distally around the medial aspect of the patella and ligamentum patella stopping just medial to the tibial tubercle (Figure 4). Figure 3 Following this incision, luxate the patella laterally to expose the entire tibio-femoral joint. Note: When having difficulties in correctly placing the High Performance instruments in any of these approaches, the incision should be further extended to avoid over-retraction of the soft tissues. Figure 4 6
8 Excise hypertrophic synovium if present and a portion of the infrapatella fat pad to allow access to the medial, lateral and intercondylar spaces. All osteophytes should be removed at this stage as they can affect soft tissue balancing (Figure 5). Particular attention should be given to posterior osteophytes as they may affect flexion contracture or femoral rotation. Evaluate the condition of the posterior cruciate ligament (PCL) to determine the appropriate SIGMA component to use. Resect the PCL if required. Figure 5 7
. The size of the resurfaced patella should be the same as the natural patella.")
. To reduce the risk of fracture a minimum of 12 mm should remain after resection.")
: From a patella 25 mm thick, resect 8.5 mm of articular surface, leaving 16.5 mm of residual bone to accommodate the 8.5 mm thickness implant.")

9 Patella Resection Posterior Resection and preparation of the patella can be performed sequentially or separately, as desired and can be performed at any time during surgery. Evaluate the thickness of the patella (Figure 6). The size of the resurfaced patella should be the same as the natural patella. There should be equal amounts of bone remaining in the medial / lateral and superior / inferior portions of the patella. Select a patella stylus that matches the thickness of the implant to be used. Slide the appropriate size stylus into the saw capture of the resection guide (Figure 7). To reduce the risk of fracture a minimum of 12 mm should remain after resection. Therefore for a size 41 mm implant the minimum natural patella thickness should be 23 mm. For all other sizes of patella the minimum should be 20.5 mm 25 mm Anterior 8.5 mm 16.5 mm Example (for a 38 mm size dome or oval/dome patella): From a patella 25 mm thick, resect 8.5 mm of articular surface, leaving 16.5 mm of residual bone to accommodate the 8.5 mm thickness implant. Figure 6 In cases of a thin patella a 12 mm remnant stylus can be attached to the resection guide resting on the anterior surface of the patella, to avoid overresection (Figure 8). Place the leg in extension and position the patella resection guide with the sizing stylus against the posterior cortex of the patella with the serrated jaws at the superior and inferior margins of the articular surface. Patella stylus Size 41- resect 11 mm Sizes 32, 35, 38 - resect 8.5 mm 12 mm remnant The jaws should be closed to firmly engage the patella (Figure 9). Figure 7 Figure 8 Figure 9 8
.")

.")

10 Tilt the patella laterally to an angle of 40 to 60 degrees (Figure 10). Remove the stylus and perform the resection using an oscillating saw through the saw capture and flush with the cutting surface (Figure 11). A patella wafer can be hand placed on the resected surface if required, to protect the patella bone bed. Figure 10 Patella wafer Figure 11 9
.")
11 Tibial Jig Assembly The tibia can now be resected to create more room in the joint space. Assemble the appropriate 0-3 degree, left / right or symmetrical cutting block to the tibial jig uprod. Slide the tibial jig uprod into the ankle clamp assembly (Figure 12). Symmetrical Tibial cutting block Tibial cutting blocks (Left/Right 0-3 degree) Press down to attach cutting block Tibial jig uprod Figure 12 10


12 Lower Leg Alignment Place the knee in 90 degrees of flexion with the tibia translated anteriorly and stabilised. Place the ankle clamp proximal to the malleoli (Figure 13). Align the proximal central marking on the tibia cutting block with the medial one third of the tibial tubercle to set rotation. To provide stability, insert a central pin through the vertical slot in the cutting block (Figure 13). Push the quick release button to set the approximate resection level. Quick release button Establish rotational alignment by aligning the tibial jig ankle clamp parallel to the transmalleolar axis. The midline of the tibia is approximately 3 mm medial to the transaxial midline (Figure 14). Figure 13 The lower assembly is translated medially (usually to the second vertical mark), by pushing the varus / valgus adjustment wings. There are vertical scribe marks for reference aligning to the middle of the talus (Figure 15). Centre of the tibial adapter Vertical pin slot Figure 14 Varus/valgus wings Figure 15 11

13 Slope The tibial jig uprod and ankle clamp are designed to prevent an adverse anterior slope. On an average size tibia this guide will give approximately a 0 degree tibial slope when the slope adjustment is translated anteriorly until it hits the stop. In some cases a slight amount of slope will remain (1-2 degrees) (Figure 17). Slope adjustment lock The angle of the tibial slope can be increased to greater than 0 degrees should the patient have a greater natural slope (Figure 16). First unlock the slide locking position and then translate the tibial slope adjuster anteriorly until the desired angle is reached. For a cruciate substituting (CS) design, a 0 degree posterior slope is recommended. Slope override button As each patient s anatomy varies, the tibial jig uprod can be used for both smaller and larger patients. The length of the tibia influences the amount of slope when translating the adapter anteriorly. The 0 degree default position can be overridden by pressing the slope override button and moving the slope adjustment closer to the ankle (Figure 16). Figure 16 On the uprod 5, 6 and 7 zones are present, which correspond to the length of the tibia. These markings can by used to fine tune the amount of slope. When the uprod shows a mark 7 zone, this indicates that when the lower assembly is translated 7 mm anterior, it will give an additional 1 degree of posterior slope. For example, when the uprod shows a mark 5 zone, 5 mm translation is needed for an additional 1 degree (Figure 17). Figure 17 12

14 Height When measuring from the less damaged side of the tibial plateau set the stylus to 8 mm or 10 mm. If the stylus is placed on the more damaged side of the tibial plateau, set the stylus to 0 mm or 2 mm. Non-slotted stylus foot Adjustment of resection height on the stylus should be done outside the joint space before locating the stylus in the cutting block. Figure 18 Fine tune adjustment If planning to resect through the slot, position the foot of the tibial stylus marked slotted into the slot of the tibial cutting block (Figure 18). If planning to resect on top of the cutting block, place the foot marked non-slotted into the cutting slot. The final resection level can be dialled in by rotating the finetune mechanism clockwise (upward adjustment) or counterclockwise (downward adjustment). Care should be taken with severe valgus deformity, not to over-resect the tibia. 13
15 Tibial Resection After the height has been set, pin the block through the 0 mm set of holes (the stylus may need to be removed for access). +2 and -2 mm pinholes are available on the resection blocks to further adjust the resection level where needed. The block can be securely fixed with a convergent pin (Figure 19). Figure 19 14
.")


16 Femoral Alignment Enter the medullary canal at the midline of the trochlea, 7 mm to 10 mm anterior to the origin of the PCL (Figure 20). Figure 20 The drill may be positioned anteromedially to allow unobstructed passage of the I.M. rod in the femoral canal (Figure 21). Attach the T-handle to the I.M. rod and slowly introduce the rod into the medullary canal, to the level of the isthmus (Figure 22). Isthmus level Note: Avoid using excessive force to drive the rod into the I.M. canal. If a large amount of force is required to insert the rod, the femoral canal may be overly bowed, or the distal entry hole may be too tight to permit the rod to centre in the canal. Should this be encountered, using a shorter I.M. rod may be more appropriate. Enlarging the distal entry hole may help as well. Figure 21 Figure 22 15

. Figure 23 The T-handle is removed and the femoral alignment guide is placed on the I.M. rod and seated against the distal femur (Figure 24).")

17 Note: Although this manual illustrates the Femur First technique, the SIGMA HP technique can also be performed using the Tibia First approach. Preoperative radiographs are used to define the angle between the femoral, anatomical and mechanical axis. The valgus angle (left or right - 0º to 9º) on the femoral alignment guide is set by compressing the two triggers and locked in place by rotating the blue locking lever clockwise (Figure 23 and 24). Figure 23 The T-handle is removed and the femoral alignment guide is placed on the I.M. rod and seated against the distal femur (Figure 24). Rotate the knob on the resection guide until the arrow is pointing to the padlock symbol. Insert the femoral block connector into the resection guide. Turn it clockwise to engage. The scale on the dial corresponds to a slotted resection. Place the cutting block in the femoral block connector so that the tang on the connector slides into the cutting slot on the cutting block. Locking trigger in the locked position The trigger should engage in the hole behind the slot (Figure 25). Figure 24 Femoral block connector Femoral resection guide Distal femoral cutting block Figure 25 16


18 Distal femoral cutting block Position the resection guide over the two legs of the distal femoral alignment guide until the distal cutting block touches the anterior femur (Figure 26). Optional Adjust the internal / external rotation of the alignment guide with reference to the trochlear groove. When rotation is correct, secure the alignment guide by inserting one threaded pin through the medial hole. Figure 26 Adjust the medial-lateral placement of the resection block as desired and rotate until firmly seated on the anterior condyles. Secure the cutting block to the femur with two threaded pins through the holes marked with a square. Make sure the pins are engaging the posterior condyles. This will allow a +2 or -2 mm adjustment to be made. Set the guide to resect at least 9 mm of distal femoral bone from the most prominent condyle (Figure 27). Figure 27 17

. Figure 28 Perform the distal femoral resection (Figure 30). Release attachment 1. Slide femoral resection guide upwards 2.")
19 Distal Femoral Resection After the correct amount of resection is set, add a convergent pin through the medial hole in the block to aid stability (Figure 28). Removal of the Femoral Alignment Guide First attach the T-handle to the I.M. guide. Then unlock the cutting block from the block connector, using your thumb and index finger to release the attachment. Slide the femoral resection guide upwards over the legs until the block connector disengages the cutting block and in one motion remove the femoral alignment guide by pulling the instruments distally in the direction of the T-handle (Figure 29). Figure 28 Perform the distal femoral resection (Figure 30). Release attachment 1. Slide femoral resection guide upwards 2. Remove femoral alignment guide towards the T-handle Figure 29 Figure 30 18


20 Extension Gap Assessment and Balancing Place the knee in full extension and apply laminar spreaders medially and laterally. The extension gap must be rectangular in configuration with the leg in full extension. If the gap is not rectangular the extension gap is not balanced and appropriate soft tissue balancing must be performed (Figure 31). A set of specific fixed bearing and mobile bearing spacer blocks are available. Every spacer block has two ends, one for measuring the extension gap and one for the flexion gap. Figure 31 The extension gap side of the spacer block can be used to determine the appropriate thickness of the tibial insert and to validate the soft tissue balance (Figure 32). Introduce the alignment rod through the spacer block. This may be helpful in assessing alignment (Figure 33). Figure 32 Spacer block Figure 33 19


21 Femoral Sizing (Optional) Place the Fixed Reference sizing guide against the resected distal surface of the femur, with the posterior condyles resting on the posterior plate of the guide. Secure with threaded headed pins (optional) (Figure 34). Place the sizing guide stylus on the anterior femur with the tip positioned at the intended exit point on the anterior cortex to avoid any potential notching of the femur. A scale on the surface of the stylus indicates the exit point on the anterior cortex for each size of femur. The scale is read from the distal side of the lock knob (Figure 35). Figure 34 Tighten the locking lever downward and read the size from the sizing window (Figure 36). Figure 35 Figure 36 20
 with the left / right designation to anterior, as determined during preoperative x-ray analysis.")


22 Femoral Rotation Select the appropriate I.M. rod (3 or 5 degrees) with the left / right designation to anterior, as determined during preoperative x-ray analysis. Slide the rod in the SIGMA or RPF balanced resection block. Insert the I.M. rod into the distal femoral I.M. canal taking care to avoid over-pressurisation (Figure 37). Figure 37 Note: The RPF and standard SIGMA blocks are visually very similar. To help differentiate them, the RPF block has the letters RPF engraved on it, and a series of grooves rising from the posterior cut face. Assemble the femoral stylus to the anterior slot of the balanced SIGMA or RPF femoral block and tighten it by turning the knurled screw clockwise (Figure 38). Ensure the A/P resection block is unlocked and lower the assembly onto the I.M. plate. Translate the block posteriorly until the anterior femoral stylus contacts the anterior cortex of the femur. The stylus should rest on the anterior femur at the approximate exit point of the anterior cut. Fix the position of the balanced femur block by using the handle turning the locking mechanism clockwise. Final rotation has not been fixed at this stage. Remove the anterior femoral stylus (Figure 39). The SIGMA RPF block Figure 38 Figure 39 21
.")
 into the joint space engaging the posterior slot of the balanced resection")

23 Two handles can be attached to the balanced cutting block to help in visualizing the degree of rotation of the balanced cutting block in respect to the trans-epicondylar axis (Figure 40). Rotation is determined with the knee in 90 degrees of flexion such that the posterior surface is parallel to the resected tibial plateau. Introduce the femoral positioner, (with the appropriate tibial shim added) into the joint space engaging the posterior slot of the balanced resection guide (Figure 41). The femoral positioner should mirror the extension gap previously evaluated with the spacer block. Note: When preparing for an RP prosthesis an additional 10 mm shim needs to be added to the femoral positioner. Figure 40 The knee may be slightly flexed or extended until the positioner lies flat on the previously resected proximal tibia. Alternatively laminar spreaders or spacer blocks (Figure 41) can be used. Figure 41 22


24 If the flexion gap is too lax, tibial shims may be added to ensure that the positioner fits snugly (Figure 42). Note: If the flexion gap no longer matches the extension gap, the distal cut will need to be revisited. Re-evaluate the tibial alignment using the external alignment rod passed through the hole in the femoral positioner. The femoral rotation is set by the femoral positioner and is based on the principle of equal compartment tension and balanced collateral ligaments. Figure 42 Using the femoral positioner this balance should automatically occur, because the femur can freely rotate around the I.M. plate. Conduct a final check of the anterior resection level with the visualization wing. All adjustments should be made prior to pinning the block. Pin the A/P resection block to the distal femur using the two neutral central holes (marked with a square) before cutting. Remove the femoral positioner (Figures 42 and 43). Figure 43 23

.")
25 Femoral Finishing Resect the anterior cortex using the balanced femoral cutting block. Remove the resected bone (Figure 44). Select the appropriate sized SIGMA or SIGMA RPF femoral finishing block and position the block on the resected anterior and distal surfaces of the femur. Note: The posterior aspect of the block corresponds exactly to the M/L dimension of the final implant and can be used to visualise the correct M/L position. In addition, the anterior flange on the cutting block represents the medial flange of the implant, with the proximal anterior protrusions representing the lateral implant flange (Figure 45). Figure 44 Pin the block in place through the fixation pinholes with at least three threaded pins before any bone cuts are made. Perform the final resections: posterior resection, notch cut, anterior and posterior chamfer resections (Figure 45). Lateral Implant position Medial Implant position Figure 45 24

.")

26 Femoral Finishing (Alternative) Alternatively, position the appropriate sized SIGMA or SIGMA RPF A/P chamfer block in the pre-drilled medial and lateral holes. Secure and stabilise the SIGMA or SIGMA RPF classic A/P chamfer block by drilling a headed drill pin through the central pinhole. Alternatively, medial and lateral pins can be placed. Place retractors to protect the MCL medially and the popliteal tendon laterally. The SIGMA RPF A/P chamfer block After securely fixing the femoral chamfer block, resect the anterior cortex, the posterior condyles and the anterior / posterior chamfers (Figure 46). Figure 46 Note: On both the classic A/P chamfer block and the femoral finishing block, the RPF and standard SIGMA blocks look very similar. To easily identify them, the RPF block has the letters RPF on the distal face, and the area above the posterior cut has several grooves. When using a stabilised SIGMA or SIGMA RPF component, select and attach the appropriate femoral notch guide. The SIGMA RPF and standard SIGMA notch guides look very similar. Care should be taken not to confuse the blocks as this will result in under-or-over resection of the box. The SIGMA RPF notch guide Note: The RPF guide can be identified through the letters RPF on the anterior face, and a series of grooves along the notch distal anterior corner. Figure 47 Position the notch guide on the resected anterior and distal surfaces of the femur. Pin the block in place through the fixation pin holes with at least three pins before any bone cuts are made. Make notch cuts with a small saw blade (Figures 47 and 48). Figure 48 25
27 Measuring the Flexion Gap The flexion side of the spacer block is used to evaluate the flexion gap. Where RPF spacer blocks are used, flexion shims will need to be added. An alignment rod assembled to the spacer block should pass through the center of the talus and lie parallel to the lateral tibial axis (Figure 49). Figure 49 26

28 Trial Components (For Fixed Bearing, see Appendix A) Note: Either M.B.T. or Fixed Bearing tibial components can be trialled prior to performing the tibial preparation step. Femoral Trial Attach the slaphammer or universal handle to the femoral inserter / extractor. Position the appropriately sized femoral trial on the inserter by depressing the two triggers to separate the arms and push the trial against the conforming poly surface. Figure 50 Release the triggers so that the arms engage in the slots on the femur, and rotate the handle clockwise to lock. Position the trial onto the femur, impacting as necessary. To detach the inserter from the femur rotate the handle counter-clockwise and push the two triggers with thumb and index finger. Position the femoral trial onto the femur (Figure 50). Tibial Trial Place the appropriate sized M.B.T. tray trial onto the resected tibial surface. Position the evaluation bullet into the cut-out of the M.B.T. tray trial (Figure 51). There are two options available to assess the knee during trial reduction. One or both may be used. 1) Trial reduction with trial bearing in non-rotation mode This option is useful when the tibial tray component size is smaller than the femoral size. Note: Mobile bearing tibial insert size MUST match femoral component size. Figure 51 27

29 With equivalent sizes the bearing rotation allowance is 8 degrees for standard SIGMA and 20 degrees for SIGMA RPF components. For a tibial tray one size smaller than the femoral component, this bearing rotation allowance reduces to 5 degrees. In this situation, finding the neutral position with respect to the femur is therefore more important in order to prevent bearing overhang and soft tissue impingement. Position the evaluation bullet into the cut-out of the M.B.T. tray trial. Figure 52 2) Trial reduction with trial bearing free to rotate This trial reduction can be done instead or in addition to the one described before. Place the appropriately sized M.B.T. trial tray onto the resected tibial surface (Figure 52). Assess the position of the tray to achieve maximal tibial coverage. The rotation of the M.B.T. tray trial is usually centred on the junction between the medial and central one-third of the tibial tubercle. Secure the keel punch impactor to the spiked evaluation bullet and position into the cut-out of the M.B.T. tray trial. Tap down lightly to secure the tray to the proximal tibia (Figure 53). Figure 53 28

. Rotational alignment of the M.B.T.")
30 Select the tibial insert trial that matches the chosen femoral size and style, curved or stabilised, and insert it onto the M.B.T. tray trial (Figure 54). Carefully remove the tibial tray handle and, with the trial prosthesis in place, extend the knee carefully, noting the anterior / posterior stability, medial / lateral stability and overall alignment in the A/P and M/L plane. If there is any indication of instability, substitute a tibial insert trial with the next greater thickness and repeat the reduction. Figure 54 Select the tibial insert trial that gives the greatest stability in flexion and extension while still allowing full extension (Figure 55). Rotational alignment of the M.B.T. tray trial is adjusted with the knee in full extension, using the tibial tray handle to rotate the tray and trial insert into congruency with the femoral trial. The rotation of the M.B.T. tray trial is usually centred on the junction between the medial and central one-third of the tibial tubercle. Cautery marks Overall alignment can be confirmed using the two-part alignment rod, attaching it to the tibial alignment handle (Figure 56). The appropriate position is marked with electrocautery on the anterior tibial cortex Fully flex the knee, and remove the trial components. Figure 55 Figure 56 29
. Attach the M.B.T. drill tower to the tray trial.")

31 Tibial Preparation - M.B.T. Tray fixation pins Tibial Preparation Align the tibial trial to fit with the tibia for maximum coverage or, if electrocautery marks are present, use these for alignment. Pin the trial with 2 pins as shown. The tray trial allows for standard and M.B.T. keeled components (Figure 57). Attach the M.B.T. drill tower to the tray trial. Control the tibial reaming depth by inserting the reamer to the appropriate coloured line (Figures 58 and 59). An optional Modular Drill Stop is available to provide a hard stop when reaming. See table for appropriate size. Figure 57 M.B.T. Tray Size Line Colour Green 2-3 Yellow 4-7 Blue Note: For cemented preparation, select the Cemented instruments, and for non-cemented or line-to-line preparation, select the Non-Cemented tibial instruments. The Cemented instruments will prepare for a 1 mm cement mantle around the periphery of the implant. Figure 58 Figure 59 30
.")
.")

32 Keeled Tray Option If a keeled M.B.T. tray is to be employed, and the bone of the medial or lateral plateau is sclerotic, it is helpful to initially prepare the keel slot with an oscillating saw or high speed burr. Assemble the M.B.T. keel punch impactor to the appropriately sized M.B.T. keel punch by pressing the side button and aligning the vertical marks on both impactor and keel punch (Figure 60). Figure 60 Insert assembly into the M.B.T. Drill Tower, taking care to avoid malrotation. Impact the assembly into the cancellous bone until the shoulder of the keel punch impactor is in even contact with the M.B.T. Drill Tower (Figure 61). Non-Keeled Tray Option For a non-keeled tray option attach the M.B.T. punch and follow the same routine (Figure 62). Final Trialing Option A secondary and final trialing step can be performed after tibial preparation. Remove the keel punch impactor from the keel punch by pressing the side button and remove the drill tower as well. Place the trial femoral component on the distal femur. Place the appropriate tibial insert trial onto the tray trial and repeat previous trial evaluation. Figure 61 Figure 62 31
.")

33 Final Patellar Preparation Select a template that most adequately covers the resected surface without overhang (Figure 63). If used, remove the patella wafer from the patella. Position the template handle on the medial side of the everted patella. Firmly engage the template to the resected surface and drill the holes with the appropriate drill bit (Figure 64). The patellar implant may now be cemented. Thoroughly cleanse the cut surface with pulsatile lavage. Apply cement to the surface and insert the component. The patellar clamp is designed to fully seat and stabilise the implant as the cement polymerises. Centre the silicon O-ring over the articular surface of the implant and the metal backing plate against the anterior cortex, avoiding skin entrapment. When snug, close the handles and hold by the ratchet until polymerisation is complete. Remove all extruded cement with a curette. Release the clamp by unlocking the locking switch and squeezing the handle together (Figure 65). Figure 64 Figure 63 The patella is reduced and the patella implant is evaluated. An unrestricted range of motion, free bearing movement and proper patellar tracking should be evident (Figure 66). Figure 65 Figure 66 32
.")
34 Cementing Technique To ensure a continuous cement mantle with good cement interdigitation, prepare the sclerotic bone. This can be done by drilling multiple small holes and cleansing the bone by pulsatile lavage (Figure 67). Any residual small cavity bone defects should be packed with cancellous autograft, allograft or synthetic bone substitutes such as CONDUIT TCP Granules. Note: Blood lamination can reduce the mechanical stability of the cement, therefore it is vital to choose a cement which reaches its working phase early. Figure 67 Whether mixed by the SMARTMIX Vacuum Mixing Bowl or the SMARTMIX CEMVAC Vacuum Mixing System, SMARTSET GHV Bone Cement offers convenient handling characteristics for the knee cementation process. A thick layer of cement can be placed either on the bone (Figure 68) or on the implant itself. Figure 68 33
. When fully inserted, several mallet blows may be delivered to the top of the tray inserter.")


35 Final Component Implantation Tibial Implantation Attach the M.B.T. tibial impactor by inserting the plastic cone into the implant and tighten by rotating the lock knob clockwise. Carefully insert the tibial tray avoiding malrotation (Figure 69). When fully inserted, several mallet blows may be delivered to the top of the tray inserter. Remove all extruded cement using a curette. Locking knob Polyethylene Implantation Loose fragments or particulates must be removed from the permanent tibial tray. The appropriate permanent tibial insert can be inserted. Figure 69 Femoral Implantation The femur is hyperflexed and the tibia is subluxed forward. Attach the slaphammer or universal handle to the femoral inserter / extractor. Position the appropriately sized femoral component on the inserter / extractor by depressing the two triggers to separate the arms and push the femoral component against the conforming poly. Release the triggers so that the arms engage in the slots on the femoral component and rotate the handle clockwise to lock (Figure 70). Extend the knee to approximately 90 degrees for final impaction. Release the inserter / extractor by rotating the handle counterclockwise and push the two triggers with thumb and index finger. For final femur impaction use the femoral notch impactor to seat the femur component. In SIGMA CS and SIGMA RPF (not SIGMA CR) cases the impactor can be used in the notch to prevent adverse flexion positioning (Figure 71). Clear any extruded cement using a curette. Figure 70 Figure 71 34

36 Closure Release the tourniquet and control bleeding by electrocautery. Place a closed wound suction drain in the suprapatellar pouch and bring out through the lateral retinaculum. Re-approximate the fat pad, quadriceps mechanism, patella tendon, and medial retinaculum with interrupted sutures. Fully rotate the knee from full extension to full flexion to confirm patellar tracking and the integrity of the capsular closure (Figure 72). Note the final flexion against gravity for postoperative rehabilitation. Re-approximate subcutaneous tissues and close the skin with sutures or staples. Figure 72 35

37 Appendix A: Fixed Bearing Modular Tibial Preparation Femoral Trial Attach the slaphammer or universal handle to the femoral inserter / extractor. Position the appropriately sized femoral trial on the inserter by depressing the two triggers to separate the arms and push the trial against the conforming poly surface. Release the triggers so that the arms engage in the slots on the femur, and rotate the handle clockwise to lock. Position the trial onto the femur, impacting as necessary. To detach the inserter from the femur rotate the handle counterclockwise and push the two triggers with thumb and index finger. Position the femoral trial onto the femur (Figure 73). There are two options available to assess the knee during trial reduction. One or both may be used. Figure Trial reduction with trial insert and tray in rotation, or free floating mode. This option is useful when allowing normal internal / external extension of the tibial components during flexion / extension to dictate optimal placement of the tibial tray. Select the trial bearing size determined during implant planning and insert onto the tray trial. Place the knee in approximately 90 to 100 degrees of flexion. With the knee in full flexion and the tibia subluxed anteriorly, attach the alignment handle to the tray trial by retracting the lever. Position the tray trial on the resected tibial surface, taking care to maximise the coverage of the tray trial on the proximal tibia (Figure 74). Figure 74 36
38 Appendix A: Fixed Bearing Modular Tibial Preparation With the trial prostheses in place, the knee is carefully and fully extended, noting medial and lateral stability and overall alignment in the A/P and M/L plane. Where there is any indication of instability, the next greater size tibial insert is substituted and reduction repeated. The insert that gives the greatest stability in flexion and extension and allows full extension is selected. Cautery marks Figure 75 Where there is a tendency for lateral subluxation or patellar tilt in the absence of medial patellar influence (thumb pressure), lateral retinacular release is indicated. Rotational alignment of the tibial tray is adjusted with the knee in full extension, using the alignment handle to rotate the tray and trial insert into congruency with the femoral trial. The appropriate position is marked with electrocautery on the anterior tibial cortex (Figures 75 and 76). 2. Trial reduction with trial insert and tray in fixed, nonrotation mode. Assess the position of the tray to achieve maximal tibial coverage (align the tibial tray handle with the electrocautery marks, if procedure described in 1) has been followed.) The rotation of the tray trial is usually centred on the junction between the medial and central one-third of the tibial tubercle. Secure the fixed bearing keel punch impactor to the evaluation bullet and position into the cut-out of the tray trial. Tap down lightly to secure the tray to the proximal tibia (Figure 77). Carefully remove the tibial tray handle and repeat the trial reduction step from Step 1. Figure 76 Figure 77 37
.")

39 SIGMA Modular & UHMWPE Tray: Select the appropriate fixed bearing drill tower, drill bushing, drill and modular keel punch system. Pin the trial with two pins. Remove the alignment handle from the tray trial and assemble the fixed bearing drill tower onto the tray trial (Figure 78). Fully advance the matching drill through the drill tower into the cancellous bone (Figure 79) to the appropriate line shown in Table below. Figure 78 Note: For cemented preparation, select the Cemented instruments, and for non-cemented or line-to-line preparation, select the Non-Cemented tibial instruments. Tray Size Line Colour Green 4-5 Yellow 6 Blue The Cemented instruments will prepare for a 1 mm cement mantle around the periphery of the implant. Insert the fixed bearing keel punch impactor and keel punch through the drill tower and impact until the shoulder of the punch is in contact with the guide (Figure 80). Remove the keel punch impactor by pressing the side button taking care that the punch configuration is preserved. Figure 79 Figure 80 38
.")

40 Appendix B: Fixed Bearing Standard Tibial Preparation SIGMA Cruciform Keel Tray: Pin the trial with two pins. Remove the alignment handle from the tray trial and assemble the appropriately sized cruciform keel punch guide to the tray trial (Figure 81). For cemented preparation, sequentially prepare the tibia starting with the standard punch, followed by the cemented punch. For non-cemented preparation, use the standard punch only (Figure 82). Assemble an appropriately sized standard or cemented keel punch onto the fixed bearing impactor handle. Insert the punch through the guide and impact until the shoulder of the punch is in contact with the guide. Free the stem punch, taking care that the punch configuration is preserved. Figure 81 Standard punch Cemented punch Figure 82 39
41 Appendix C: Tibial I.M. Jig Alignment The entry point for the intramedullary alignment rod is a critical starting point for accurate alignment of the intramedullary alignment system. In most cases, this point will be centred on the tibial spine in both medial / lateral and anterior / posterior aspect. In some cases, it may be slightly eccentric. The knee is flexed maximally, the tibial retractor is inserted over the posterior cruciate ligament and the tibia is subluxed anteriorly. All soft tissue is cleared from the intercondylar area. The tibial spine is resected to the highest level of the least affected tibial condyle. Position the correct size fixed bearing or mobile bearing tray trial on the proximal tibia to aid in establishing a drill point. Drill a hole through the tray trial to open the tibia intramedullary canal with the I.M. step drill (Figure 83). Figure 83 The intramedullary rod is passed down through the medullary canal until the isthmus is firmly engaged (Figure 84). Figure 84 40


42 Appendix C: Tibial I.M. Jig Alignment The handle is removed and the I.M. rotation guide is placed over the I.M. rod to define the correct rotational tibia axis, referring to the condylar axis, medial 1/3 of the tibia tubercle and the centre of the ankle (Figure 85). The angle can also be checked relative to the posterior condylar axis by moving the slider forward and rotating it until it is aligned with the posterior condyles. The marks on the rotation guide are in 2 degree increments and give an indication of the angle between the posterior condylar axis and the chosen rotation. Figure 85 A/P slide adjustment lock I.M. rod lock The rotation can then be marked through the slot on the rotation guide. The rotation guide can then be removed. After the correct rotation has been marked, slide the I.M. tibial jig over the I.M. rod and rotate the I.M. jig until the rotation line on the jig lines up with the line previously marked using the rotation guide. Assemble the appropriate SIGMA HP handed (left / right) or symmetrical tibia cutting block to the HP I.M. tibial jig in line with the marked rotation (Figure 86). Additional posterior slope can be added through the slope adjustment knob, when using SIGMA cruciate retaining components. Slope adjustment Note: The number in the window indicates the amount of ADDITIONAL SLOPE that has been added. Distal proximal lock Slope scale Tibial cutting block release button Figure 86 41
.")

43 Slide the appropriate fixed or adjustable stylus in the HP tibial cutting block slot. When measuring from the less damaged side of the tibia plateau set the stylus to 8 mm or 10 mm. If the stylus is placed on the more damaged side of the tibia plateau, set the stylus to 0 mm or 2 mm (Figure 87). Slide the total construct as close as possible towards the proximal tibia and lock this position. Adjust the correct degree of slope by rotating the slope adjustment screw. For SIGMA cruciate retaining components a 3-5 degree slope is recommended. For SIGMA cruciate substituting components a 0 degree slope is recommended as previously described. Ensure that the slope scale reads zero. The correct block height can be obtained by unlocking the distal proximal lock and lowering the bottom half of the block until the stylus is resting on the desired part of the tibia. Lock the device, by turning the distal proximal locking screw, when the correct position has been reached. Figure 87 After the height has been set, insert two pins through the 0 mm set of holes in the block (the stylus may need to be removed for access). The block can be securely fixed with one extra convergent pin. +2 and 2 mm pinholes are available on the cutting blocks to further adjust the resection level where needed. Check the position of the resection block with an external alignment guide before making any cut. Unlock the intramedullary alignment device from the cutting block and remove the I.M. rod (Figure 88). Figure 88 42


44 Appendix D: Spiked Uprod Assemble the appropriate 0-3 degree, left / right or symmetrical cutting block to the spiked uprod (Figure 89). Slide the spiked uprod into the ankle clamp assembly. Place the knee in 90 degrees of flexion with the tibia translated anteriorly and stabilised. Place the ankle clamp proximal to the malleoli and insert the larger of the two proximal spikes in the centre of the tibial eminence to stabilise the EM alignment device. Loosen the A/P locking knob and position the cutting block roughly against the proximal tibia and lock the knob. Position the cutting block at a rough level of resection and tighten the proximal / distal-sliding knob (Figure 90). Figure 89 Varus / valgus Establish rotational alignment by aligning the tibial Jig ankle clamp parallel to the transmalleolar axis. The midline of the tibia is approximately 3 mm medial to the transaxial midline. Translate the lower assembly medially (usually to the second vertical mark) by pushing the varus / valgus adjustment wings. There are vertical scribe marks for reference aligning to the middle of the talus. Figure 90 43

.")
 design, a 0 degree posterior slope is recommended. As each patient s anatomy varies, the spiked uprod can be used for both smaller and larger patients.")
45 Slope The spiked uprod and ankle clamp are designed to prevent an adverse anterior slope. On an average size tibia this guide will give approximately a 0 degree tibial slope when the slope adjustment is translated anteriorly until it hits the stop. In some cases a slight amount of slope will remain (1-2 degrees). Slope adjustment lock The angle of the tibial slope can be increased to greater than 0 degrees should the patient have a greater natural slope (Figure 91). First unlock the slide locking position and then translate the tibial slope adjuster anteriorly until the desired angle is reached. For a cruciate substituting (CS) design, a 0 degree posterior slope is recommended. As each patient s anatomy varies, the spiked uprod can be used for both smaller and larger patients. The length of the tibia influences the amount of slope when translating the adapter anteriorly. The 0 degree default position can be overridden by pressing the slope override button and moving the slope adjustment closer to the ankle (Figure 91). Figure 91 Slope override button On the spiked uprod 5, 6 and 7 zones are present, which correspond to the length of the tibia. These markings can by used to fine tune the amount of slope. When the spiked uprod shows a larger mark 7 zone, this indicates that when the lower assembly is translated 7 mm anterior, it will give an additional 1 degree of posterior slope (Figure 92). Figure 92 44


46 Appendix D: Spiked Uprod Non-slotted stylus foot Height Loosen the proximal / distal sliding knob, insert the adjustable tibial stylus into the cutting block, and adjust to the correct level of resection. When measuring from the less damaged side of the tibial plateau, set the stylus to 8 mm or 10 mm. If the stylus is placed on the more damaged side of the tibial plateau, set the stylus to 0 mm or 2 mm. Figure 91 Adjustment of resection height on the stylus should be done outside the joint space before locating the stylus in the cutting block. If planning to resect through the slot, position the foot of the tibial stylus marked slotted into the slot of the tibial cutting block (Figure 93). If planning to resect on top of the cutting block, place the foot marked non-slotted into the cutting slot. Move the block and stylus assembly so that the stylus touches the desired point on the tibia. Care should be taken with severe valgus deformity, not to over resect the tibia. Tibial Resection After the height has been set, lock the proximal / distal sliding knob and pin the block through the 0 mm set of holes (the stylus may need to be removed for access). +2 and -2 mm pinholes are available on the resection blocks to further adjust the resection level where needed. The block can be securely fixed with one extra convergent pin. Spiked Uprod Removal 1. Loosen the proximal distal sliding knob. Press Release trigger to disengage the tibial cutting Block 2. Connect the sla p-hammer to the top of the spiked uprod and disengage the spikes from the proximal tibia. 3. Press the cutting block release button to disengage from the cutting block. Figure 91 Remove the tibial jig and perform the appropriate resection (Figure 94). 45
47 Ordering Information Item # Description Tibia Resection HP EM Tibial Jig Uprod HP EM Tibial Jig Spiked Uprod HP EM Tibial Jig Ankle Clamp HP IM Tibia Rotation Guide HP IM Tibia Jig SIGMA HP 0 degrees Symmetrical Cut Block SIGMA HP 0 degrees Left Cut Block SIGMA HP 0 degrees Right Cut Block SIGMA HP 3 degrees Symmetrical Cut Block SIGMA HP 3 degrees Left Cut Block SIGMA HP 3 degrees RIght Cut Block SIGMA HP Adj Tibial Stylus Femoral Resection IM Rod Handle IM Rod 300 mm HP Step IM Reamer SIGMA HP Distal Femoral Align Guide SIGMA HP Distal Femoral Resect Guide SIGMA HP Distal Femoral Connector SIGMA HP Distal Femoral Block HP Alignment Tower HP Alignment Rod Reference Guide Balanced Femoral Sizing HP Fixed Reference Femoral Sizer Femoral Resection SIGMA HP Classic A/P Block Size SIGMA HP Classic A/P Block Size SIGMA HP Classic A/P Block Size SIGMA HP Classic A/P Block Size SIGMA HP Classic A/P Block Size SIGMA HP Classic A/P Block Size SIGMA HP Classic A/P Block Size SP 2 Mini Femoral Chamfer Cut Block Handles SIGMA HP Femoral Notch Guide Size SIGMA HP Femoral Notch Guide Size SIGMA HP Femoral Notch Guide Size SIGMA HP Femoral Notch Guide Size SIGMA HP Femoral Notch Guide Size 4 46
48 Item # Description Femoral Resection (Cont.) SIGMA HP Femoral Notch Guide Size SIGMA HP Femoral Notch Guide Size RPF HP Classic A/P Block Size RPF HP Classic A/P Block Size RPF HP Classic A/P Block Size RPF HP Classic A/P Block Size RPF HP Classic A/P Block Size RPF HP Classic A/P Block Size RPF HP Classic A/P Block Size RPF HP Classic A/P Block Size RPF HP Femoral Notch Guide Size RPF HP Femoral Notch Guide Size RPF HP Femoral Notch Guide Size RPF HP Femoral Notch Guide Size RPF HP Femoral Notch Guide Size RPF HP Femoral Notch Guide Size RPF HP Femoral Notch Guide Size RPF HP Femoral Notch Guide Size SIGMA HP Balanced A/P Block Size SIGMA HP Balanced A/P Block Size SIGMA HP Balanced A/P Block Size SIGMA HP Balanced A/P Block Size SIGMA HP Balanced A/P Block Size SIGMA HP Balanced A/P Block Size SIGMA HP Balanced A/P Block Size SIGMA HP Balanced A/P Block Stylus SIGMA HP Balanced IM Rod 5 Degrees SIGMA HP Balanced IM Rod 3 Degrees SIGMA HP Balanced RP Femoral Positioner SIGMA HP Balanced FB Femoral Positioner SIGMA HP Balanced Femoral Positioner Shim 10 mm SIGMA HP Balanced Femoral Positioner Shim 12.5 mm SIGMA HP Balanced Femoral Positioner Shim 15 mm Sigma HP Balanced Femoral Positioner Shim 17.5 mm Removable Handles (Pack Of 2) SIGMA HP Femoral Finish Block Size SIGMA HP Femoral Finish Block Size SIGMA HP Femoral Finish Block Size SIGMA HP Femoral Finish Block Size SIGMA HP Femoral Finish Block Size SIGMA HP Femoral Finish Block Size SIGMA HP Femoral Finish Block Size RPF HP Balanced A/P Block Size RPF HP Balanced A/P Block Size RPF HP Balanced A/P Block Size RPF HP Balanced A/P Block Size RPF HP Balanced A/P Block Size RPF HP Balanced A/P Block Size RPF HP Balanced A/P Block Size 5 47
49 Item # Description RPF HP Balanced A/P Block Size SIGMA RPF HP Femoral Finish Block Size SIGMA RPF HP Femoral Finish Block Size SIGMA RPF HP Femoral Finish Block Size SIGMA RPF HP Femoral Finish Block Size SIGMA RPF HP Femoral Finish Block Size SIGMA RPF HP Femoral Finish Block Size SIGMA RPF HP Femoral Finish Block Size SIGMA RPF HP Femoral Finish Block Size P.F.C. Chamfer Guides Size P.F.C. Chamfer Guides Size P.F.C. Chamfer Guides Size P.F.C. Chamfer Guides Size P.F.C. Chamfer Guides Size P.F.C. Chamfer Guides Size P.F.C. Chamfer Guides Size 6 Fixed Bearing Preparation SIGMA HP F.B.T. Tray Trial Size SIGMA HP F.B.T. Tray Trial Size SIGMA HP F.B.T. Tray Trial Size SIGMA HP F.B.T. Tray Trial Size SIGMA HP F.B.T. Tray Trial Size SIGMA HP F.B.T. Tray Trial Size SIGMA HP F.B.T. Tray Trial Size SIGMA HP F.B.T. Evaluation Bullet Size SIGMA HP F.B.T. Evaluation Bullet Size SIGMA HP F.B.T. Keel Punch Impact SIGMA HP F.B.T. Drill Tower M.B.T. Tray Fixation Pins HP Tibial Tray Handle FBT Modular Drill Stop Standard Tray Preparation HP F.B.T. Standard Tibial Punch Guide Size HP F.B.T. Standard Tibial Punch Guide Size HP F.B.T. Standard Tibial Punch Size HP F.B.T. Standard Tibial Punch Size HP F.B.T. Standard Tibial Punch Size HP F.B.T. Standard Cemented Tibial Punch Size HP F.B.T. Standard Cemented Tibial Punch Size
INSTRUMENTS. Measured Resection Classic Surgical Technique
 INSTRUMENTS Measured Resection Classic Surgical Technique RECOVERY FUNCTION SURVIVORSHIP DePuy believes in an approach to knee arthroplasty that places equal importance on recovery, function and survivorship.
INSTRUMENTS. Balanced Surgical Technique
 INSTRUMENTS Balanced Surgical Technique Contemporary total knee arthoplasty demands high performance instrumentation that provides enhanced efficiency, precision and flexibility. Through a program of continuous
TOTAL KNEE ARTHROPLASTY SYSTEM
 SURGICAL TECHNIQUE TOTAL KNEE ARTHROPLASTY SYSTEM 90-SRK-700000 B.0 0 Contents 1. Implant Sizing 2. Surgical Technique a. Incision and Exposure b. Distal Femoral Resection c. Tibial Resection d. Femoral
Measured Resection Fixed Reference Surgical Technique Featuring the Mini-Subvastus Approach
 2 Measured Resection Fixed Reference Surgical Technique Featuring the Mini-Subvastus Approach Contemporary total knee arthroplasty demands high performance instrumentation that provides enhanced efficiency,
INSTRUMENTS SIGMA. Primary Knee System. Fixed Reference Surgical Technique Featuring the Mini-Subvastus Approach. Surgical Technique
 INSTRUMENTS SIGMA Primary Knee System Fixed Reference Surgical Technique Featuring the Mini-Subvastus Approach Surgical Technique Introduction Contemporary total knee arthroplasty demands high performance
Distal Cut First Femoral Preparation
 Surgical Technique Distal Cut First Femoral Preparation Primary Total Knee Arthroplasty LEGION Total Knee System Femoral preparation Contents Introduction...3 DCF femoral highlights...4 Preoperative planning...6
LCS COMPLETE KNEE SYSTEM
 LCS COMPLETE KNEE SYSTEM High Performance Instruments SURGICAL TECHNIQUE SURGICAL TECHNIQUE Contemporary total knee arthroplasty demands high performance instrumentation that provides enhanced efficiency,
Revolution. Unicompartmental Knee System
 Revolution Unicompartmental Knee System While Total Knee Arthroplasty (TKA) is one of the most predictable procedures in orthopedic surgery, many patients undergoing TKA are in fact excellent candidates
Triathlon Knee System
 Triathlon Knee System Express Instruments Surgical Protocol Posterior Stabilized & Cruciate Retaining TriathlonKneeSystem Express Instruments Surgical Protocol Acknowledgments..........................................................2
Total Knee Original System Primary Surgical Technique
 Surgical Procedure Total Knee Original System Primary Surgical Technique Where as a total hip replacement is primarily a bony operation, a total knee replacement is primarily a soft tissue operation. Excellent
Extramedullary Tibial Preparation
 Surgical Technique Extramedullary Tibial Preparation Primary Total Knee Arthroplasty LEGION Total Knee System Extramedullary tibial preparation Contents Introduction...2 EM tibial highlights...3 Preoperative
ANATOMIC SURGICAL TECHNIQUE. 5 in 1. Conventional instrumentation 07/11/2013
 ANATOMIC SURGICAL TECHNIQUE 5 in 1 Conventional instrumentation PRO.GB.933/1.0 Octobre 2013 2 Tibial step 3 Intramedullary technique - Based on the preoperative plan, drill the medullary canal with the
Surgical Technique. VISIONAIRE Disposable Instruments for the LEGION Total Knee System
 Surgical Technique VISIONAIRE Disposable Instruments for the LEGION Total Knee System VISIONAIRE and LEGION Disposable instrument technique* Note: All disposable instruments are interchangeable with the
TRK REVISION KNEE Surgical Technique
 1 TRK REVISION KNEE Surgical Technique 1. 2. 3. 4. 5. 6. 7. 8. 9. 10. INTERCONDYLAR RESECTION...... page FEMORAL STEM...... page NON CEMENTED FEMORAL STEM...... page TRIAL FEMORAL COMPONENTS...... page
INTUITION INSTRUMENTS SURGICAL TECHNIQUE
 INTUITION INSTRUMENTS SURGICAL TECHNIQUE Introduction This surgical technique provides guidelines for the implantation of the ATTUNE Knee System Family of Knee Implants with the INTUITION Instrumentation.
INTUITION INSTRUMENTS SURGICAL TECHNIQUE
 INTUITION INSTRUMENTS SURGICAL TECHNIQUE Introduction This surgical technique provides guidelines for the implantation of the ATTUNE Knee System Family of Knee Implants with the INTUITION Instrumentation.
Unicondylar Surgical Technique
 Unicondylar Surgical Technique Contents Indications, Contra-indications and X-ray Templating 2 Approach and Exposure 3 Proximal Tibial Resection 4 Tibial Jig Alignment 6 Tibial Sizing 9 Balancing 10 Distal
LCS COMPLETE SURGICAL TECHNIQUE. MILESTONE Instruments with MBT Tray Preparation
 LCS COMPLETE MILESTONE Instruments with MBT Tray Preparation SURGICAL TECHNIQUE CONTENTS Preface 2 Surgical Concepts 3 Instruments 4 Surgical Technique Summary 6 Surgical Technique 8 Preparation 8 Incision
Zimmer NexGen MIS Tibial Component. Cemented Surgical Technique IMAGE TO COME
 Zimmer NexGen MIS Tibial Component Cemented Surgical Technique IMAGE TO COME Zimmer NexGen MIS Tibial Component Cemented Surgical Technique 1 Zimmer NexGen MIS Tibial Component Cemented Surgical Technique
NATURAL MOTION TECHNOLOGY SURGICAL TECHNIQUE. EMPOWR 3D Knee. EMPOWR PS Knee
 NATURAL MOTION TECHNOLOGY EMPOWR 3D Knee EMPOWR PS Knee SURGICAL TECHNIQUE Contents System Features.... 3 Indications and Contraindications.... 4 Surgical Snap Shot.... Preoperative Planning.... Surgical
Zimmer FuZion Instruments. Surgical Technique (Beta Version)
") Zimmer FuZion Surgical Technique (Beta Version) INTRO Surgical Technique Introduction Surgical goals during total knee arthroplasty (TKA) include establishment of normal leg alignment, secure implant fixation,
Zimmer FuZion Surgical Technique (Beta Version) INTRO Surgical Technique Introduction Surgical goals during total knee arthroplasty (TKA) include establishment of normal leg alignment, secure implant fixation,
Intramedullary Tibial Preparation
 Surgical Technique Intramedullary Tibial Preparation Primary Total Knee Arthroplasty LEGION Total Knee System Intramedullary tibial preparation Contents Introduction...2 IM tibial highlights...3 Preoperative
Zimmer NexGen Trabecular Metal Tibial Tray
 Zimmer NexGen Trabecular Metal Tibial Tray Surgical Technique Zimmer NexGen Trabecular Metal Tibial Tray Surgical Technique Give Bone A Solid Hold Zimmer NexGen Trabecular Metal Tibial Tray Surgical Technique
PIN GUIDE SYSTEM SURGICAL TECHNIQUE. with the SIGMA High Performance Instruments System. This publication is not intended for distribution in the USA.
 PIN GUIDE SYSTEM with the SIGMA High Performance Instruments System This publication is not intended for distribution in the USA. SURGICAL TECHNIQUE Pin Guide Surgical Technique The following steps are
The information contained in this document is intended for healthcare professionals only.
 The information contained in this document is intended for healthcare professionals only. Triathlon Knee System Posterior Stabilized & Cruciate Retaining Table of Contents Acknowledgments.......................................................1
SIGMA High Performance Partial Knee. Unicondylar. Surgical Technique
 SIGMA High Performance Partial Knee Unicondylar Surgical Technique Table of Contents Surgical Technique X-ray Templating 3 Approach and Exposure 4 Proximal Tibial Resection 5 Tibial Jig Alignment 7 Tibial
MIS Cemented Tibial Component
 MIS Cemented Tibial Component NexGen Complete Knee Solution Surgical Technique Table of Contents Surgical Exposure... 2 Finish the Tibia... 2 Position Based on Anatomic Landmarks... 3 Lateral Posterior
OPERATIVE TECHNIQUE SKS Total Knee Replacement
 OPERATIVE TECHNIQUE SKS Total Knee Replacement Femoral preparation A40577 1 2 5 1: Alignment rod A30049 + A30124 2: Centromedullary rod A40224 4: T-handle A40232 6: Femoral measuring device A40411 + A40414
Patella Planing System
 REFERENCE GUIDE AND SURGICAL TECHNIQUE Patella Planing System SPECIALIST INSTRUMENTS AN ONLAY PATELLA PREPARATION SYSTEM TECHNIQUE FOR PRIMARY PATELLAR RESURFACING The Specialist 2 Patellar Planer System
Profix. Total Knee System. As described by
 Profix Total Knee System P R I M A R Y P R O C E D U R E As described by Leo A. Whiteside, M.D. Associate Research Professor Washington University School of Medicine Director, Biomechanical Research Laboratory
FOREWORD PRESERVATION UNICOMPARTMENTAL KNEE SYSTEM
 Surgical Technique FOREWORD PRESERVATION UNICOMPARTMENTAL KNEE SYSTEM Our surgeon design team first implanted the Preservation Unicompartmental Knee System in 2001. The system was developed with over
Surgical Technique. VISIONAIRE FastPak Instruments for the LEGION Total Knee System
 Surgical Technique VISIONAIRE FastPak Instruments for the LEGION Total Knee System VISIONAIRE FastPak for LEGION Instrument Technique* Nota Bene The technique description herein is made available to the
TRUMATCH PERSONALIZED SOLUTIONS with the SIGMA High Performance Instruments
 TRUMATCH PERSONALIZED SOLUTIONS with the SIGMA High Performance Instruments Pin Guide System SURGICAL TECHNIQUE PIN GUIDE SURGICAL TECHNIQUE The following steps are an addendum to the SIGMA High Performance
DePuy Orthopaedics, Inc. 700 Orthopaedic Drive Warsaw, IN USA Tel: +1 (800)
") DePuy Orthopaedics, Inc. 700 Orthopaedic Drive Warsaw, IN 46581-0988 USA Tel: +1 (800) 366 8143 0086 Printed in USA. DePuy Synthes Companies 2013 All rights reserved. 0612-09-512 Rev 1 5M 0513 Surgical
DePuy Orthopaedics, Inc. 700 Orthopaedic Drive Warsaw, IN 46581-0988 USA Tel: +1 (800) 366 8143 0086 Printed in USA. DePuy Synthes Companies 2013 All rights reserved. 0612-09-512 Rev 1 5M 0513 Surgical
Resurfacing Distal Femur. Orthopaedic Salvage System
 Resurfacing Distal Femur Orthopaedic Salvage System Primary Arthroplasty OSS 3cm Resurfacing Distal Femur Distal Femoral Resection Drill and ream the distal femur in the following sequence: (Figure 1)
Uniglide. Unicompartmental Knee Replacement Mk III surgical technique
 Uniglide Unicompartmental Knee Replacement Mk III surgical technique Uniglide Contents Operative summary 4 Pre-operative assessment 6 Preparation 7 Incision 7 Approach 7 Medial procedure 8 Tibial preparation
Knee. Surgical Protocol
 U2 TM PS CR Knee Surgical Protocol Table of Contents Pre-Operative Planning... Surgical Incision... 1 2 A. Femoral Preparation A.1. Pilot Hole... A.2. Femoral Valgus Angle Confirmation... A.3. Distal
FLK167 02/08. Biomet UK Ltd Waterton Industrial Estate Bridgend, South Wales CF31 3XA, United Kingdom. Tel Fax:
 FLK167 02/08 Biomet UK Ltd Waterton Industrial Estate Bridgend, South Wales CF31 3XA, United Kingdom Tel. 01656 655221 Fax: 01656 645454 Premier Instrumentation CR or PS Surgical Technique Vanguard Premier
Contact your Zimmer representative or visit us at
 Please refer to the package inserts for complete product information, including contraindications, warnings, precautions, and adverse effects. Contact your Zimmer representative or visit us at www.zimmer.com
AGC Total Knee System. Concise Surgical Technique Featuring EquiFlex Instrumentation
 AGC Total Knee System Concise Surgical Technique Featuring EquiFlex Instrumentation AGC TOTAL KNEE SYSTEM Concise Surgical Technique Instrumentation Disclaimer This brochure provides a description of the
SURGICAL TECHNIQUE FOR USE WITH P. F. C. SIGMA KNEE SYSTEMS
 SURGICAL TECHNIQUE FOR USE WITH P. F. C. SIGMA KNEE SYSTEMS Primary Cruciate-Retaining & Cruciate-Substituting Procedure SPECIALIST INSTRUMENTS CRUCIATE-RETAINING PROSTHESIS DESIGNED BY RICHARD D. SCOTT,
LCS Complete P.F.C. Sigma RP Mobile-bearing Total Knee System
 LCS Complete P.F.C. Sigma RP Mobile-bearing Total Knee System IMPORTANT This Essential Product Information sheet does not include all of the information necessary for selection and use of a device. Please
Primary Surgical Technique. Part 2 of 2 P. F. C. SIGMA KNEE SYSTEM PRIMARY CRUCIATE-RETAINING AND CRUCIATE-SUBSTITUTING PROCEDURES
 Primary Surgical Technique Part 2 of 2 P. F. C. SIGMA KNEE SYSTEM PRIMARY CRUCIATE-RETAINING AND CRUCIATE-SUBSTITUTING PROCEDURES P.F.C. Sigma Knee System Surgical Technique Primary Cruciate-Substituting
G K SPHERE. Surgical Technique STABILITY FOR LIFE. Hip Knee Spine Navigation
 G K SPHERE M E D I A L L Y S T A B I L I Z E D K N E E STABILITY FOR LIFE Surgical Technique Hip Knee Spine Navigation GMK SPHERE Surgical Technique Hip Knee Spine Navigation INTRODUCTION This brochure
NexGen Cruciate Retaining (CR) and Revision Instrumentation. Surgical Technique
 and Revision Instrumentation. Surgical Technique") NexGen Cruciate Retaining (CR) and Revision Instrumentation Surgical Technique Table of Contents Introduction... 4 Revision Arthroplasty... 4 Multi-Reference 4-in-1 Instrumentation System MICRO-MILL Instrumentation
NexGen Cruciate Retaining (CR) and Revision Instrumentation Surgical Technique Table of Contents Introduction... 4 Revision Arthroplasty... 4 Multi-Reference 4-in-1 Instrumentation System MICRO-MILL Instrumentation
LAMINA SPREADER SURGICAL TECHNIQUE
 LAMINA SPREADER SURGICAL TECHNIQUE Balanced and appropriate external rotation of the femoral component is important for tibio-femoral stability in flexion and patello-femoral tracking/function. Depending
Premier Total Knee Instrumentation
 Premier Total Knee Instrumentation Vanguard Complete Knee System Surgical Technique Table of Contents Indications and Contraindications... 3 Introduction... 4 Patient Selection Preoperative Planning Approaches...
Aesculap Orthopaedics Columbus MIOS
 Aesculap Orthopaedics Columbus MIOS Minimally Invasive Orthopaedic Solutions Manual TKA Surgical Technique MIOS 4-in-1 Cutting Block MIOS Distal Femoral Cutting Block MIOS Tibial Left and Right Cutting
Microplasty Elite Total Knee Instrumentation
 Microplasty Elite Total Knee Instrumentation Vanguard Complete Knee System Surgical Technique Table of Contents Indications and Contraindications... 3 Introduction... 4 Patient Selection Preoperative
Anterior Cut First Surgical Technique
 Anterior Cut First Surgical Technique GENESIS II Anterior Cut First Surgical Technique Table of Contents Introduction....................................... 2 Preop Planning....................................
NEXGEN COMPLETE KNEE SOLUTION S A. Tibial Stem Extension & Augmentation Surgical. ATechnique
 NEXGEN COMPLETE KNEE SOLUTION ATechnique Tibial Stem Extension & Augmentation Surgical INTRODUCTION The NexGen Complete Knee Solution Intramedullary Tibial Instruments have been designed to provide an
TRUMATCH PERSONALIZED SOLUTIONS with the SIGMA High Performance Instruments
 TRUMATCH PERSONALIZED SOLUTIONS with the SIGMA High Performance Instruments Resection Guide System SURGICAL TECHNIQUE RESECTION GUIDE SURGICAL TECHNIQUE The following steps are an addendum to the SIGMA
STABILITY FOR LIFE. Surgical Technique
 STABILITY FOR LIFE Surgical Technique Joint Spine Sports Med GMK Sphere Surgical Technique 2 INDEX 1. INTRODUCTION 4 1.1 Indications 4 1.2 Contraindications 4 1.3 Preoperative planning 5 1.4 Surgical approach
Triathlon TS Knee System. Surgical Protocol
 Triathlon TS Knee System Surgical Protocol Triathlon TS Knee System Surgical Protocol Table of Contents Acknowledgments..........................................................2 Exposure...................................................................4
Zenith. Total Ankle Replacement Surgical technique
 Total Ankle Replacement Surgical technique Contents Operative summary 4 Pre-operative planning and templating 6 Patient positioning 6 Exposure 6 Saw blades 7 Joint line definition 7 Tibial alignment jig
S U R G I C A L T E C H N I Q U E David A. McQueen, MD Return to Menu
 S U R G I C A L T E C H N I Q U E David A. McQueen, MD TOTAL KNEE INSTRUMENTS Wichita Fusion Nail Introduction...1 Preoperative Planning...2 Surgical Technique...3-8 Wichita Fusion Nail Surgical Technique
The ACL-PCL Substituting Knee. BioFoam Tibial Bases. Surgical Technique For Cementless Tibial Fixation
 The CL-PCL Substituting Knee BioFoam Surgical Technique For Cementless Tibial Fixation Surgical techniques and instrument recommendations were provided by: Michael nderson, MD Milwaukee, WI G. Lynn Rasmussen,
BIOTECH FUTURE KNEE Minimal Invasive (and classic) Surgical Technique
 Surgical Technique") BIOTECH FUTURE KNEE Minimal Invasive (and classic) Surgical Technique Page No. Product description 2. Pre-operational planning 3. 1st step Femoral resection 4. P/S Femoral component 7. 2nd step Proximal
BIOTECH FUTURE KNEE Minimal Invasive (and classic) Surgical Technique Page No. Product description 2. Pre-operational planning 3. 1st step Femoral resection 4. P/S Femoral component 7. 2nd step Proximal
U2 PSA. Revision Knee. Surgical Protocol
 U2 PSA TM Revision Knee Surgical Protocol Table of Contents 1 Component Removal... 1 2 Tibial Preparation... 1 2.1 Tibial Canal Preparation... 1 2.2 Proximal Tibial Resection... 2 2.3 Non Offset Tibial
1. Pre-Operative Planning Skin Incision and Arthrotomy
 Stage of Operation 1. Pre-Operative Planning --------------------------1 2. Skin Incision and Arthrotomy ------------------1 3. Femoral valgus angle confirmation ------------2 4. Distal Femur Cutting -----------------------------3
ClassiQ. Scorpio. Anterior Referencing Surgical Protocol. Anterior Referencing. For use with Scorpio ClassiQ Instrument System
 Scorpio ClassiQ Anterior Referencing Surgical Protocol For use with Scorpio ClassiQ Instrument System For use with Scorpio ClassiQ Single Radius Total Knee System AR Anterior Referencing This document
Pin Guide System. Surgical Technique
 Pin Guide System Surgical Technique Pin Guide Surgical Technique The following steps are an addendum to the SIGMA High Performance (HP) Instruments, Fixed Reference Surgical Technique (Cat. No. 0612-87-510
Persona The Personalized Knee. Surgical Technique
 Persona The Personalized Knee Surgical Technique Table of Contents Introduction... 2 Constraint Options Preoperative Planning Surgical Approach Patient Preparation Magnet Usage Symbols Screw/Pin Information
Inspiring people, Enriching lives
 TM Inspiring people, Enriching lives Encore Medical, L.P. 9800 Metric Blvd. Austin, Texas 78758 512-832-9500 www.encoremed.com Encore Medical, L.P. Cat. # 0152-017 2.5k/rev. A Encore and Foundation are
Orthopedic Bone Nail System - Distal Femoral Nail Surgical Technique Manual
 Orthopedic Bone Nail System - Distal Femoral Nail Surgical Technique Manual Note: The surgical procedures should be performed under the guidance of qualified skilled orthopedic surgeons, and this surgical
DePuy International Ltd St Anthony s Road Leeds LS11 8DT England Tel: +44 (0) Fax: +44 (0) Fixed Bearing Surgical Technique
 Fax: +44 (0) Fixed Bearing Surgical Technique") SIGMA KNEE SYSTEM This publication is not intended for distribution in the USA. Never Stop Moving is a trademark of DePuy International Ltd. P.F.C. and Sigma are registered trademarks of DePuy Orthopaedics,
SIGMA KNEE SYSTEM This publication is not intended for distribution in the USA. Never Stop Moving is a trademark of DePuy International Ltd. P.F.C. and Sigma are registered trademarks of DePuy Orthopaedics,
CONTRIBUTING SURGEON. Barry Waldman, MD Director, Center for Joint Preservation and Replacement Sinai Hospital of Baltimore Baltimore, MD
 CONTRIBUTING SURGEON Barry Waldman, MD Director, Center for Joint Preservation and Replacement Sinai Hospital of Baltimore Baltimore, MD System Overview The EPIK Uni is designed to ease the use of the
Triathlon with Single-Use Instrumentation Optimize Your TKA Experience. Posterior Referencing Surgical Protocol
 Triathlon with Single-Use Instrumentation Optimize Your TKA Experience Posterior Referencing Surgical Protocol Introduction............................................................2 Assembly Instructions...................................................6
Zimmer NexGen Tibial Stem Extension & Augmentation. Surgical Technique IMAGE TO COME. Stem Extensions and Augments
 Zimmer NexGen Tibial Stem Extension & Augmentation Surgical Technique IMAGE TO COME Stem Extensions and Augments Zimmer NexGen Tibial Stem Extension & Augmentation Surgical Technique 1 Zimmer NexGen Tibial
Triathlon Knee System. Anterior Referencing Surgical Protocol
 Triathlon Knee System Anterior Referencing Surgical Protocol Triathlon Knee System Anterior Referencing Surgical Protocol Table of Contents Acknowledgments..........................................................2
P. F. C. Sigma RP Knee System surgical technique
 P. F. C. Sigma RP Knee System surgical technique I N T E L L I G E N T O R T H O P A E D I C S Contents Ci System Connections 2 Ci System Set-up 4 Start-up Procedure 5 Ci Menu Buttons 6 Ci Procedure Set-up
Zimmer Unicompartmental High Flex Knee. Spacer Block Surgical Technique
 Zimmer Unicompartmental High Flex Knee Spacer Block Surgical Technique INTRO Zimmer Unicompartmental High Flex Knee Spacer Block Surgical Technique Introduction Unicompartmental knee arthroplasty (UKA)
Triathlon Knee System. Universal Baseplate Surgical Protocol
 Triathlon Knee System Universal Baseplate Surgical Protocol Table of Contents Acknowledgments..........................................................2 Introduction...............................................................2
KneeAlign System Surgical Technique Guide
 KneeAlign System Surgical Technique Guide Table of Contents Step 1 System Assembly... 1 Step 2 System Assembly... 2 Step 3 System Assembly... 2 Step 4 System Assembly... 2 Step 5 Sensor Pairing... 2 Step
Knee. Surgical Protocol
 U2 TM PS CR Knee Surgical Protocol Table of Contents Pre-Operative Planning... Surgical Incision... 1 2 A. Femoral Preparation A.1. Pilot Hole... A.2. Femoral Valgus Angle Confirmation... A.3. Distal
Zimmer Trabecular Metal Ankle Interpositional Spacer and Trabecular Metal Ankle Fusion Spacer
 Zimmer Trabecular Metal Ankle Interpositional Spacer and Trabecular Metal Ankle Fusion Spacer Surgical Technique 2 Zimmer Trabecular Metal Ankle Interpositional Spacer and Trabecular Metal Ankle Fusion
Persona Partial Knee System. Surgical Technique
 Persona Partial Knee System Surgical Technique Table of Contents Introduction... 2 Cross-System Compatibility... 2 Surgical Technique... 3 Positioning the Limb... 3 Incision... 3 Osteophyte Excision...
Triathlon Tritanium. Surgical Protocol. with Triathlon Cementless Beaded PA Femoral Component
 Triathlon Tritanium Surgical Protocol with Triathlon Cementless Beaded PA Femoral Component Triathlon Tritanium Surgical Protocol with Triathlon Cementless Beaded PA Femoral Component Description...............................
MRH Knee System Modular Peg Baseplate Surgical Protocol
 MRH Knee System Modular Peg Baseplate Surgical Protocol Using Monogram IM Revision Instruments 4 N 4 N Modular Rotating Hinge Knee System Using Monogram IM Revision Instruments Mr C R Howie FRCS Consultant
Trabecular Metal Femoral Component. Surgical Technique
 Trabecular Metal Femoral Component Surgical Technique INTRO Trabecular Metal Femoral Component Surgical Technique Introduction The Persona Trabecular Metal Femoral Component is designed to unite stable
Zimmer MOST Options System
 Zimmer MOST Options System Surgical Technique Modular Options for Severe Bone Loss and Trauma Zimmer MOST Options System Surgical Technique 1 MOST Options System Surgical Technique Developed in conjunction
NexGen Trabecular Metal Tibial Tray. Surgical Technique
 NexGen Trabecular Metal Tibial Tray Surgical Technique Table of Contents Surgical Technique...2 Resect the Tibia...2 Finish the Tibia...2 Position Based Anatomic Landmarks...3 Position Based on Trial
Constrained Posterior Stabilized (CPS) Surgical Technique
 Surgical Technique") Constrained Posterior Stabilized (CPS) Surgical Technique Constrained Posterior Stabilized (CPS) Surgical Technique INTRO Introduction The Constrained Posterior Stabilized (CPS) articular surfaces can
Constrained Posterior Stabilized (CPS) Surgical Technique Constrained Posterior Stabilized (CPS) Surgical Technique INTRO Introduction The Constrained Posterior Stabilized (CPS) articular surfaces can
Proven Gen-Flex Revision Knee System. Surgical Protocol
 Proven Gen-Flex Revision Knee System Surgical Protocol Proven Gen-Flex Revision Knee System Surgeon Design Team The Proven Gen-Flex Revision Knee System Instrumentation and Surgical Protocol were developed
Persona. The Personalized Knee. Trabecular Metal Tibia. Surgical Technique
 Persona The Personalized Knee Trabecular Metal Tibia Surgical Technique Table of Contents Resect the Tibia... 4 Size and Finish the Tibia... 4 Trial Fit... 6 Component Implantation... 7 Inserter/Implant
RESECTION GUIDE SYSTEM. TRUMATCH Personalized Solutions Surgical Technique with ATTUNE Knee INTUITION Instruments
 RESECTION GUIDE SYSTEM TRUMATCH Personalized Solutions Surgical Technique with ATTUNE Knee INTUITION Instruments RESECTION GUIDE SURGICAL TECHNIQUE The following steps are an addendum to the ATTUNE Knee
Surgical Technique Final Trial Reduction and Component Implantation of
 Surgical Technique Final Trial Reduction and Component Implantation of TC *smith&nephew TC-PLUS PRIMARY Mobile Bearing TC-PLUS PRIMARY Mobile Bearing Final Trial Reduction and Component Implantation of
Vanguard ID Total Knee. Surgical Technique
 Vanguard ID Total Knee Surgical Technique Table of Contents Overview... 2 Preoperative Planning... 4 Incision... 4 Patella Preparation... 5 Patella Resection Femoral Preparation... 8 Distal Femoral Resection
Rotating Hinge Knee System
 S-ROM NOILES Rotating Hinge Knee System Surgical Technique Table of Contents Surgical Technique Key Surgical Steps Summary 4 S-ROM NOILES Rotating Hinge Knee System 6 The S-ROM Hinge System Overview 7
U2 KNEE SYSTEM. High Flexion Engineered
 U2 KNEE SYSTEM High Flexion Engineered TABLE OF CONTENTS Pre-Operative Planning...1 Surgical Incision...2 A. Femoral Preparation A.1. Pilot Hole...3 A.2. Femoral Valgus Angle Confirmation...4 A.3. Distal
Surgical Technique Final Trial Reduction and Component Implantation of
 Surgical Technique Final Trial Reduction and Component Implantation of TC *smith&nephew TC-PLUS PRIMARY Fixed Bearing TC-PLUS PRIMARY Fixed Bearing Final Trial Reduction and Component Implantation of
Zimmer Unicompartmental High Flex Knee. Intramedullary, Spacer Block Option and Extramedullary Minimally Invasive Surgical Techniques
 Zimmer Unicompartmental High Flex Knee Intramedullary, Spacer Block Option and Extramedullary Minimally Invasive Surgical Techniques ZIMMER UNICOMPARTMENTAL HIGH FLEX KNEE INTRAMEDULLARY, SPACER BLOCK
ANTERIOR REFERENCE NEXGEN COMPLETE KNEE SOLUTION. Multi-Reference 4-in-1 Femoral Instrumentation Anterior Reference Surgical Technique
 ANTERIOR REFERENCE NEXGEN COMPLETE KNEE SOLUTION Multi-Reference 4-in-1 Femoral Instrumentation Anterior Reference Surgical Technique For NexGen Cruciate Retaining & Legacy Posterior Stabilized Knees INTRODUCTION
Surgical Technique. Hinge Disassembly and Rebuild Technique
 Surgical Technique Hinge Disassembly and Rebuild Technique Revision Knee Arthroplasty Surgical Technique LEGION HK Hinge Knee System Introduction The LEGION HK Hinge Knee System has been designed as an
Triathlon Knee System Universal Baseplate Surgical Protocol
 Triathlon Knee System Universal Baseplate Surgical Protocol Triathlon Knee System Universal Baseplate Surgical Protocol Table of Contents Acknowledgments... 2 Introduction... 2 Assembly Instructions...
Zimmer NexGen LPS-Flex Mobile and LPS-Mobile Bearing Knees. Surgical Technique United States Version IMAGE TO COME
 Zimmer NexGen LPS-Flex Mobile and LPS-Mobile Bearing Knees Surgical Technique United States Version IMAGE TO COME Zimmer NexGen LPS-Flex Mobile and LPS-Mobile Bearing Knees Surgical Technique 1 Zimmer
POSTERIOR REFERENCE NEXGEN COMPLETE KNEE SOLUTION. Multi-Reference 4-in-1 Femoral Instrumentation Posterior Reference Surgical Technique
 POSTERIOR REFERENCE NEXGEN COMPLETE KNEE SOLUTION Multi-Reference 4-in-1 Femoral Instrumentation Posterior Reference Surgical Technique For NexGen Cruciate Retaining & Legacy Posterior Stabilized Knees
Wichita Fusion Nail Surgical Technique. David A. McQueen, MD
 Wichita Fusion Nail Surgical Technique David A. McQueen, MD The patented design with a dual advantage Generates compression intraoperatively Innovative compression screw (a) locks femoral and tibial components